Review the information below to learn how to perform Scheduling in REMAPP.
Note: To create or edit a schedule, it is recommended to use the Master Filters to select an area or office. Setting the Master Filters will reduce the number of resources visible at once time. Scheduling is a planning tool and is not intended to dictate whether or not a resource can be assigned to an incident.
-
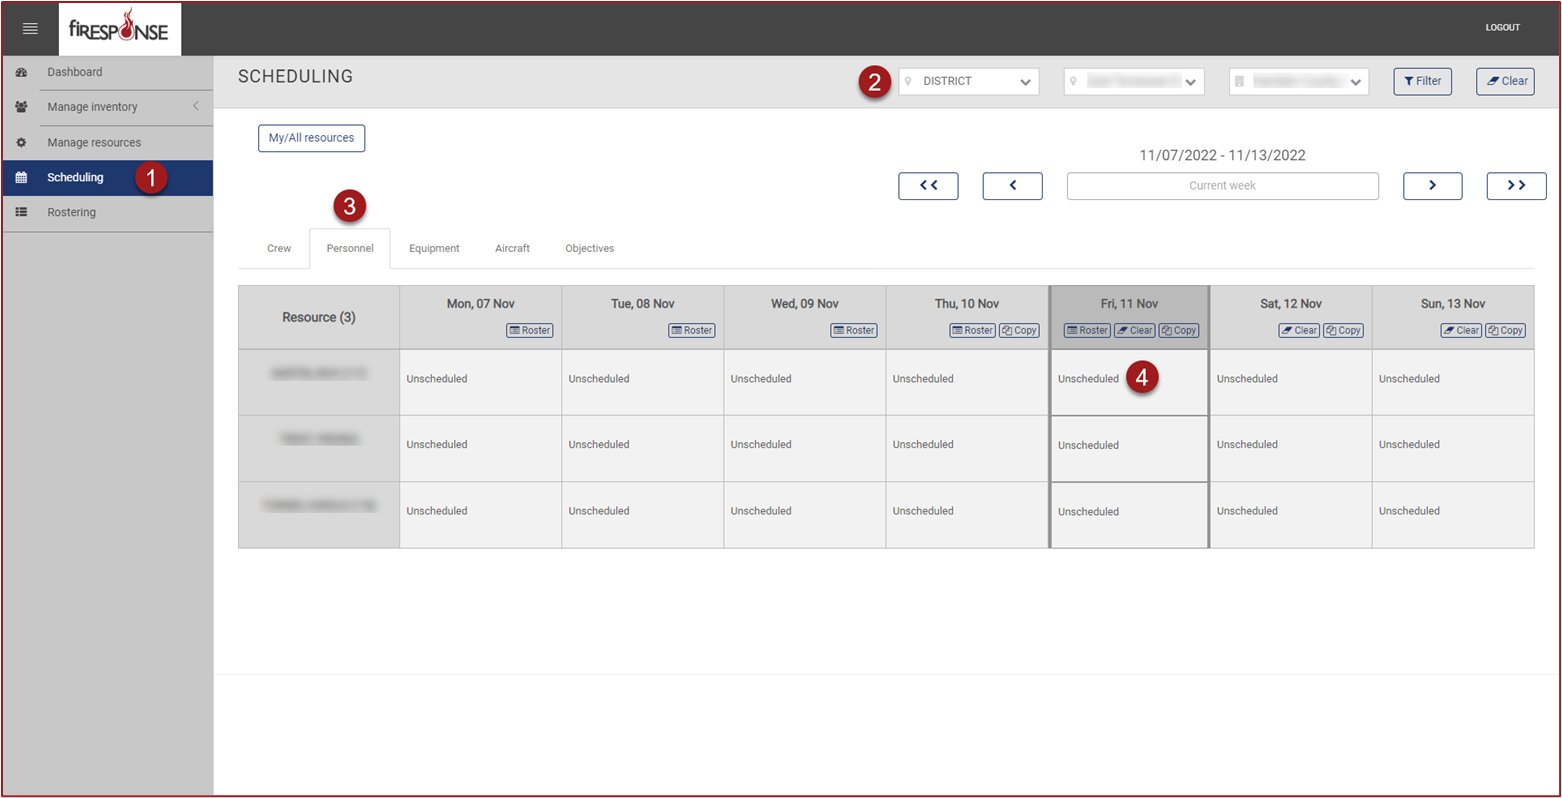
On the left-hand side in the page navigation list, click Scheduling.
-
Set the Master Filters to the desired Office. You must click Filter after selecting values to see the filter results.
-
Select the Resource Kind using the tabs at the top of the Scheduling table.
-
Find the resource you need to update and then click on the cell with the preferred Start Date for scheduling. The column for “today” will appear highlighted.
-
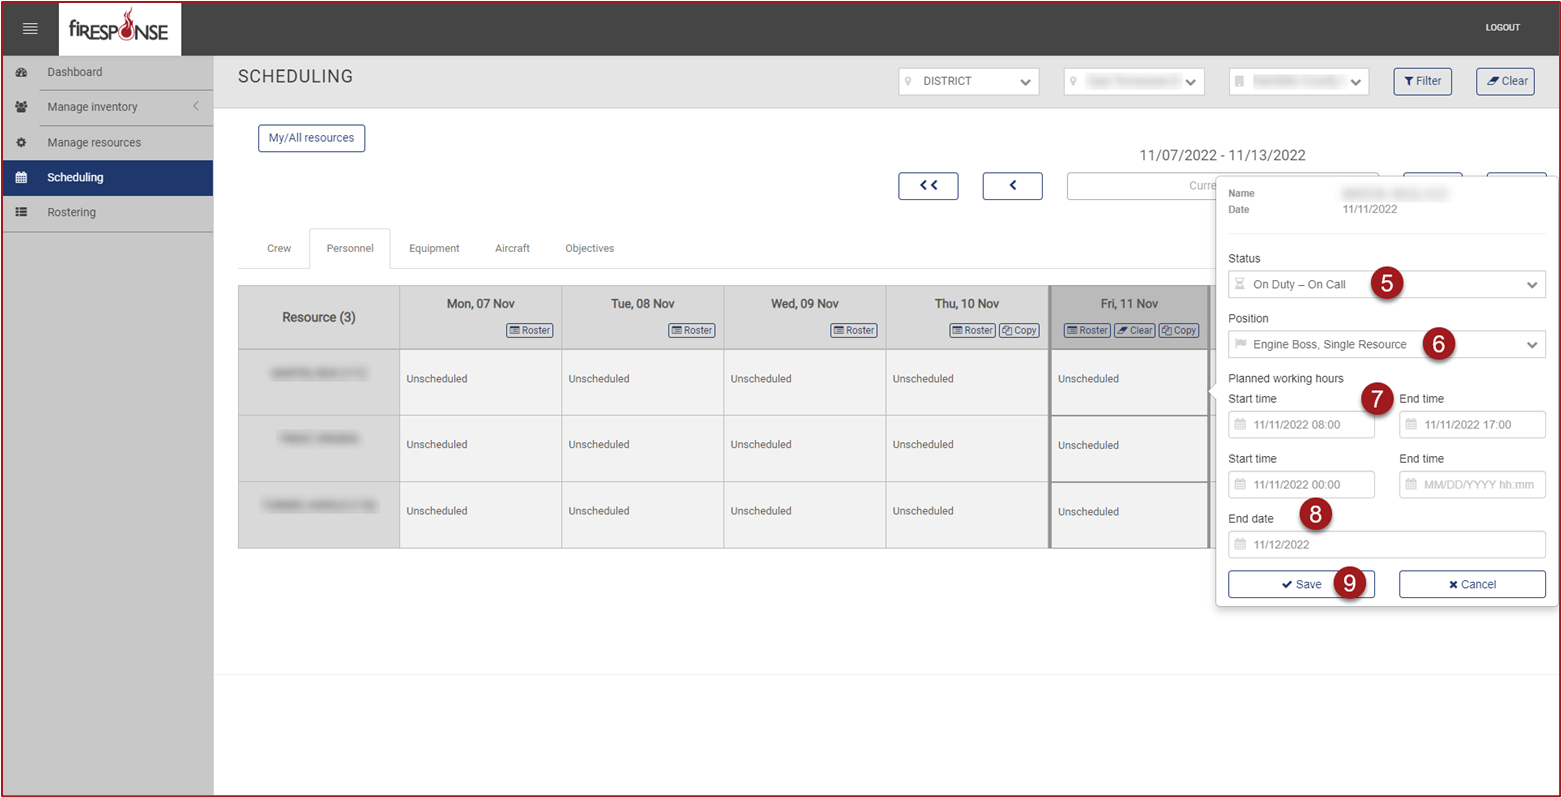
Set the Status.
-
Set the Position (optional).
-
Set the Start Time (if present) and End Time (if present).
-
Set the End Date.
-
Click Save.
Tip: Schedules can be set for longer periods of time by setting the End Date to the desired date in the future.