
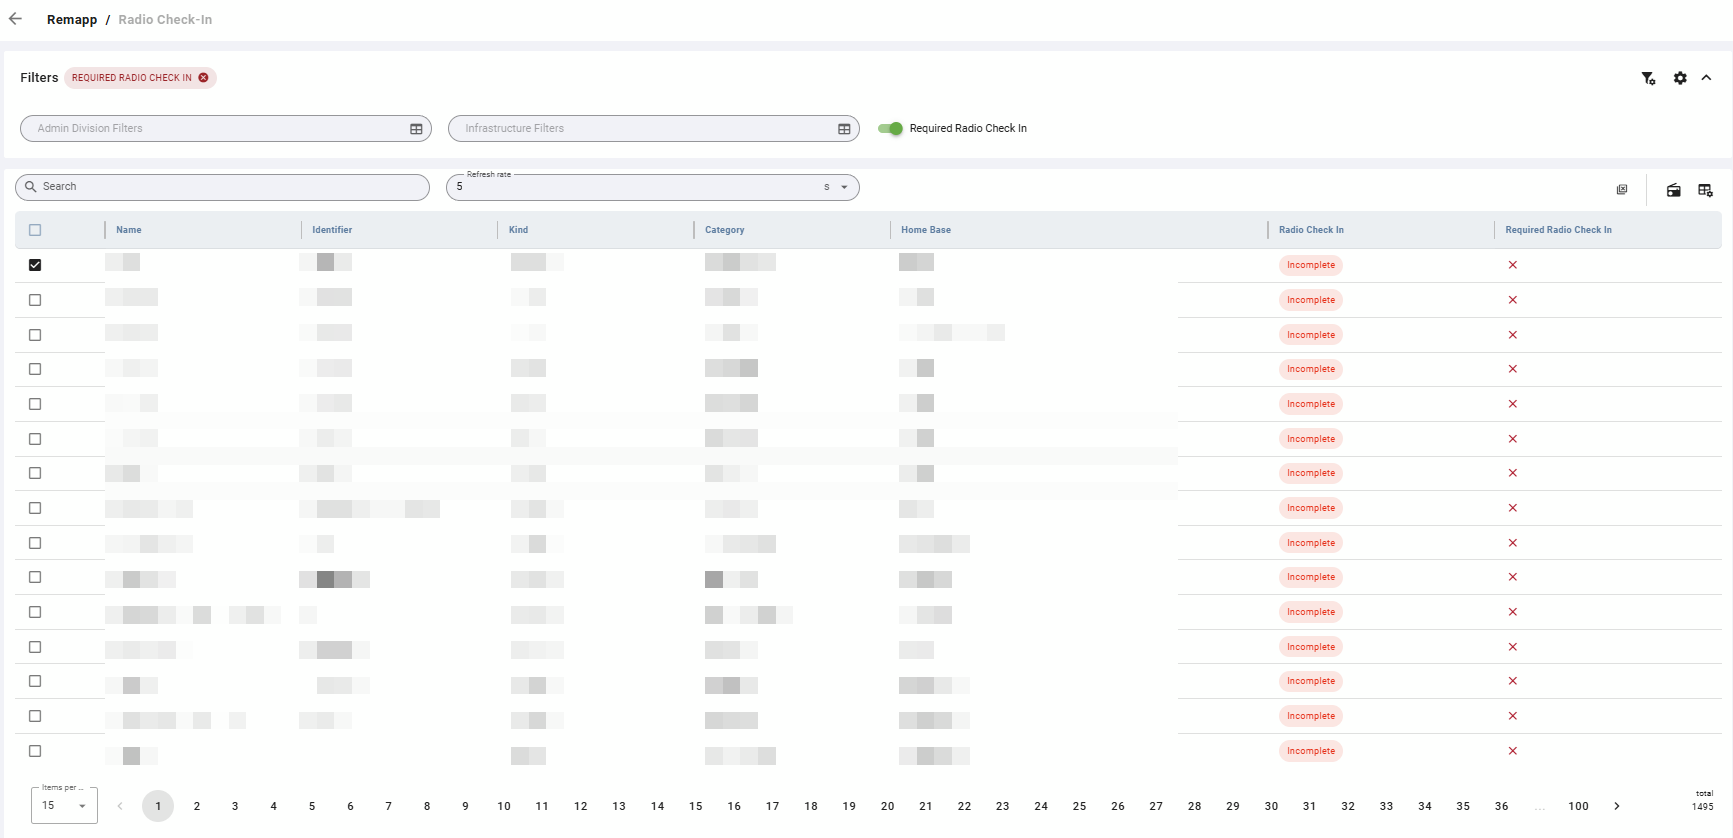
The Radio Check-In grid displays the radio check-in status for resources. Use this grid to monitor check-in completion and to record check-ins on behalf of resources.
The grid auto-refreshes at a configurable interval so dispatchers can monitor status in real time without manually reloading the page.
Filters
Filters (in dropdown, multi-select, and toggle formats) are available at the top of the grid view. If you have configured default filters in Configuration, they will be applied automatically when you open this grid. See Configuration for instructions on setting defaults.
A Search bar also appears below the Filters.
Refresh Rate
The grid automatically refreshes at the interval set in the Refresh rate field below the filters. Available options are 5, 10, 20, and 30 seconds. Adjust this based on how frequently you need updated status during operations.
Toolbar
|
Icon |
Label |
Description |
|---|---|---|
|
Grid with X |
Clear Selection |
Deselects all currently selected rows. |
|
Radio icon |
Radio Check-In |
Opens the Radio Check-In form for the selected resource. Use this to record a check-in manually on behalf of a resource. |
|
Grid with gear |
Toggle Columns |
Opens column visibility controls. |
Grid
Radio Check-In
The Radio Check-In column displays the current check-in status for the resource.
|
Status |
Meaning |
|---|---|
|
Complete |
The resource has successfully completed their radio check-in. |
|
Attempted |
A check-in was attempted but not fully completed. |
|
Incomplete |
The resource has not yet completed their radio check-in. |
Required Radio Check-In
The Required Radio Check-In column displays whether the resource has been designated as required to complete a radio check-in. This is a read-only field in this grid. To change whether a resource is required to check in, edit the resource record directly.
Common Tasks
Record a Radio Check-In for a Resource
Use this when a resource has checked in via radio and you need to record it manually in REMAPP 2.
-
In the left-hand navigation panel under Organization and Operations, click Radio Check-In.
-
Use the filters to locate the resource.
-
Select the resource using the checkbox.
-
Click the Radio Check-In icon in the toolbar.
-
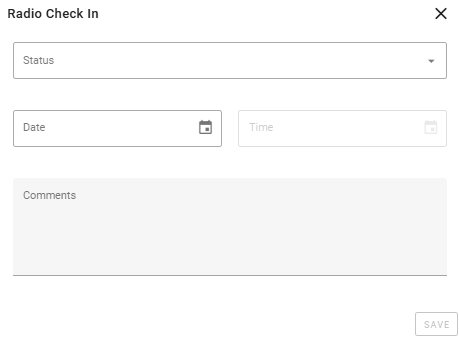
In the Radio Check-In form, complete the following fields:
-
Status — Select Complete, Attempted, or Incomplete.
-
Date — Set the date of the check-in.
-
Time — Set the time of the check-in.
-
Comments — Optional. Add any relevant notes.
-
-
Click Save.
Monitor Check-In Status in Real Time
-
Click Radio Check-In in the left-hand navigation panel.
-
Apply Admin Division or Infrastructure filters to narrow the view to the relevant resources.
-
Set the Refresh rate to the desired interval (5, 10, 20, or 30 seconds).
-
Monitor the Radio Check-In column for status updates as resources check in.
Require a Resource to Complete Radio Check-In
The Required Radio Check-In designation is set on the individual resource record, not in this grid.
-
Navigate to the relevant Inventory grid (Staff, Equipment, or Aircraft).
-
Locate the resource record and click the eye icon (View Details).
-
Click Edit.
-
In the Resource section, enable the Required Radio Check-In toggle.
-
Click Save.
The resource will now appear in the Radio Check-In grid when the Required Radio Check-In filter is active.