The Configuration page controls your interface preferences and the default filters that REMAPP 2 applies automatically across all grids.
Configuration settings are per-user. Changes you make here apply only to your account and do not affect other users.
To access Configuration, click the Configuration icon at the bottom of the left-hand navigation panel.
To make changes, click Edit in the upper right corner of the page. Click Save when finished.
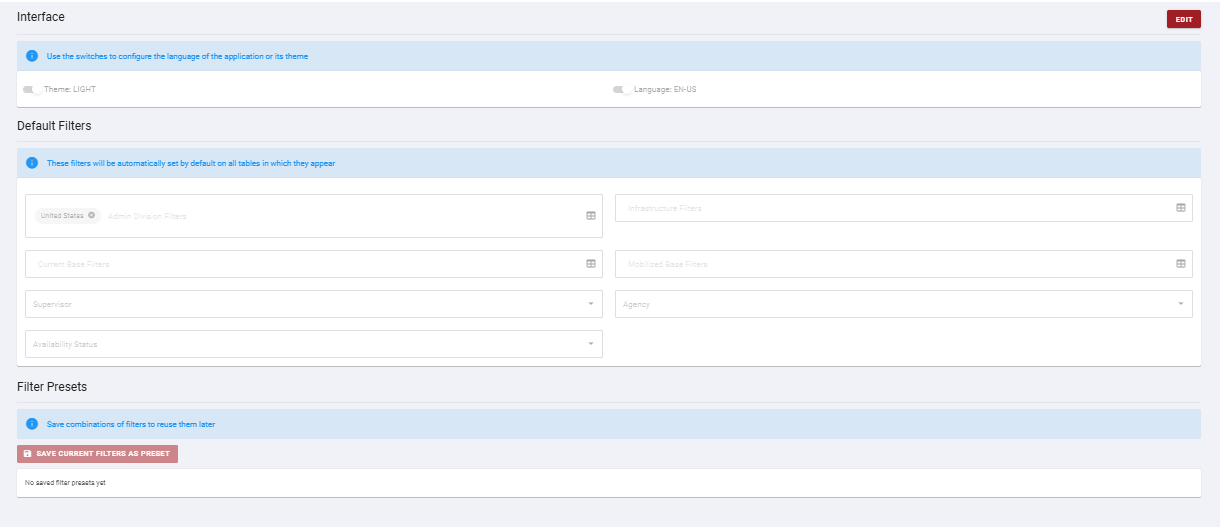
Interface
The Interface section controls the visual theme and display language for your REMAPP 2 session.
|
Setting |
Options |
Description |
|---|---|---|
|
Theme |
Light / Dark |
Sets the color theme of the interface. |
|
Language |
EN-US / ES-ES |
Sets the display language. |
Default Filters
Default filters are automatically applied to all grids in REMAPP 2 where those filter types appear, including the Staff, Equipment, Aircraft, Scheduling, Rostering, and Radio Check-In grids. Setting defaults means you do not need to manually re-apply filters each session.
Note: The Scheduling and Rostering grids require at least one filter to be active before they will display records. Setting a default filter here is the recommended way to meet that requirement.
You can set up to six default filters. Multiple values can be added to each filter field — each selected value appears as a removable tag. To remove a value, click the X on its tag.
Admin Division Filters
Filters grids to show only resources belonging to the selected Admin Division.
-
Click Edit.
-
Click the grid icon on the right side of the Admin Division Filters field. The Admin Division modal opens.
-
In the Admin Division Type dropdown, select the type (for example, Area, Branch, County, Dispatch Zone, or District).
-
Select the specific value within that type.
-
Click Add. The modal closes and your selection appears as a tag in the Admin Division Filters field.
-
Repeat steps 2–5 to add additional values if needed.
-
Click Save.
Infrastructure Filters
Filters grids to show only resources associated with the selected Infrastructure (for example, a specific station or base).
-
Click Edit.
-
Click the grid icon on the right side of the Infrastructure Filters field.
-
Select the Admin Division Type, Admin Division, and Infrastructure value.
-
Click Add.
-
Repeat to add additional values if needed.
-
Click Save.
Current Base Filters
Filters grids to show only resources whose current base matches the selected value. This reflects where a resource is currently based, including resources that have been mobilized to a temporary location.
-
Click Edit.
-
Click the grid icon on the right side of the Current Base Filters field.
-
Select the Admin Division Type, Admin Division, and Base value.
-
Click Add.
-
Repeat to add additional values if needed.
-
Click Save.
Mobilized Base Filters
Filters grids to show only resources that have been formally mobilized to the selected base.
-
Click Edit.
-
Click the grid icon on the right side of the Mobilized Base Filters field.
-
Select the Admin Division Type, Admin Division, and Base value.
-
Click Add.
-
Repeat to add additional values if needed.
-
Click Save.
Supervisor
Filters grids to show only resources assigned to the selected supervisor(s).
-
Click Edit.
-
Click the Supervisor dropdown and select a supervisor name.
-
Click Save.
Agency
Filters grids to show only resources belonging to the selected agency or agencies.
-
Click Edit.
-
Click the Agency dropdown and select one or more agencies.
-
Click Save.
Availability Status
Filters grids to show only resources with the selected availability status or statuses.
-
Click Edit.
-
Click the Availability Status dropdown.
-
Check one or more statuses to include in the default filter.
-
Click Save.
Removing a Default Filter
To remove an individual filter value, click Edit, then click the X on the tag for that value. To remove all values from a filter field, remove each tag individually. Click Save.
Filter Presets
Users can create and apply preset filters in any inventory grid (Staff, Equipment, Aircraft, Crew, or All Resources). The Filter Presets section of the Configuration page can be used to rename or remove preset filters.
Presets can only be created from a grid. The Configuration page is for management only.
How to Create a Preset Filter
-
Go to any inventory grid (Staff, Equipment, Aircraft, Crew, or All Resources).
-
Open the filter menu at the top of the page and set the combination of filters you want to save.
-
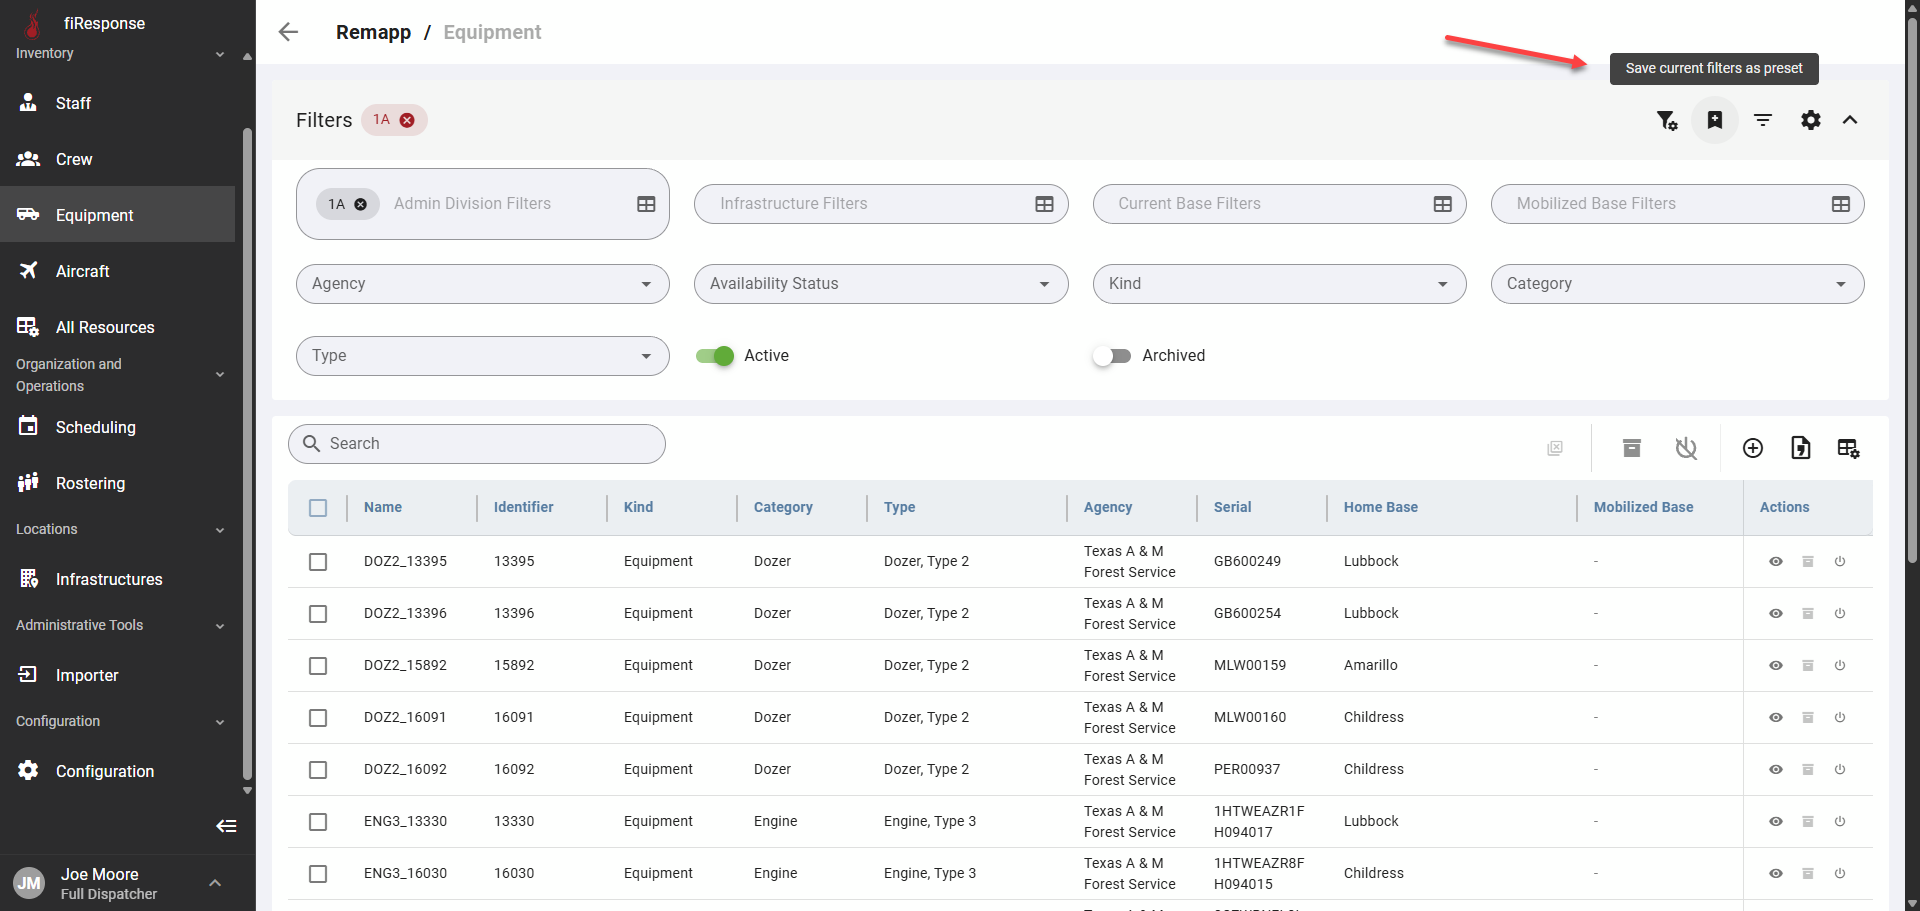
Click Save Current Filters as Preset in the toolbar above the grid.
-
Enter a name for the preset.
-
Click Save.
The preset is now available to apply from any inventory grid during any session.
How to Apply a Preset Filter
-
Go to any inventory grid.
-
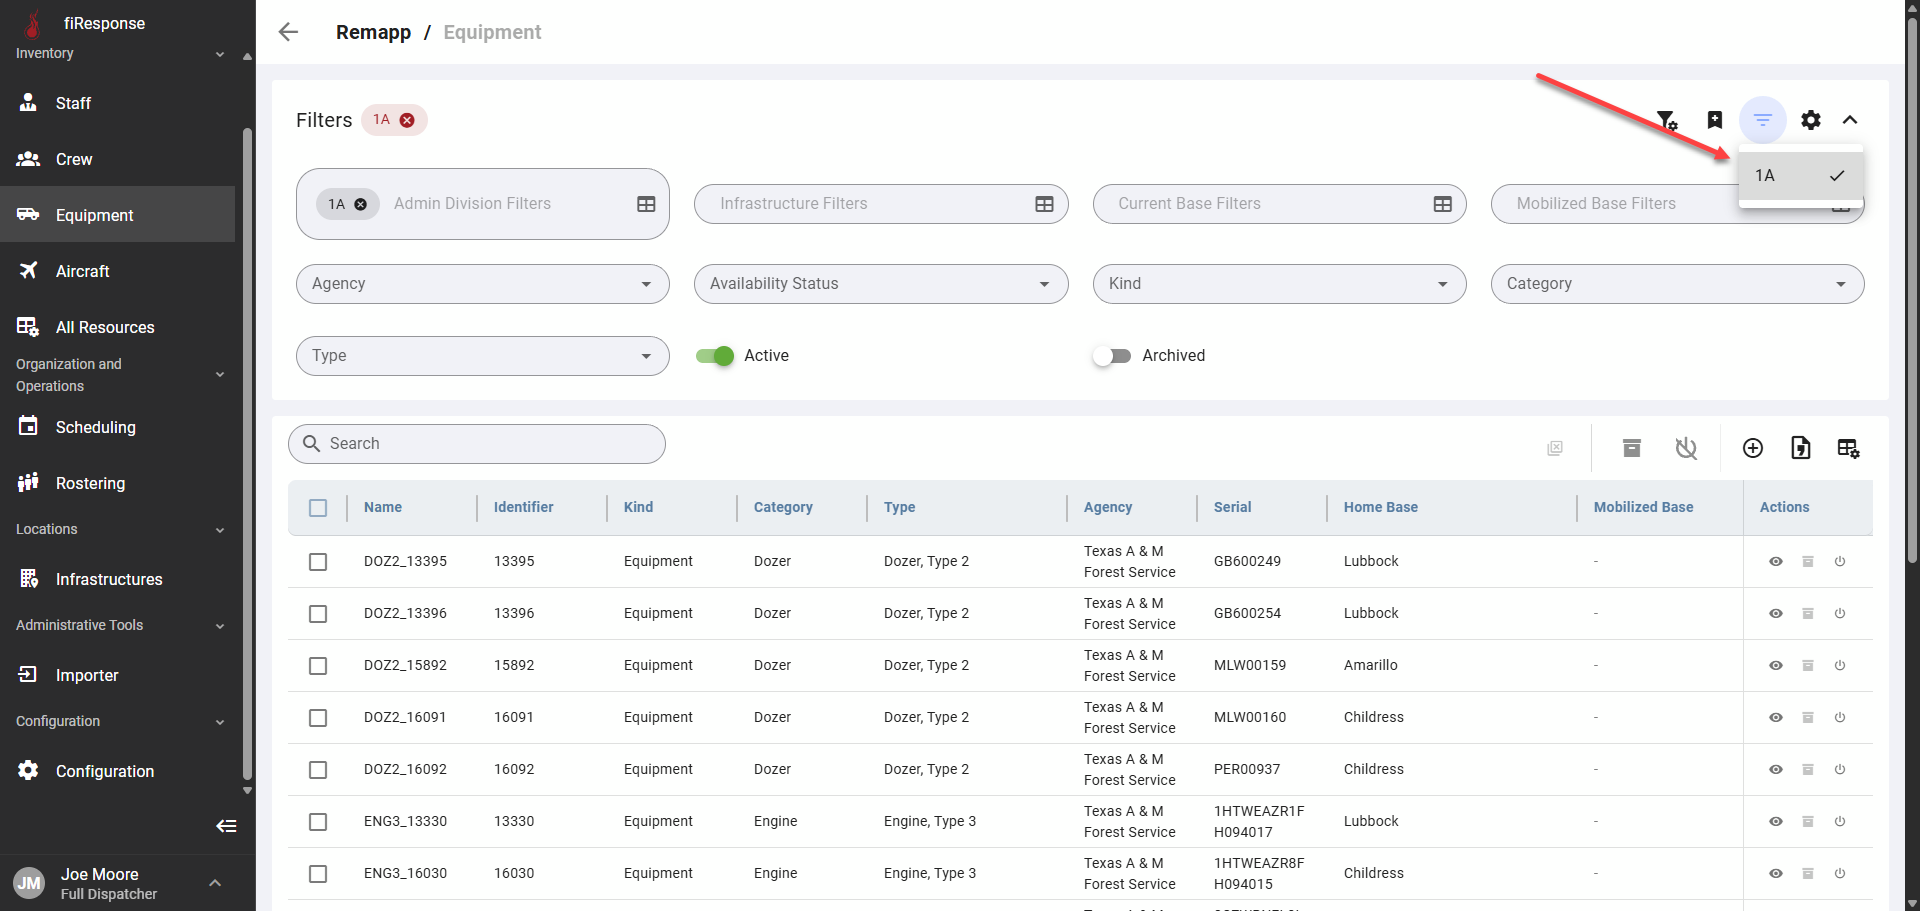
Click Filter Presets in the toolbar above the grid.
-
Select the preset you want to apply.
The filters defined in that preset will be applied to the current grid immediately.
How to Manage Presets
Presets can be renamed or deleted from the Configuration page.
-
Navigate to Configuration from the bottom of the left navigation panel.
-
Find the preset you want to manage.
-
Click the edit icon to rename it or the delete icon to remove it.
-
Preset filters work across all inventory grids: a preset created on the Staff grid can be applied on the Equipment grid or any other inventory grid.
-
Presets save the full combination of filters including admin division, base, resource type, and toggle states (Active, Archived, Enabled as Resource).
-
Applying a preset replaces your current filters with the saved combination.
-
Your default filter (set in Configuration) is separate from presets: it applies automatically at the start of every session, while presets are applied on demand.