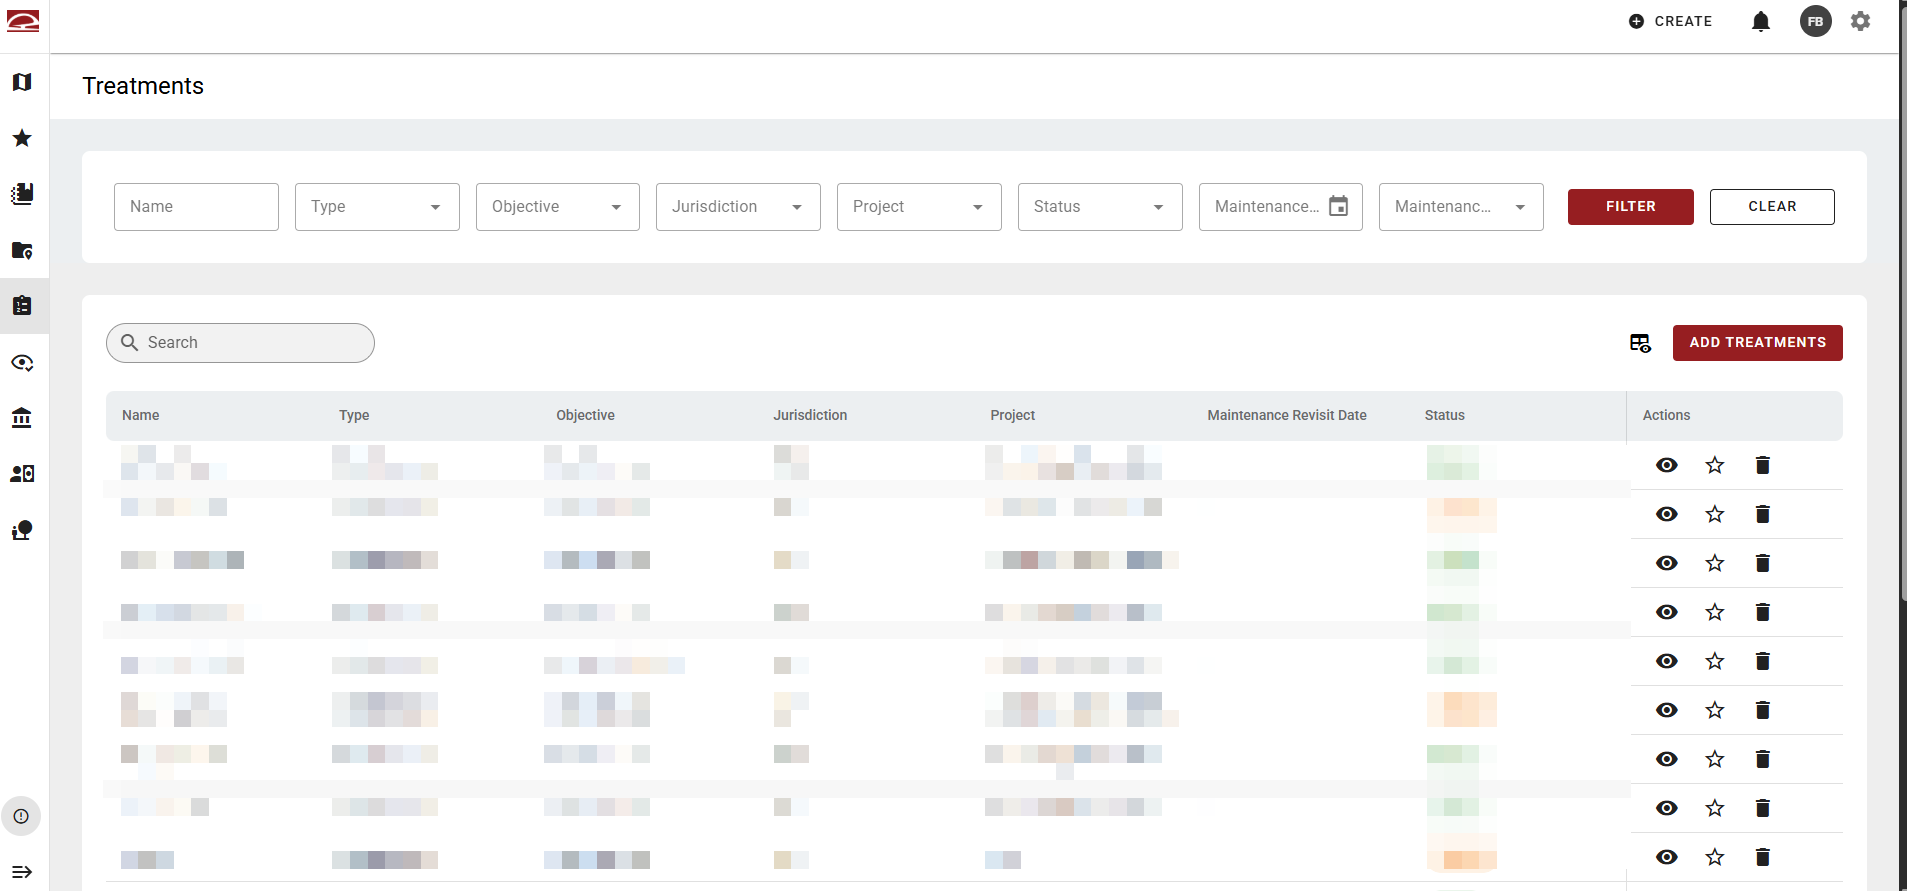
The Treatments page displays all treatment records in the system — the specific fuel management actions that take place within a project. Treatments sit one level below Projects in the hierarchy.
Activity Tracker Web
Filtering and Search
Users can filter the list using multiple criteria — Name (text input), Type, Objective, Jurisdiction, Project, Status (Active/Cancelled/Complete/Complete in Maintenance/Planned), Maintenance Revisit Date (date picker), and Maintenance Required. A Filter button applies selections and Clear resets them. A free-text search bar is also available for quick lookup. Or, click a column heading to sort it in ascending or descending order.
Table
The table displays each treatment with default columns. Use the spreadsheet icon in the top right to adjust the columns shown.
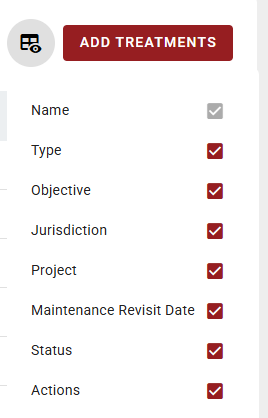
Table Actions
Each treatment (row) has three action icons — a view (eye) icon to open the record, a favorites (star) icon to save it for quick access, and a delete (trash) icon.
View Treatment
Clicking the view (eye) icon opens an individual record page for the treatment selected.
The treatment record has seven tabs:
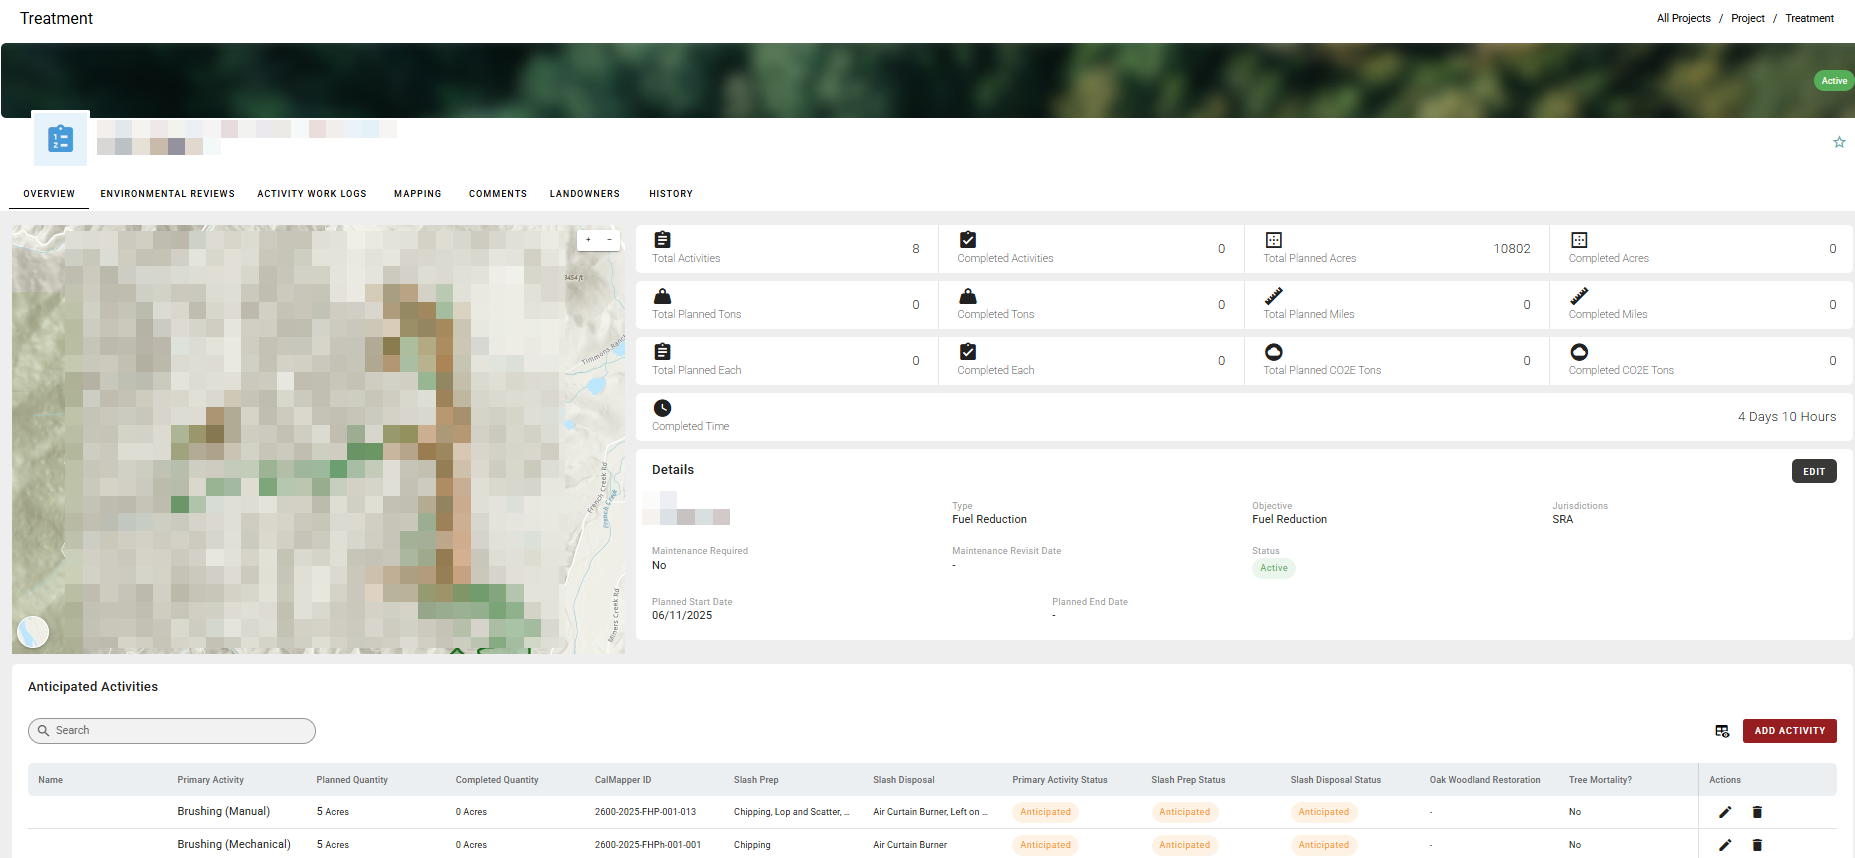
1. Overview
The Overview tab is the landing tab when a treatment record is opened. It displays a mini map showing the treatment's geographic context alongside a Details panel containing the treatment's key attributes. An Edit button in the top right of the Details panel allows authorized users to modify the record.
2. Environmental Reviews
Lists environmental reviews linked to this treatment. Treatments can only link to existing environmental reviews created at the project level, not create new ones.
3. Activity Work Logs
The primary workspace for viewing and managing work log entries associated with each activity. Click Add Activity to add a new activity.
4. Mapping
The Mapping tab expands the treatment's map, zooms in on the treatment, and adds map tools to the map. The Feature Manager appears below the map.
5. Comments
The Comments tab allows users to add and view comments on the treatment record, supporting collaboration and internal notes without modifying the core record data.
6. Landowners
The Landowners tab lists landowner contacts associated with the treatment. Click Add Landowner to search for an existing contact to add or click New Person.
7. History
The History tab provides an audit log of changes made to the treatment record, including what was changed, by whom, and when.
Add Activity
Below the map and details panel, an Anticipated Activities section lists all activities associated with the treatment. It includes a search bar and an Add Activity button.

New activity fields include:
-
Name — An optional free-text field for giving the activity a descriptive name.
-
Tree Mortality? — A checkbox to indicate whether tree mortality is associated with this activity. Defaults to unchecked (No) if left blank.
-
Primary Activity — A required dropdown for selecting the specific activity type being performed (e.g., Brushing, Thinning). Must be selected before other dependent fields become available.
-
Burn Type — A conditional dropdown that appears based on the Primary Activity selection. Only relevant for fire-related activities
-
Slash Prep — A required dropdown for selecting the slash preparation method. Only becomes available after a Primary Activity is selected. Displays a validation error if left empty
-
Slash Disposal — A required dropdown for selecting the slash disposal method. Only becomes available after a Primary Activity is selected. Displays a validation error if left empty.
-
Planned Quantity — A required numeric field for entering the target quantity for the activity. Must be a positive number. A unit label appears to the right — displaying "Measurement not found" when no applicable unit can be determined from the current selections.
The form is highly dynamic, meaning fields cascade based on prior selections. Enter the required fields for the activity and click Save.
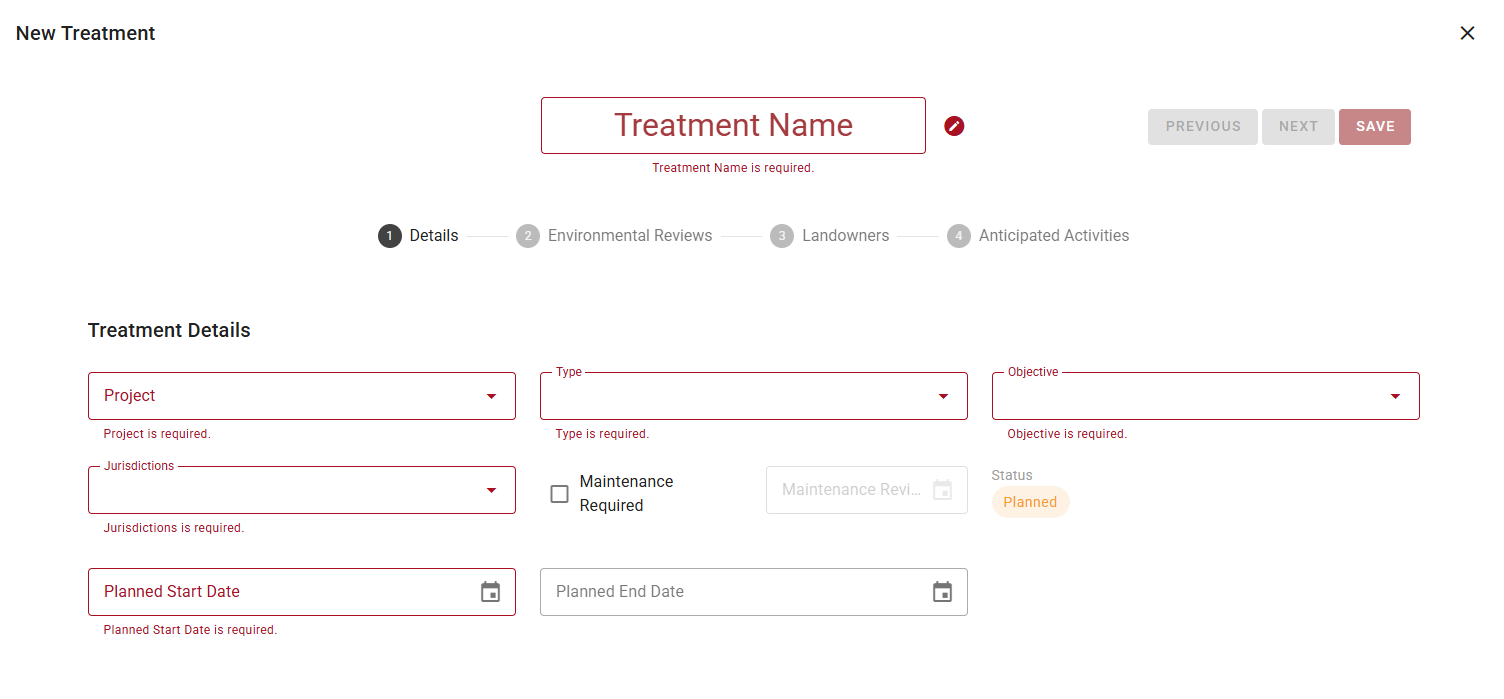
New Treatment
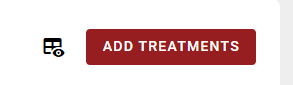
A prominent Add Treatments button in the top right launches the treatment creation workflow.
Enter the required information and click Next to move through each of the four tabs: Details, Environmental Reviews, Landowners, and Anticipated Activities. Click Save to add the treatment to the table.
Activity Tracker Mobile
Treatment List
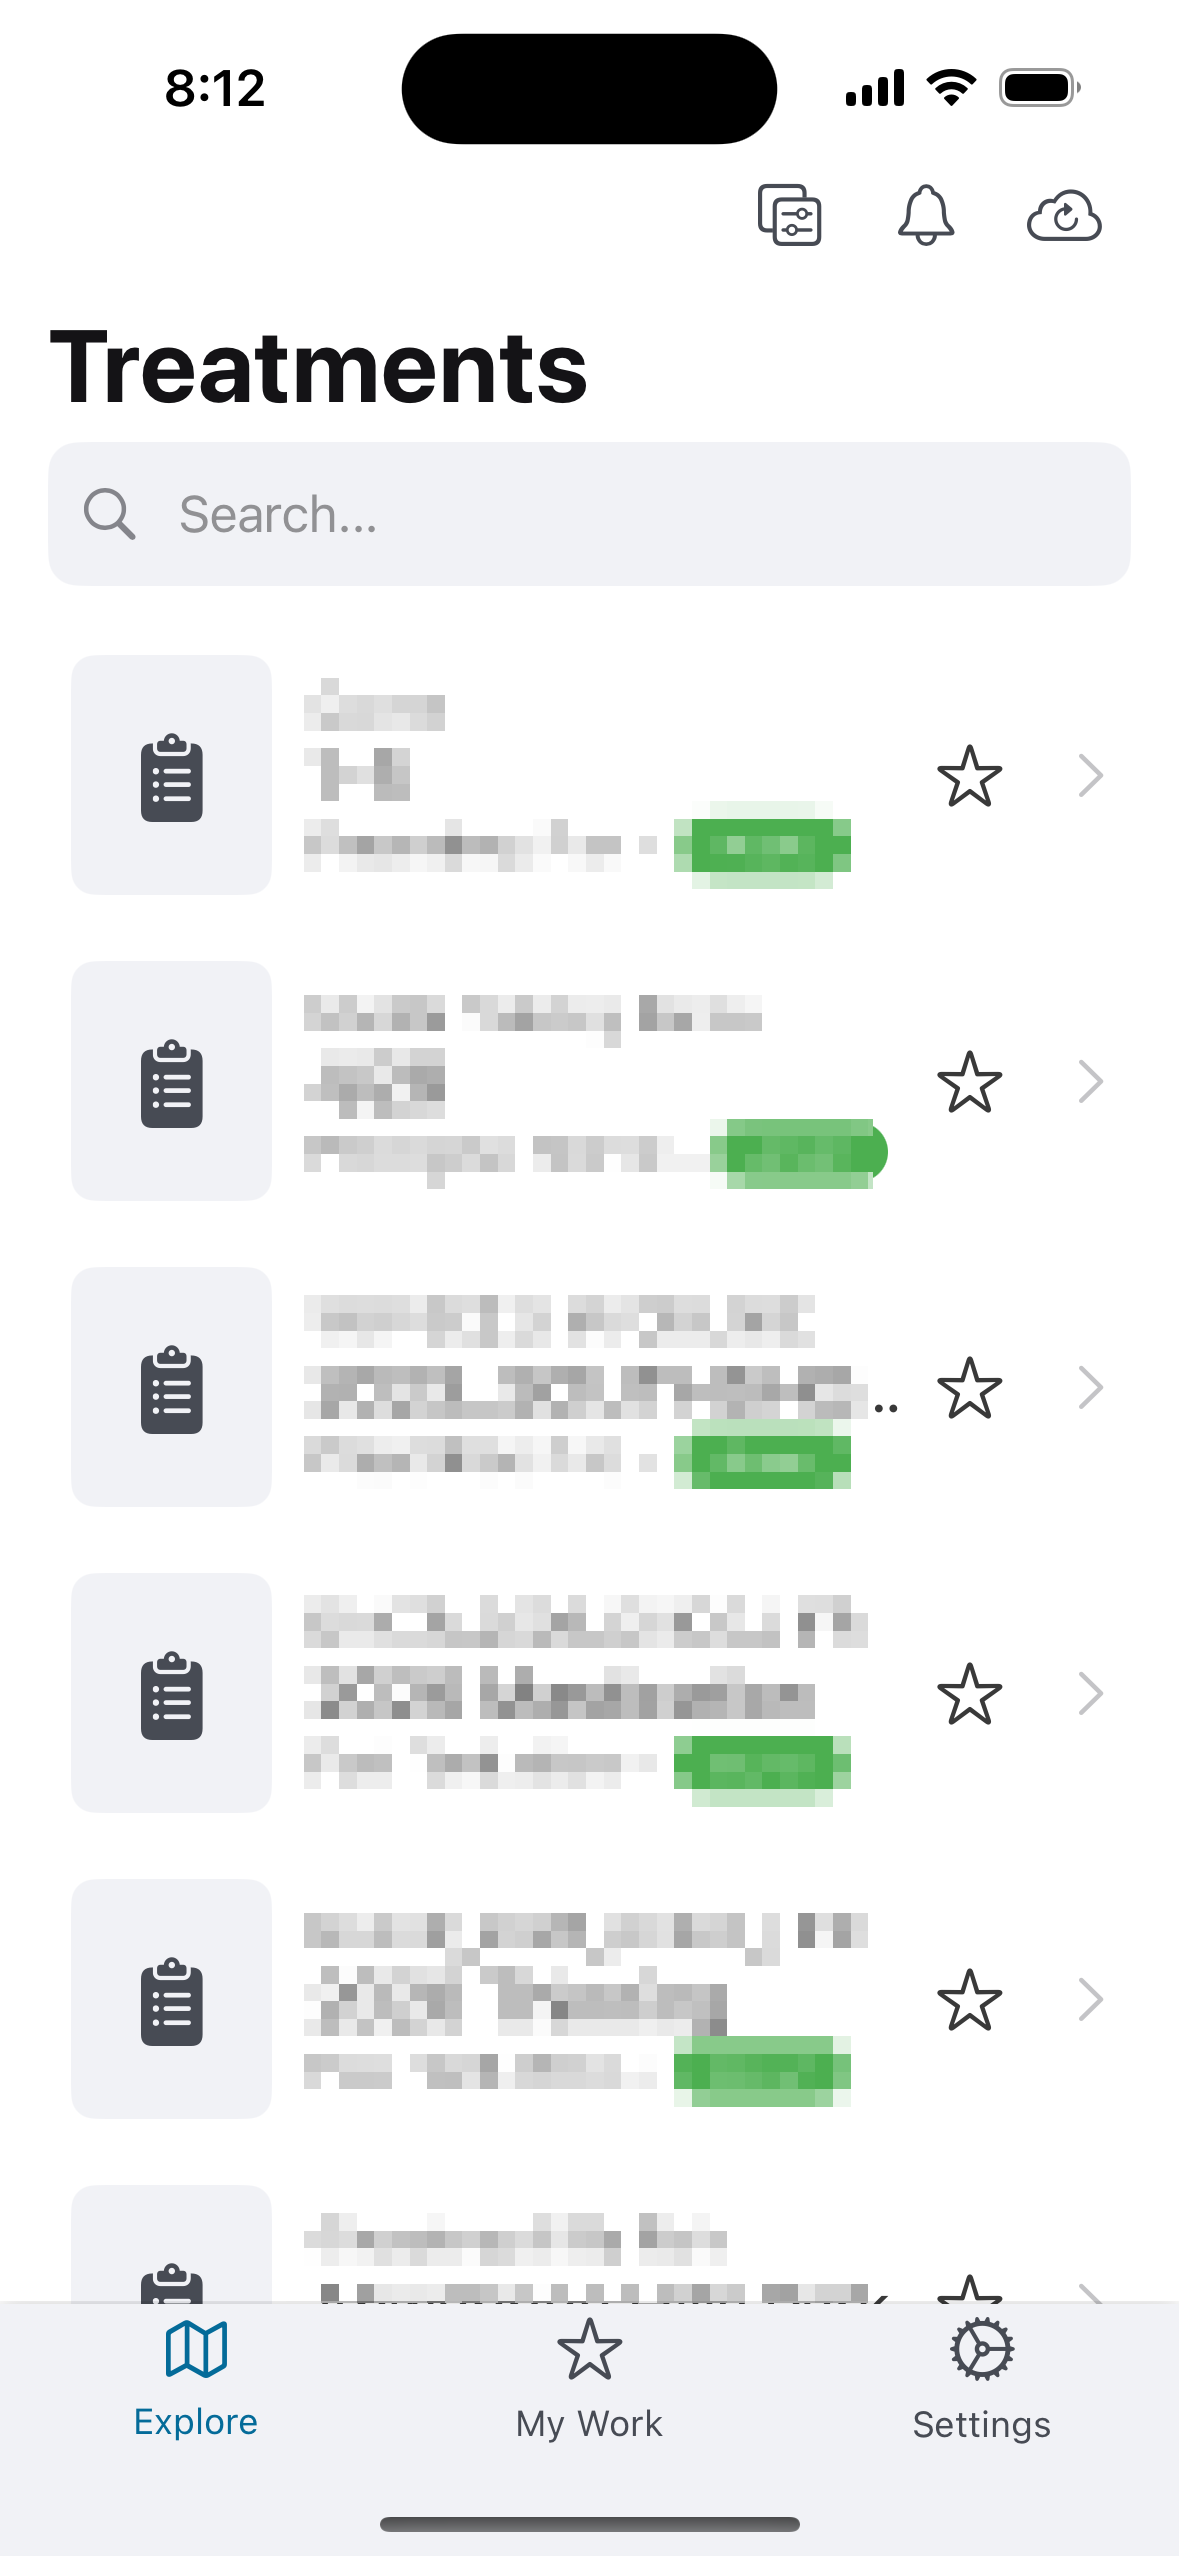
Open the Treatments List by clicking the List button at the bottom center of the main map on Activity Tracker Mobile.
Treatment Details
Tapping a treatment in the Treatments list or on the map opens a bottom sheet with the treatment's details. The sheet slides up over the map and can be dismissed with the X button in the header.
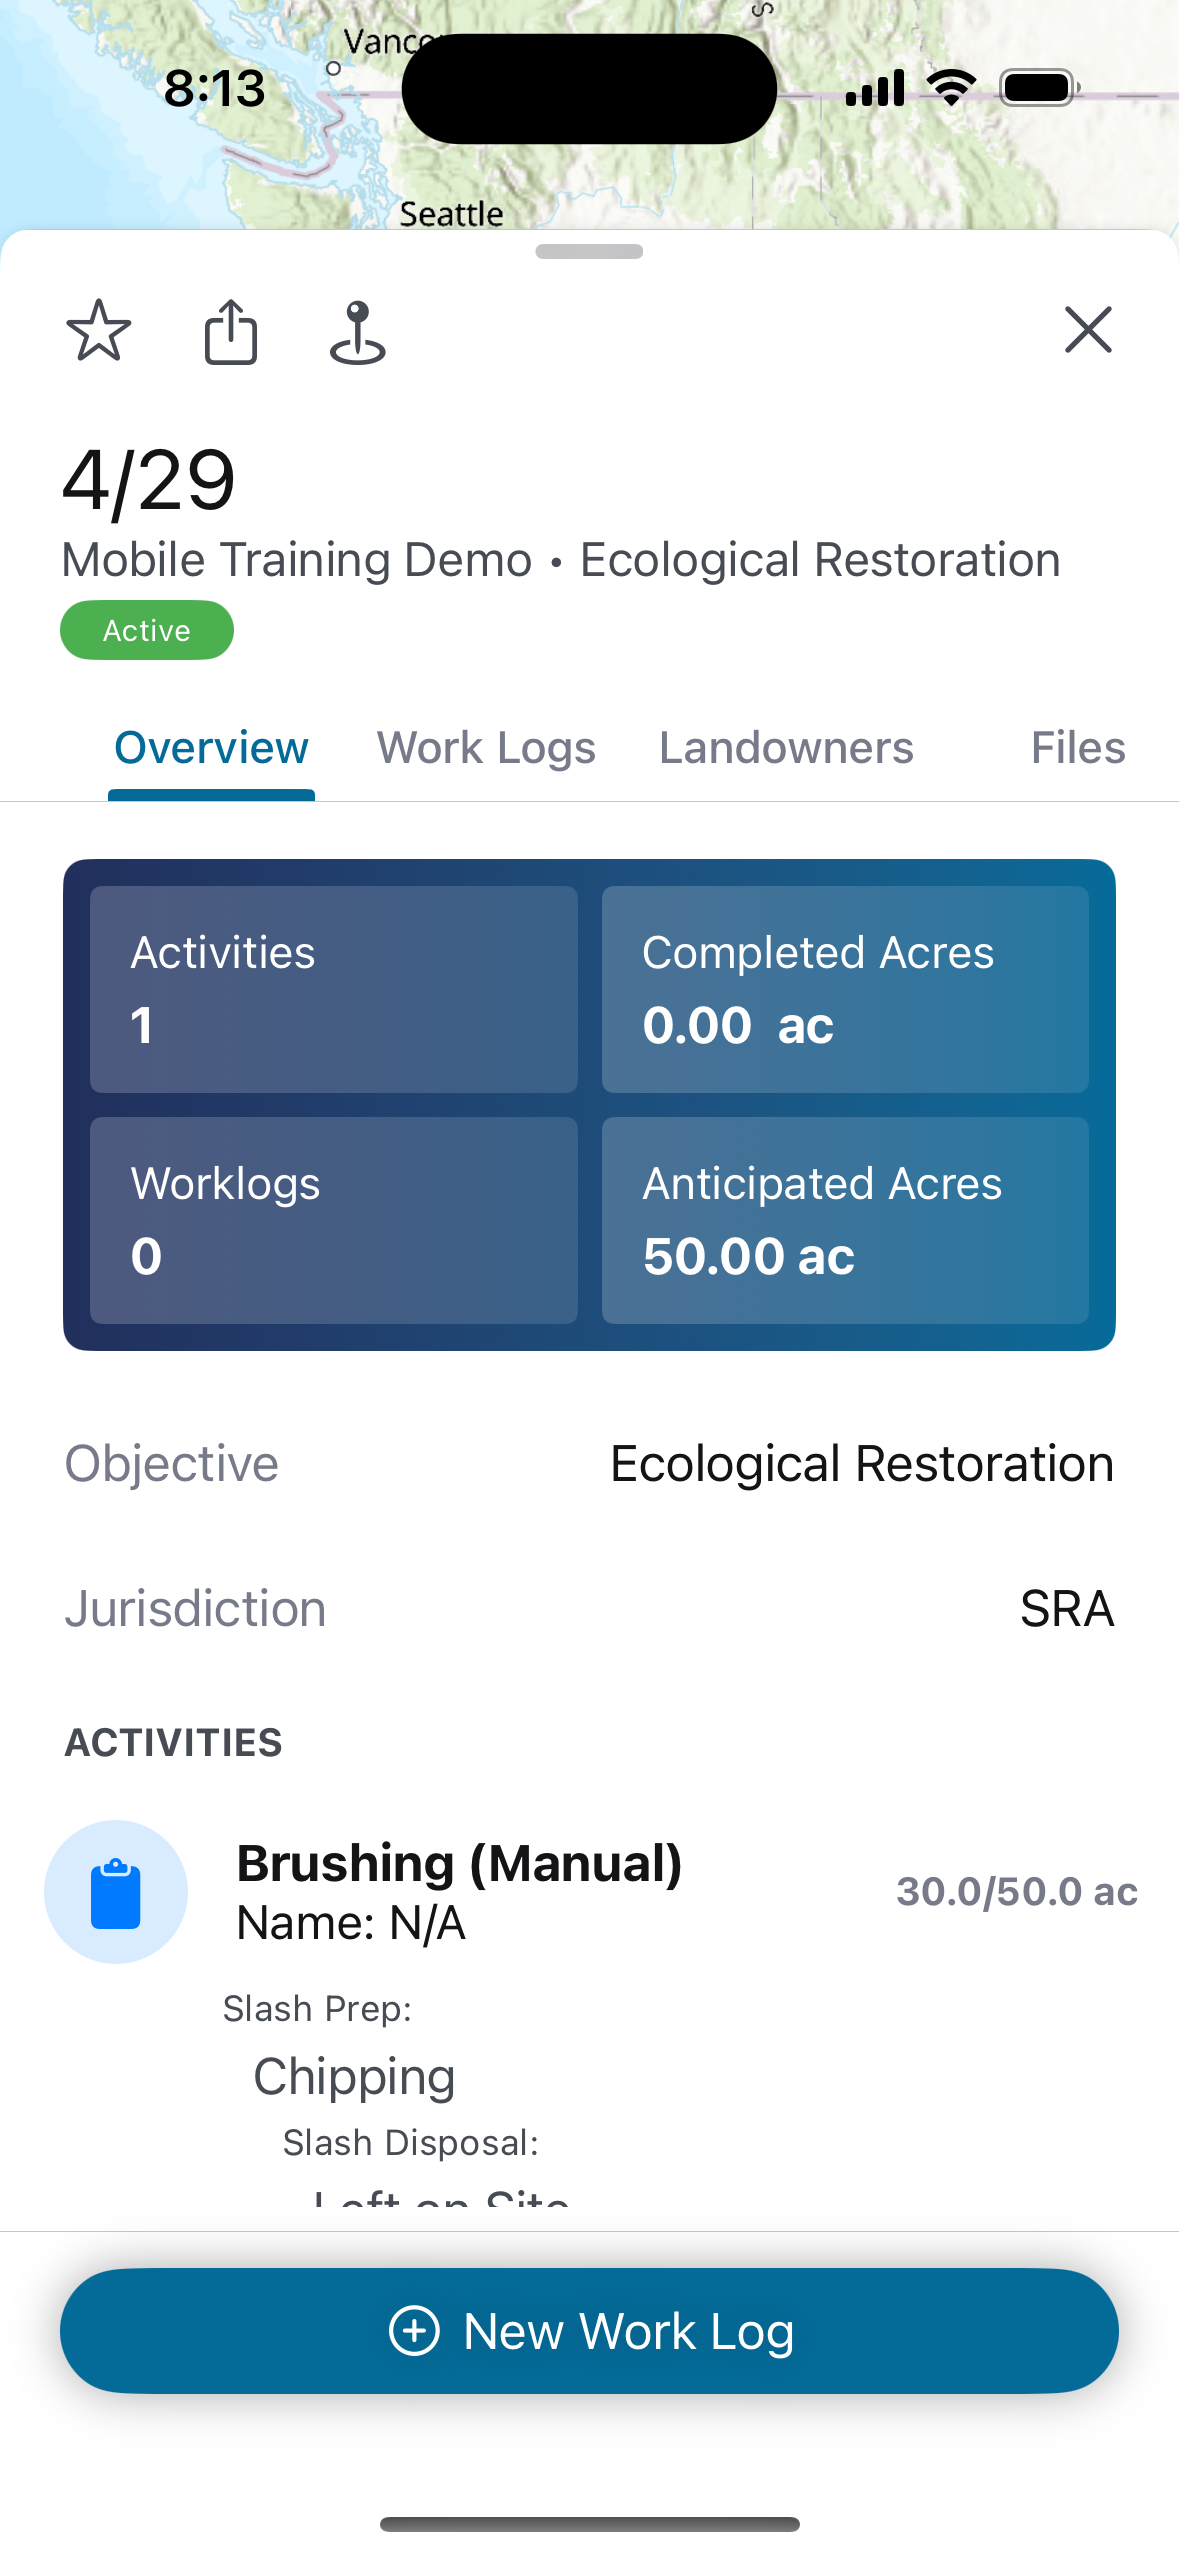
The header displays the treatment name, parent project name and treatment type, and Active status badge. Four icons appear in the header row: star (add to My Work), share, location pin (centers the map on the treatment), and X (close).
The treatment detail has four tabs:
-
Overview Tab — The Overview tab displays a 2x2 stats grid at the top showing:
-
Activities — Displays the total number of activities on the treatment.
-
Completed Acres — Displays the acres recorded across all submitted work logs.
-
Work Logs — Displays the total number of work logs submitted.
-
Anticipated Acres — Displays the planned acres from the treatment record.
-
Below the stats grid, the tab shows the treatment's Objective and Jurisdiction fields, followed by an Activities section listing each activity with details.
A New Work Log button is pinned to the bottom of the sheet.
-
Work Logs Tab — Displays work logs submitted against this treatment.
-
Landowners Tab — Displays landowners associated with this treatment.
-
Files Tab — Displays files attached to this treatment.
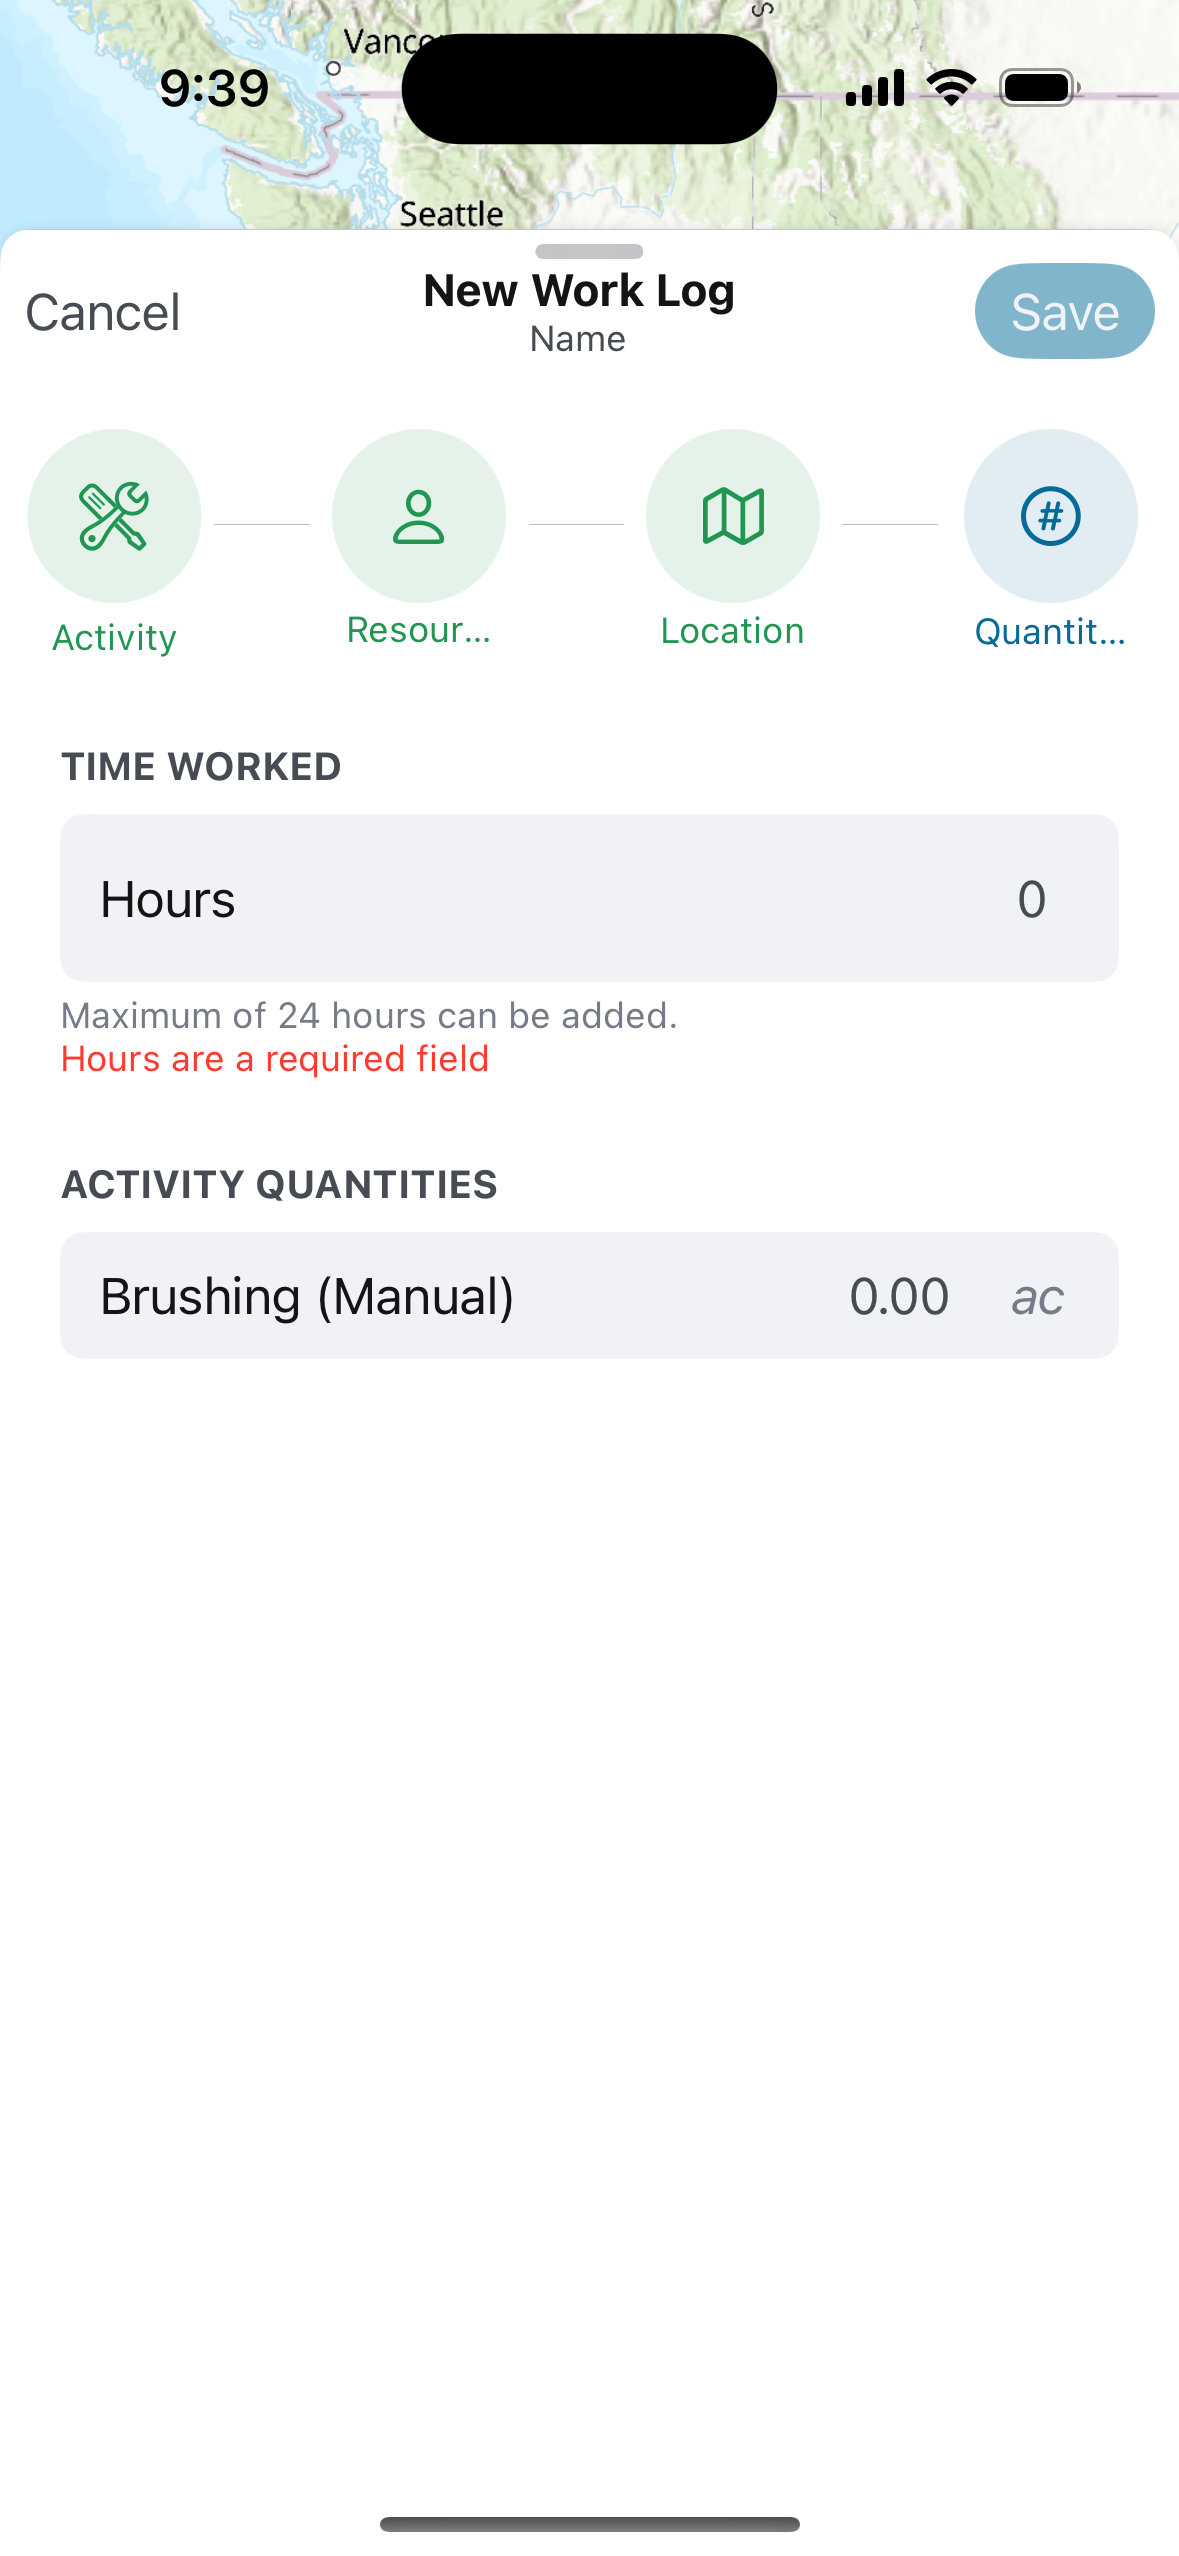
New Work Log
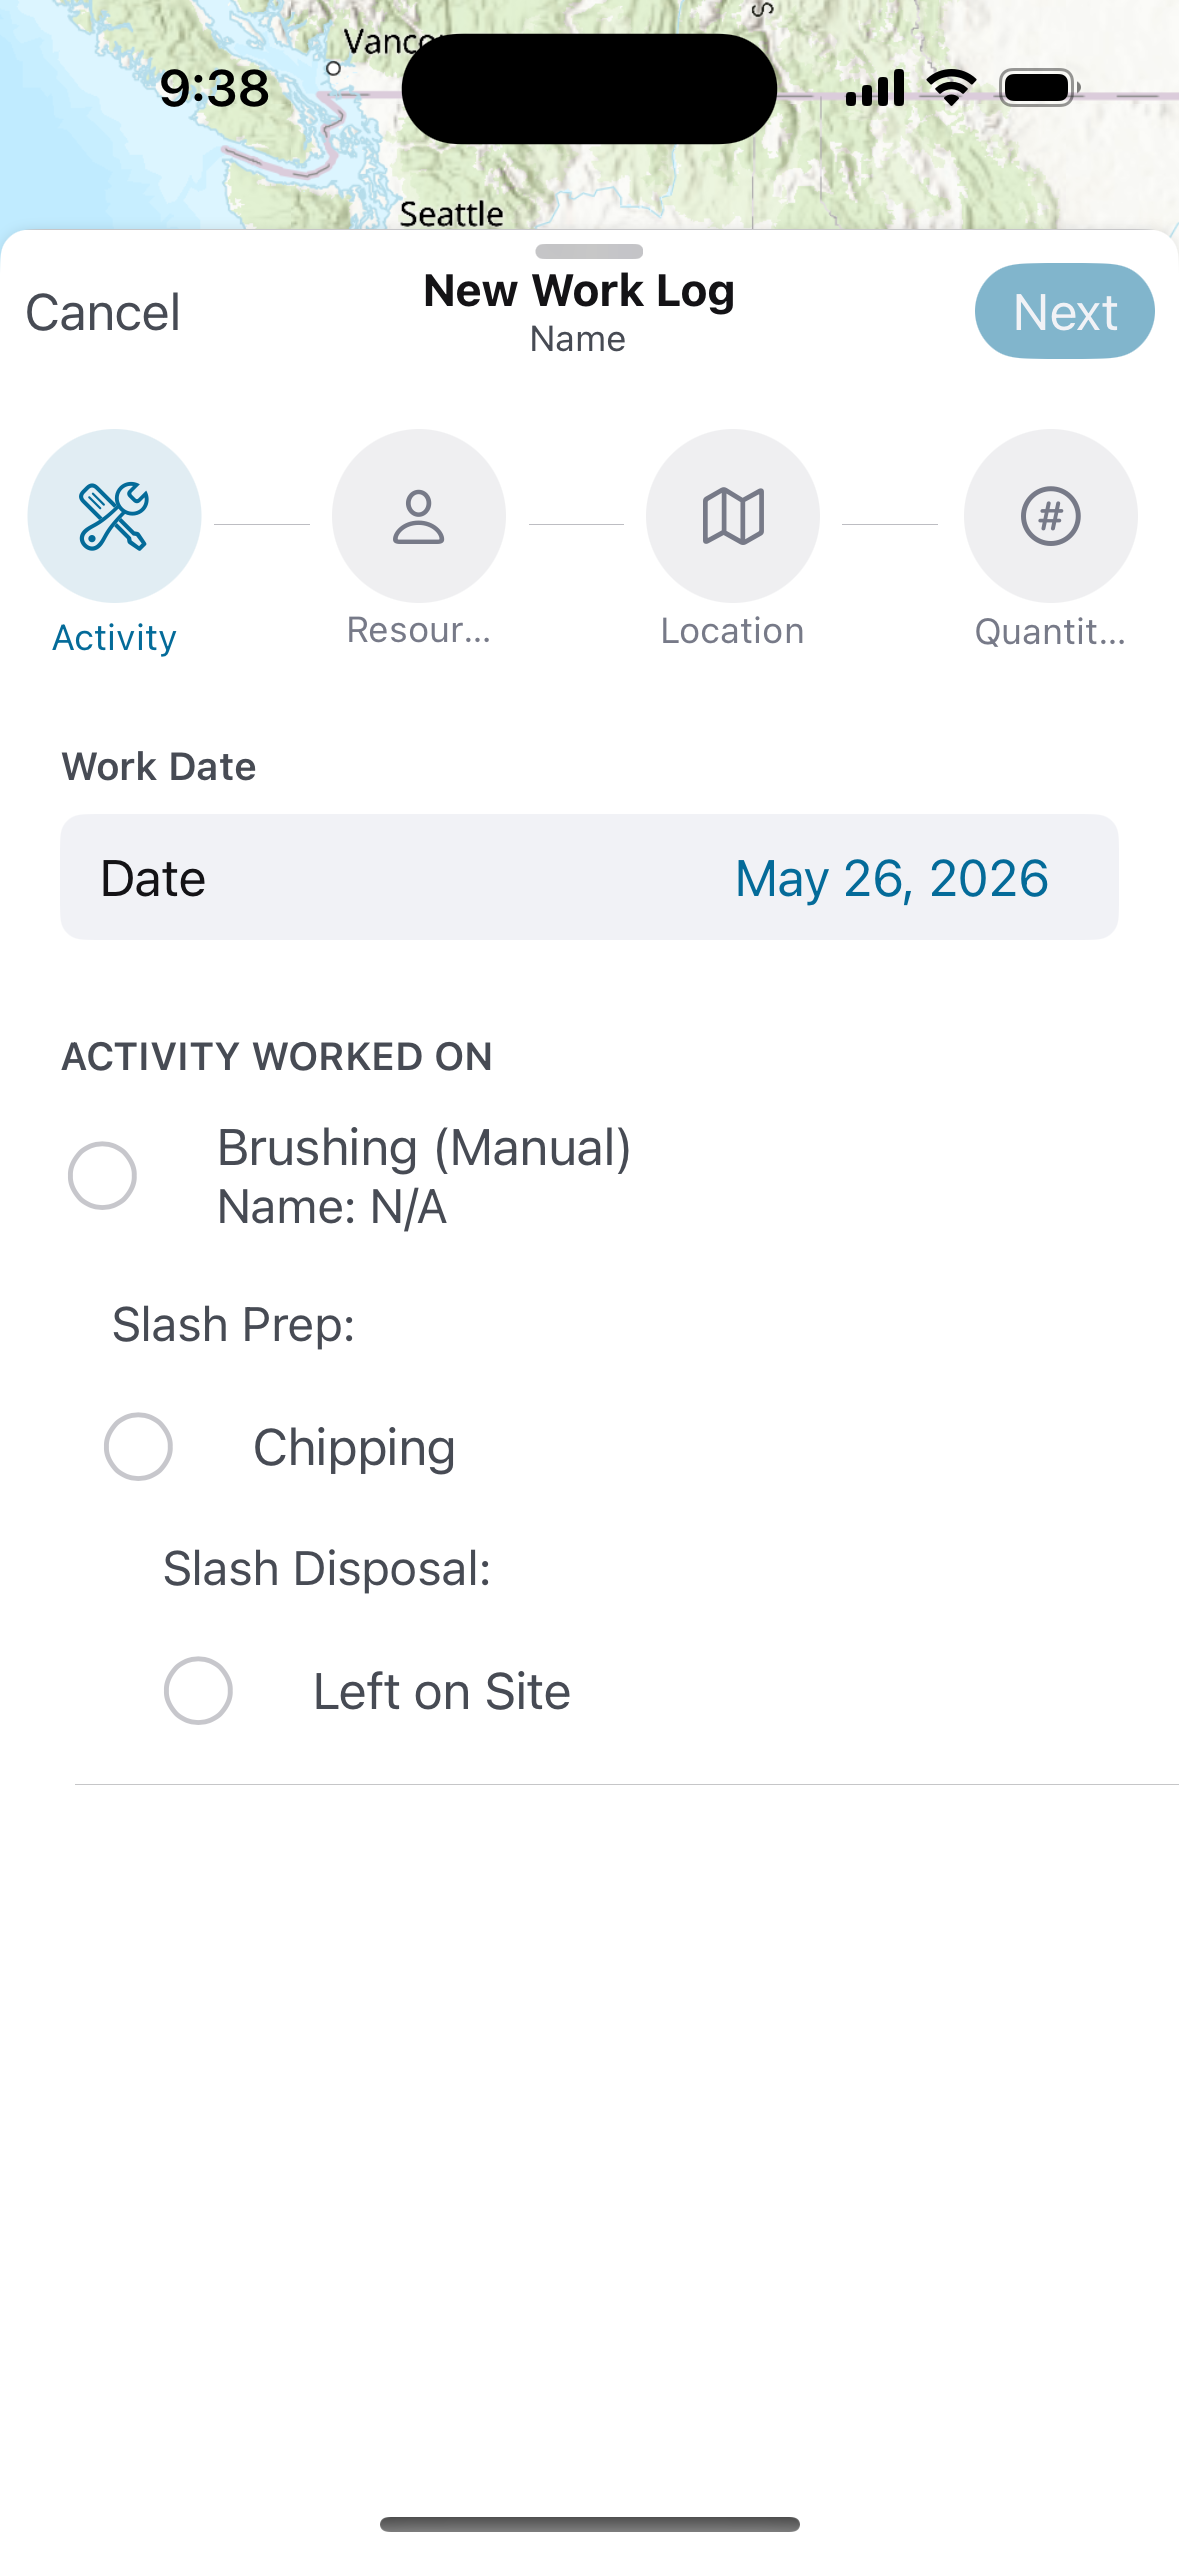
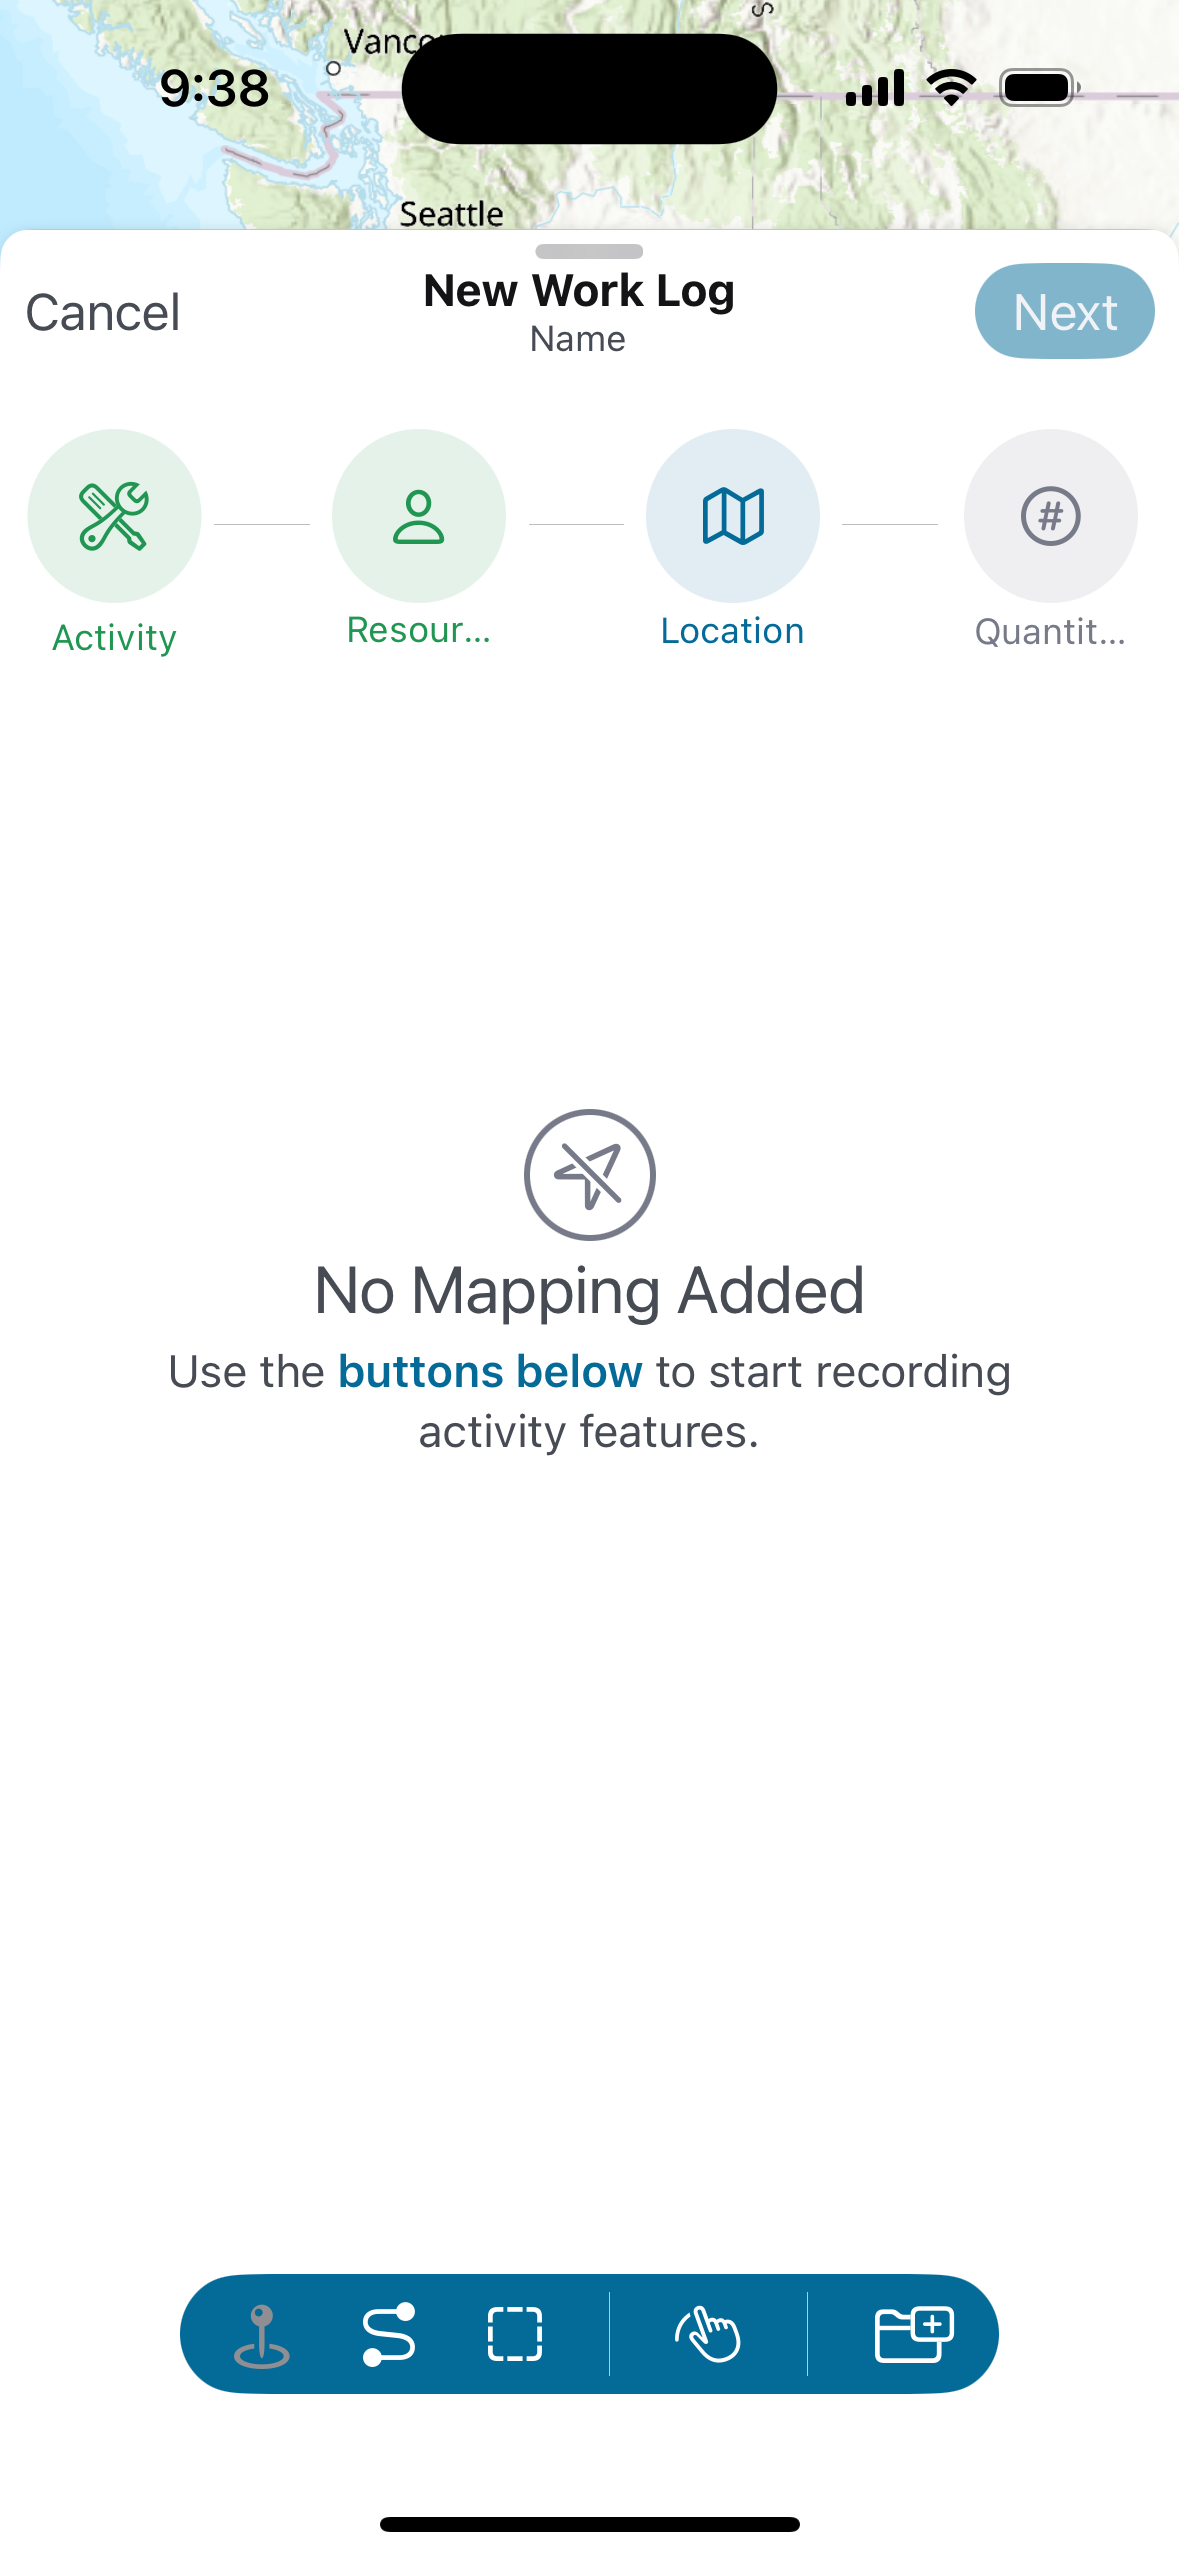
New work logs are created from the treatment detail sheet. The form opens as a bottom sheet over the map and is divided into four steps, shown as a horizontal stepper at the top of the sheet. Completed steps are highlighted in green, the active step in blue, and upcoming steps in grey. The header shows Cancel on the left and Next (or Save on the final step) on the right.
1. Activity
Select the work date and the activity worked on.
-
Work Date — Defaults to today's date. Cannot be set to a future date and must fall within the parent project's start and end dates.
-
Activity Worked On — Lists each activity on the treatment as a radio button. Each activity shows the primary activity name and options as nested radio buttons beneath it.
Tap Next to continue.
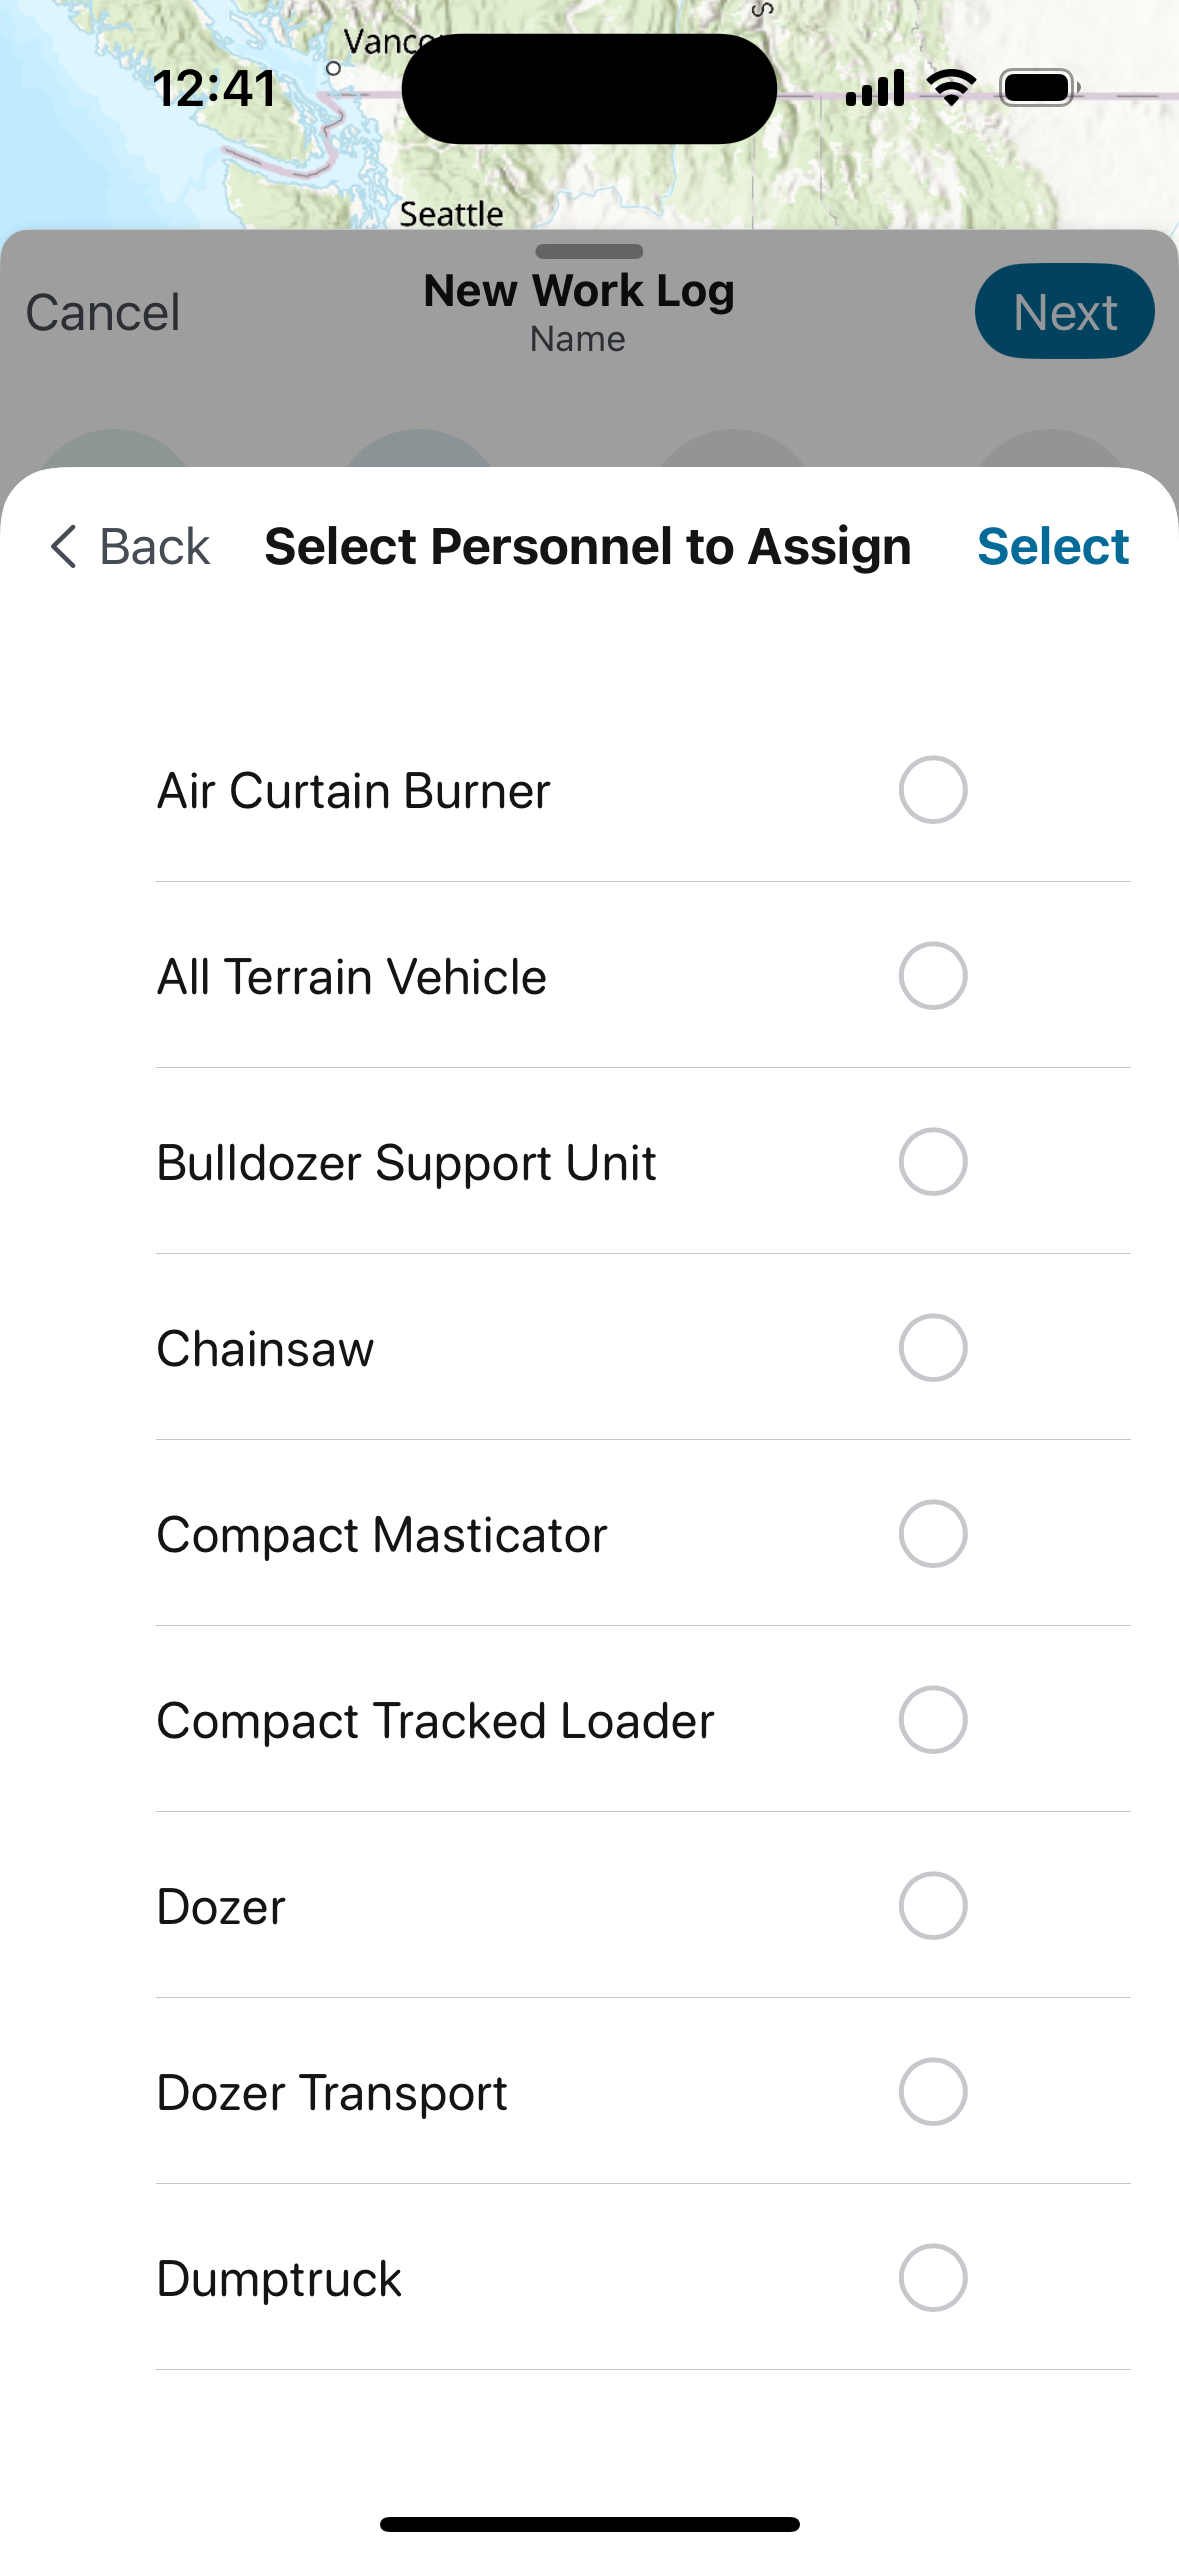
2. Resources
Add the crew and equipment used for this work log. The empty state displays "No Resources Assigned."
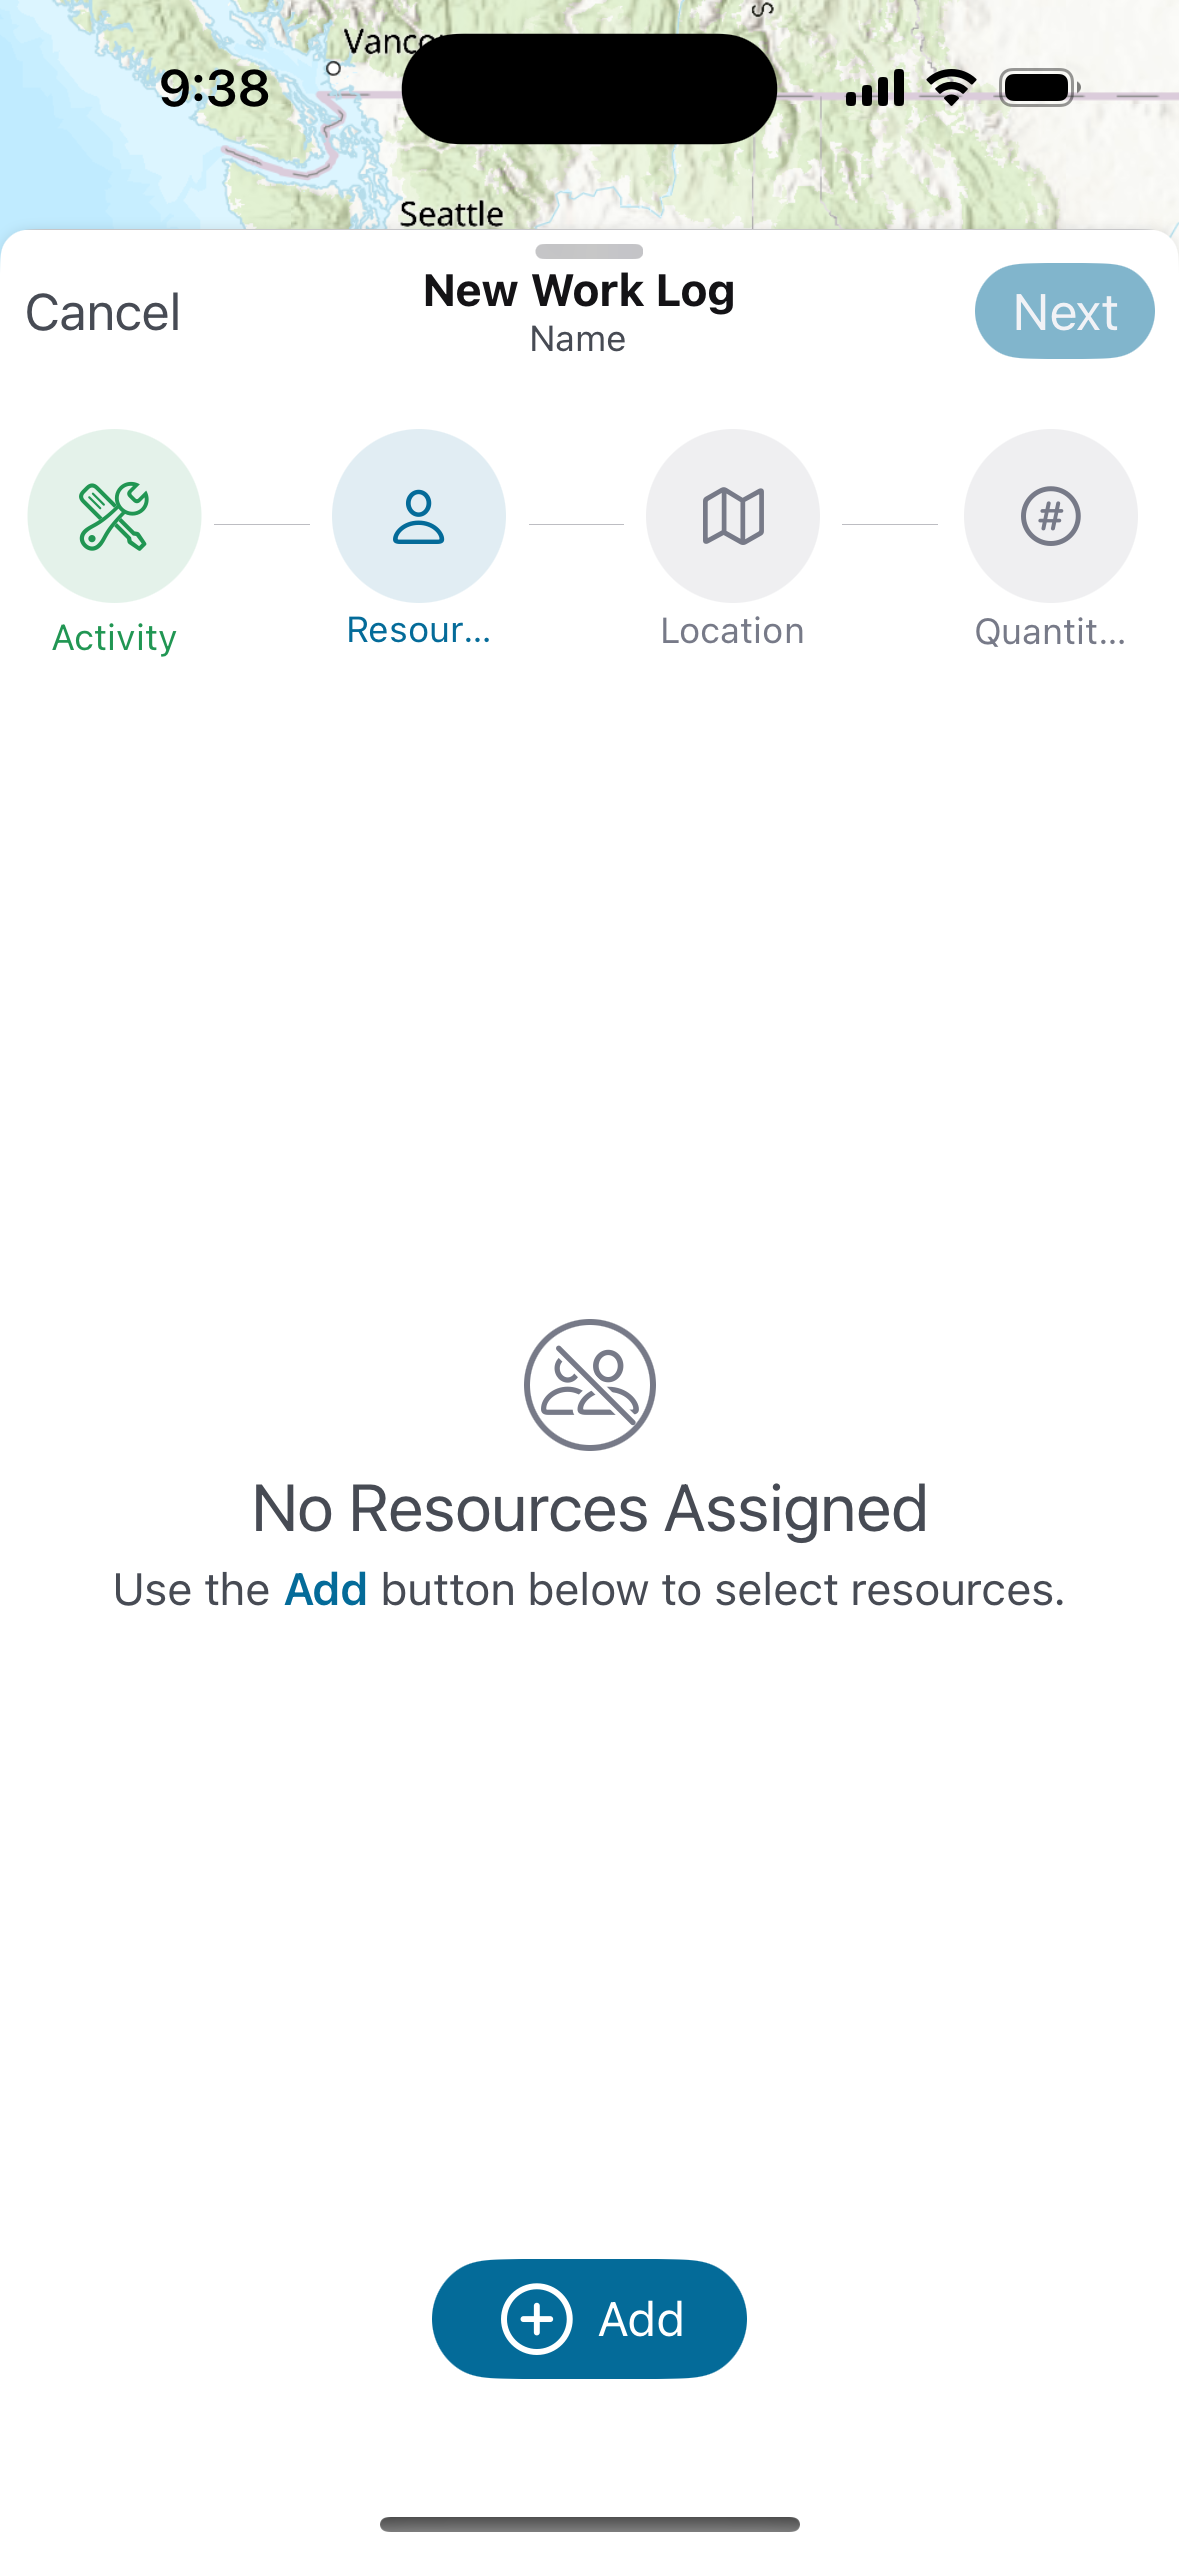
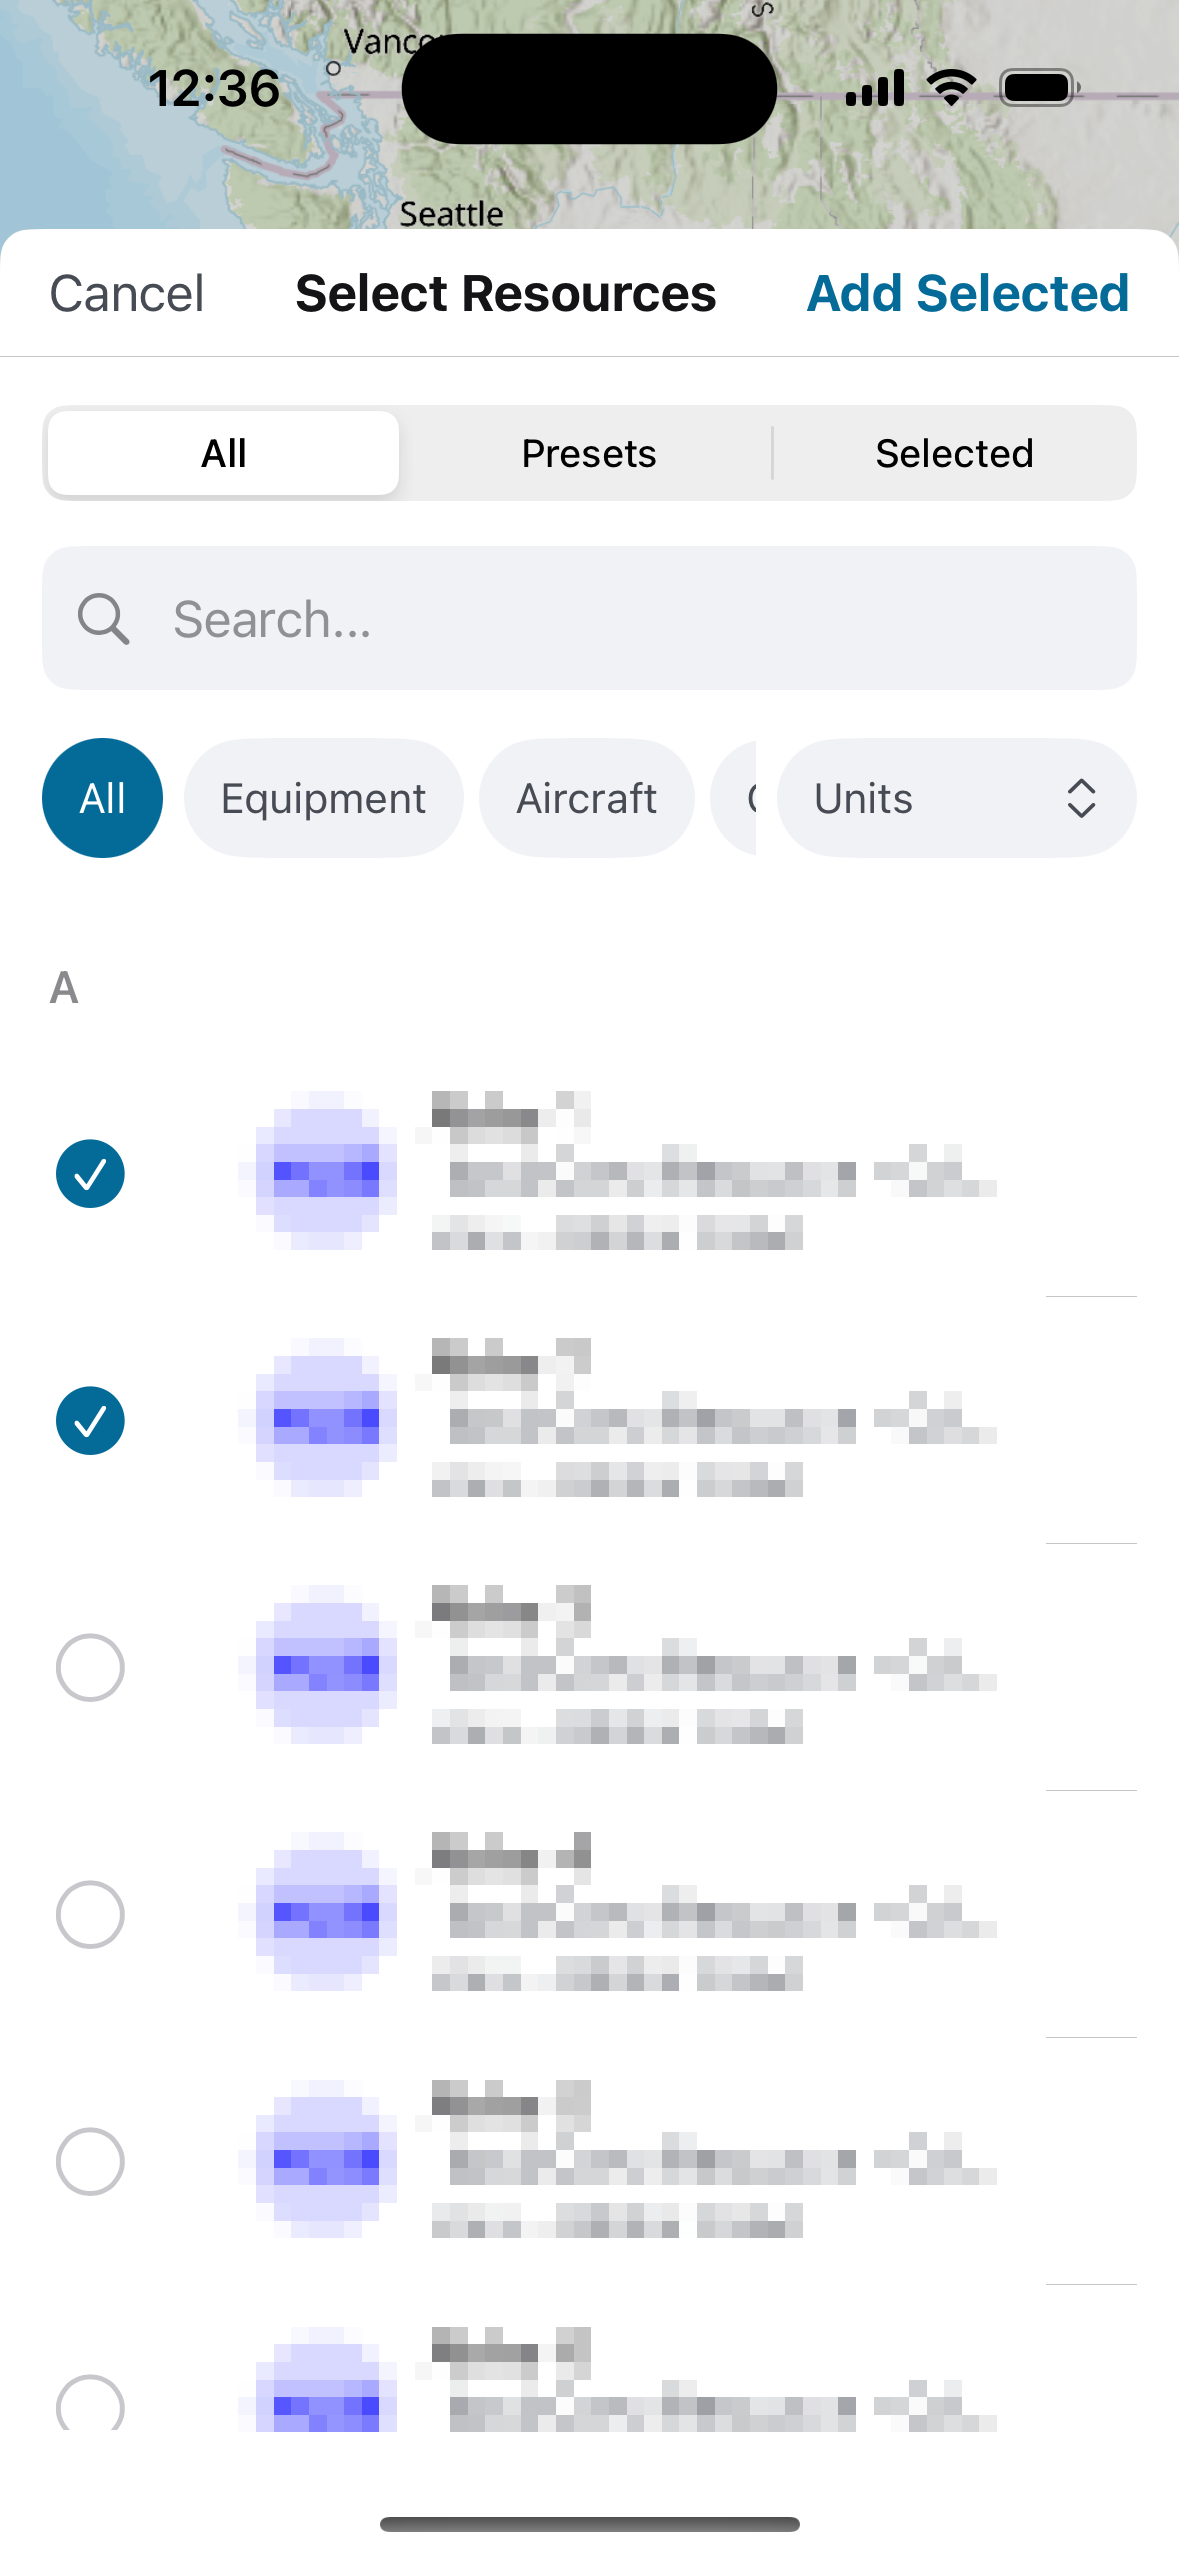
Tap Add to select a resource. Multiple resources may be selected. Click Add Selected.
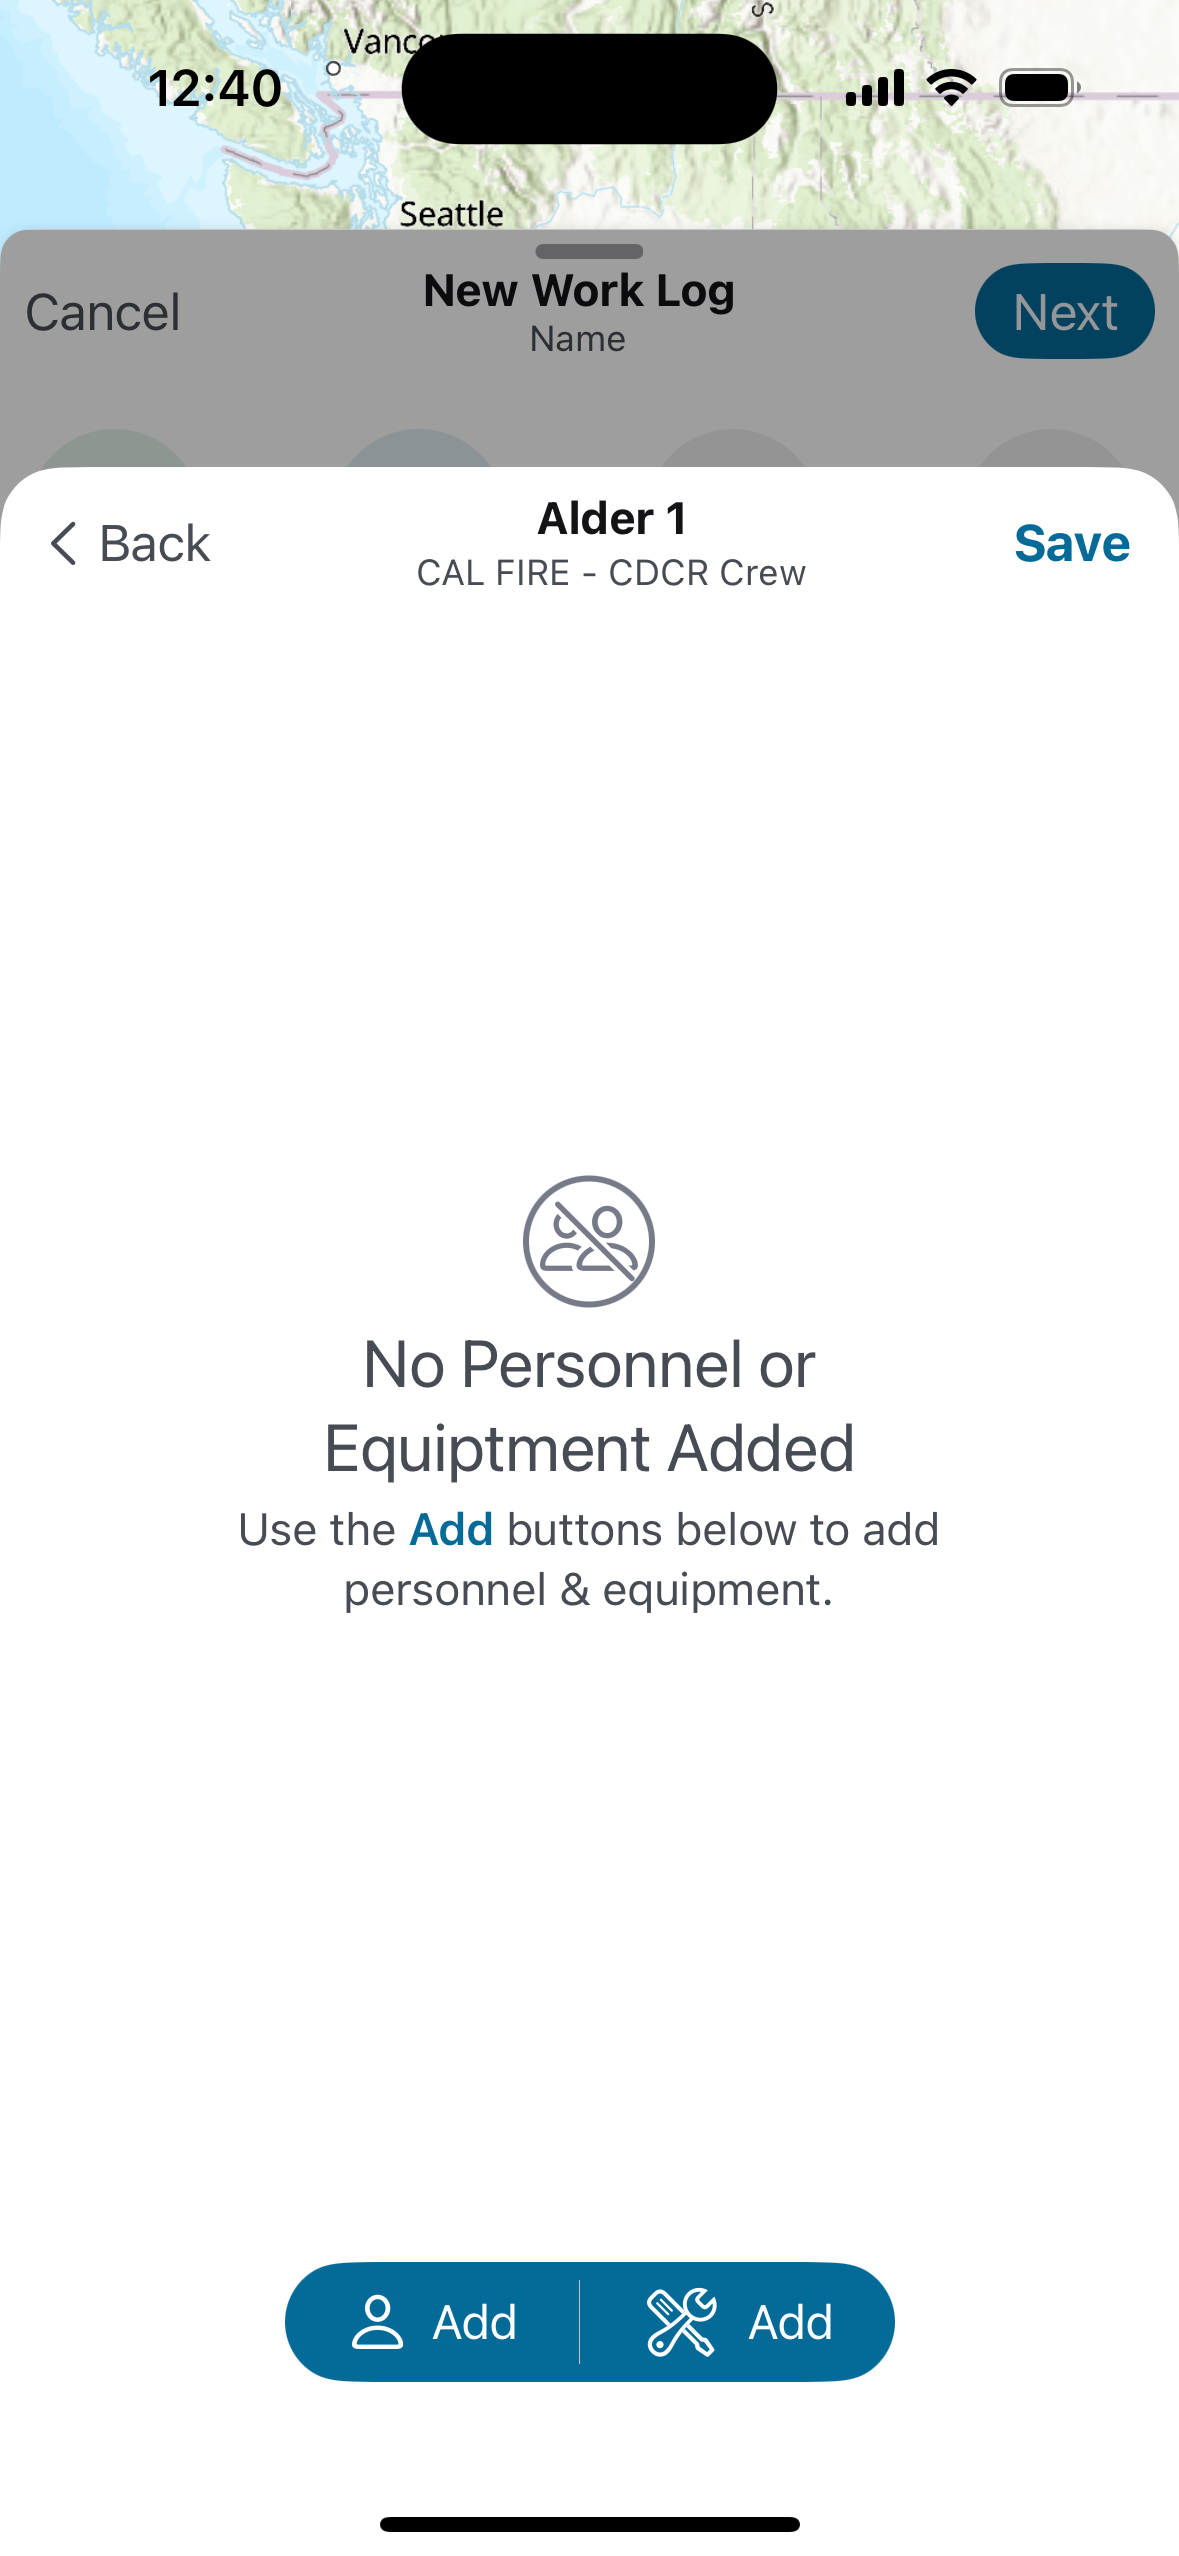
Click Add to assign Personnel (left icon) and Equipment (right icon) to each resource added. Tap Next to continue.
|
|
|---|
3. Location
Record the geographic location of the work performed. The empty state displays "No Mapping Added."
Use the geometry toolbar at the bottom of the screen to add a location. Geometry types (point/line/polygon) are filtered based on the Treatment objective.
-
Point (pin icon) — Places a single GPS point at your current location.
-
Streaming (path icon) — Records a continuous GPS track as you move through the work area.
-
Polygon (square icon) — Draw a polygon by tapping points on the map.
-
Freehand (hand icon) — Draw a freehand shape directly on the map.
-
Upload (folder icon) — Upload an existing geometry file.
Tap Next to continue.
4. Quantities
Review and confirm the hours worked and activity quantities.
-
Hours — Enter the total hours worked. Required. Maximum 24 hours.
-
Activity Quantities — Displays the acreage calculated from the geometry added in Step 3. This value is calculated automatically and cannot be edited directly.
Tap Save to submit the work log. The record is saved locally and queued for sync.