
The Projects page displays all fuel management projects in the system. It is one level below Plans in the hierarchy and serves as the central hub for tracking individual project efforts.
Filtering and Search
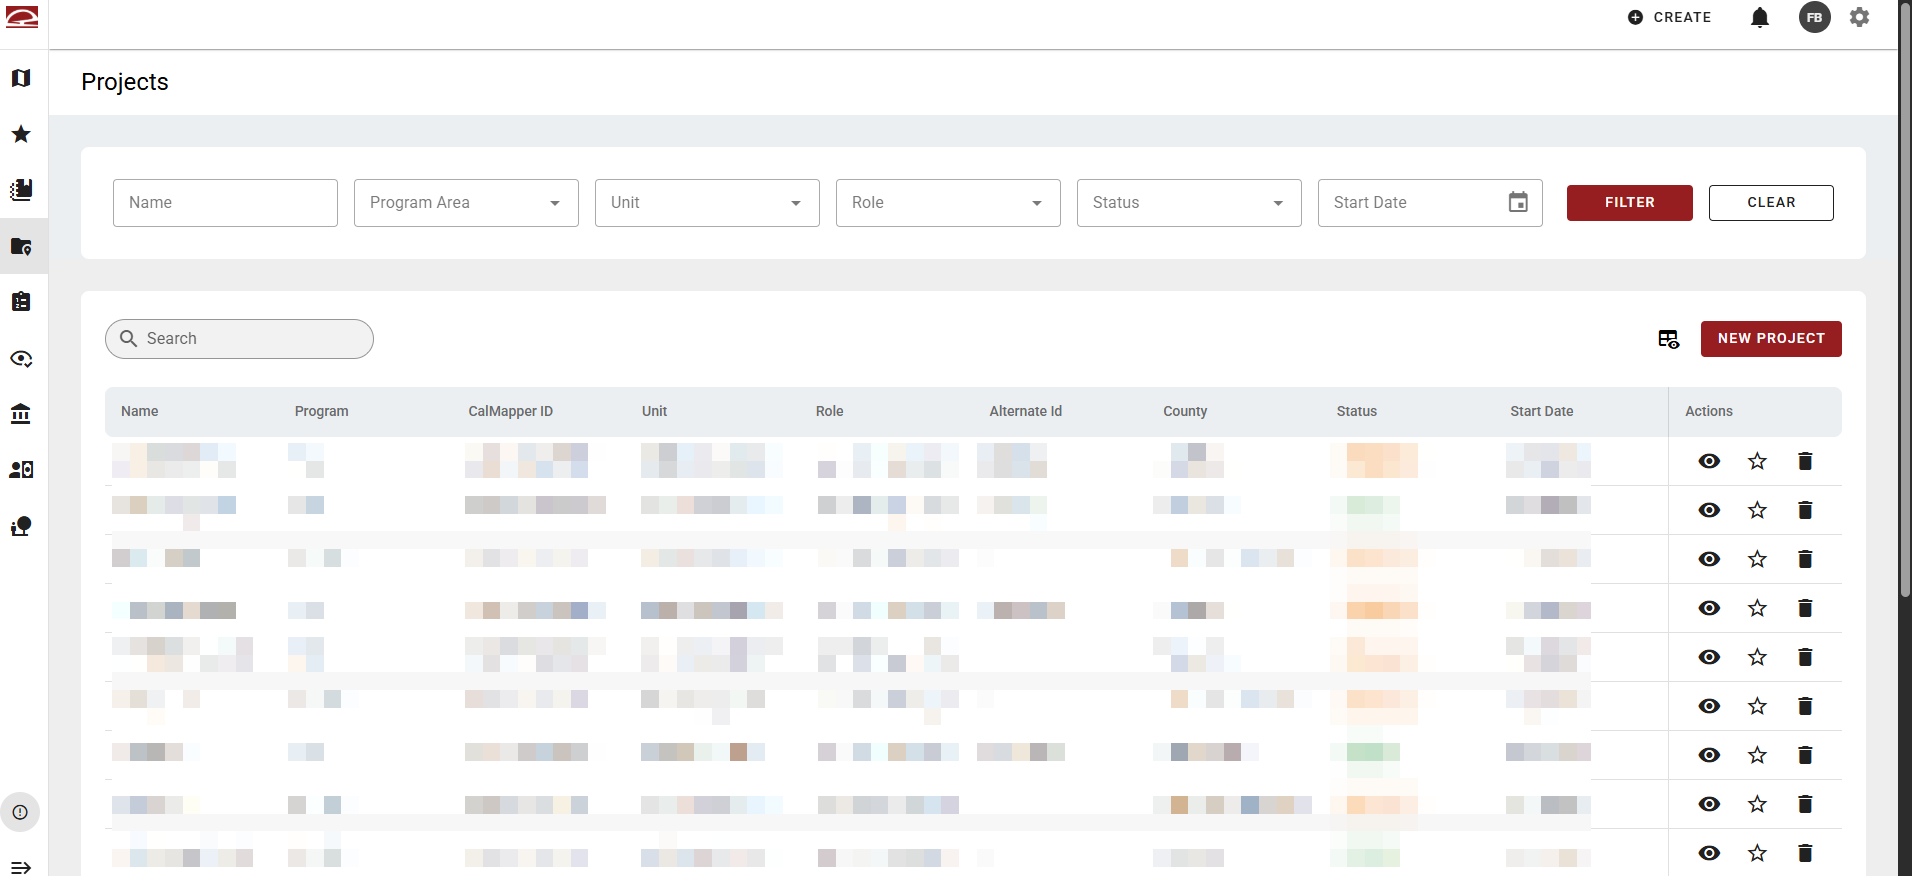
Users can filter the list using criteria such as Name (text input), Program Area, Unit, Role, Status (Active/Cancelled/Complete/Proposed), and Start Date. A Filter button applies the selection and Clear resets it. A separate free-text search bar allows quick lookup by name or ID. Or, click a column heading to sort it in ascending or descending order.
Table
The table displays each project with default columns. Use the spreadsheet icon in the top right to adjust the columns shown.
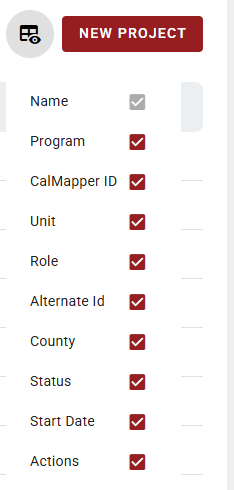
Table Actions
Each project (row) has three action icons: a view (eye) icon to open the record, a favorites (star) icon to save it for quick access, and a delete (trash) icon.
View Project
Clicking the view (eye) icon opens an individual record page for the project selected.
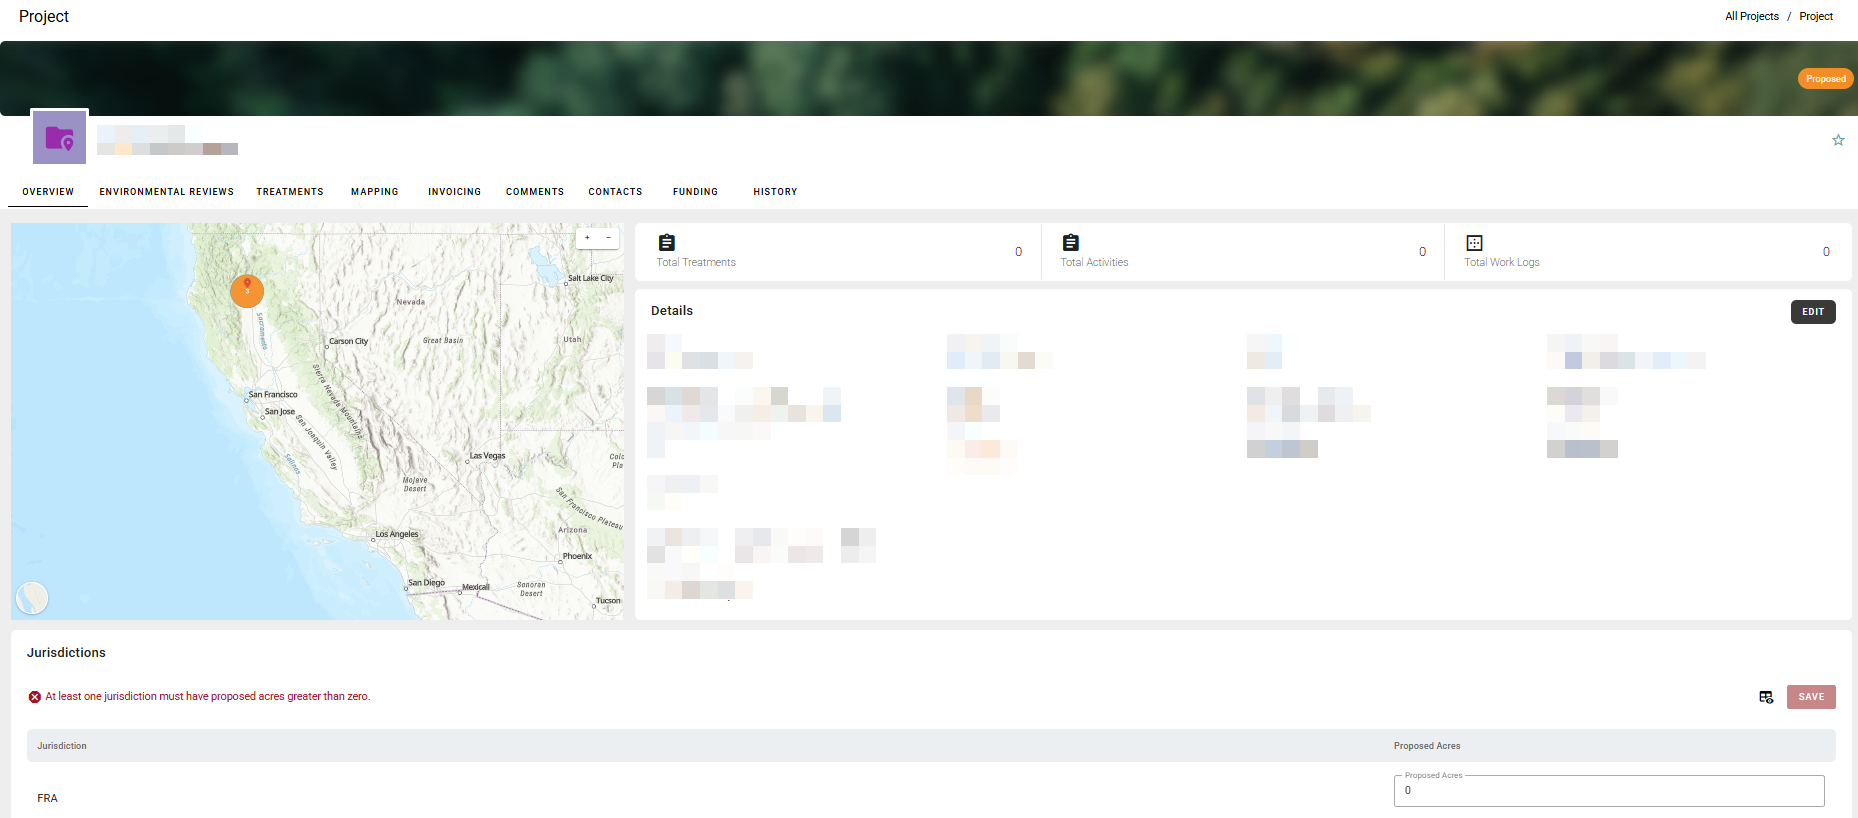
The record is organized into nine tabs:
1. Overview
The Overview tab is the landing tab when a project record is opened. It displays a mini map showing the project's geographic context alongside a Details panel containing the project's key attributes. An Edit button in the top right of the Details panel allows authorized users to modify the record.
2. Environmental Reviews
The Environmental Reviews tab lists environmental review documents associated with the project. Click Add Record to add a new environmental review.
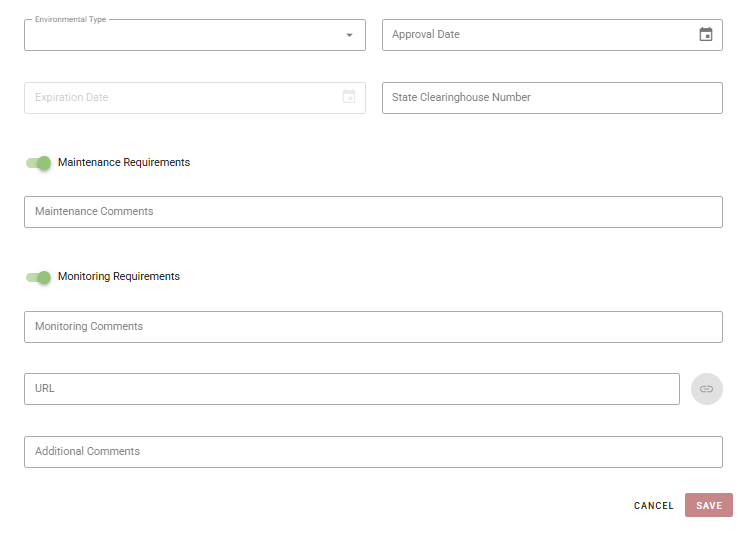
Environmental review fields include:
-
Environmental Type: A dropdown to select the category or type of environmental review (e.g., CEQA, NEPA, or other regulatory framework).
-
Approval Date: A date picker for recording when the environmental review was formally approved.
-
Expiration Date: A date picker for recording when the approval expires.
-
State Clearinghouse Number: A free-text field for entering the official State Clearinghouse tracking number associated with the environmental review.
-
Maintenance Requirements: A toggle switch to indicate whether the review carries maintenance requirements. When enabled, a Maintenance Comments text field appears below for capturing relevant notes.
-
Monitoring Requirements: A toggle switch to indicate whether the review carries monitoring requirements. When enabled, a Monitoring Comments text field appears below for capturing relevant notes.
-
URL: A free-text field for linking to an external document or resource related to the environmental review, accompanied by a link icon button to open the URL.
-
Additional Comments: A free-text field for any other notes or context not captured by the structured fields above.
3. Treatments
Click Add Record to add a new treatment.
4. Mapping
The Mapping tab expands the project’s map, zooms in on the project, and adds map tools to the map. The Feature Manager appears below the map.
5. Invoicing
The Invoices tab lists invoices associated with the project. Click Add Invoice to open the New Invoice window.
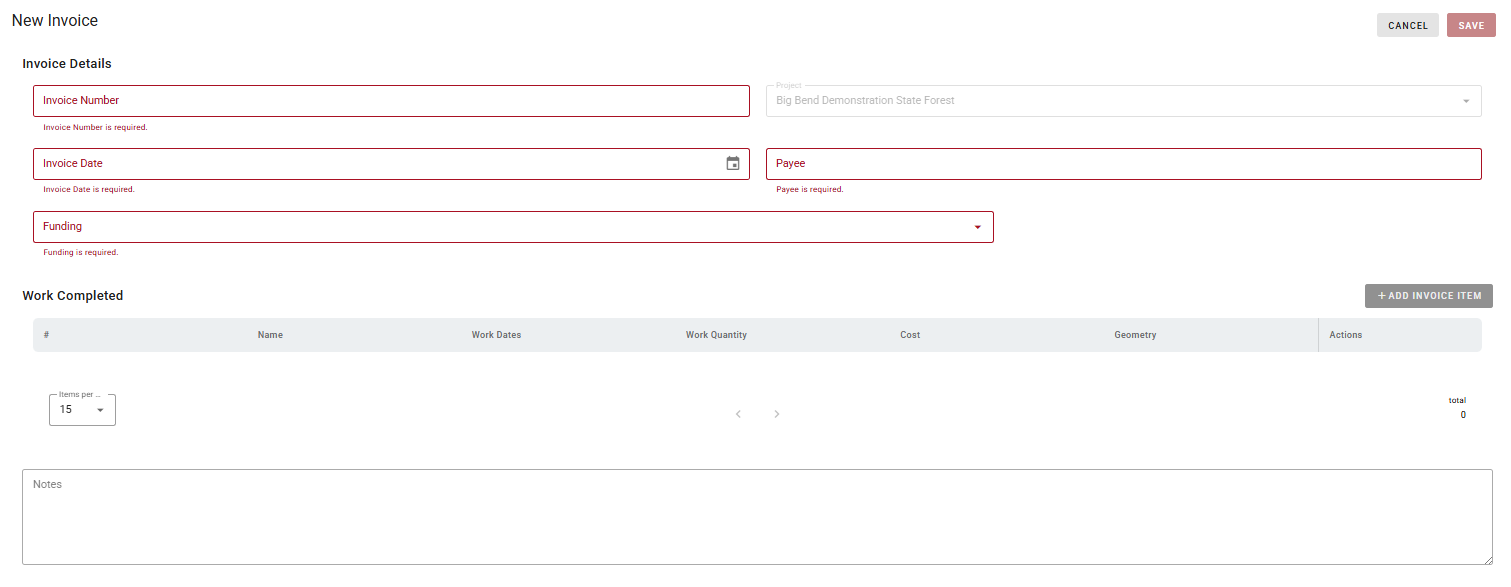
The top section captures the primary information for the invoice. All fields marked with validation messages are required:
-
Invoice Number: A free-text field for entering the invoice identifier.
-
Project: A dropdown pre-populated with the parent project the invoice is being created under. Locked to the current project context.
-
Invoice Date: A date picker for the invoice date.
-
Payee: A free-text field for the entity being paid.
-
Funding: A dropdown to select the funding source the invoice draws from. Only funding sources already linked to the project are available.
Below the invoice header, a Work Completed table lists the individual invoice line items. It has six columns. An + Add Invoice Item button in the top right of this section adds new line items to the invoice. The table is empty on a new invoice until items are added.
A free-text Notes field at the bottom of the form allows users to add any additional context or comments to the invoice record.
6. Comments
The Comments tab allows users to add and view comments on the project record, supporting collaboration and internal notes without modifying the core record data.
7. Contacts
Lists contacts associated with the project.
8. Funding
Lists funding sources linked to the project; funding must be linked here before invoices can be created.

Click Add New Funding to follow the funds creation workflow or click Link Funding to link existing funding to the selected project.
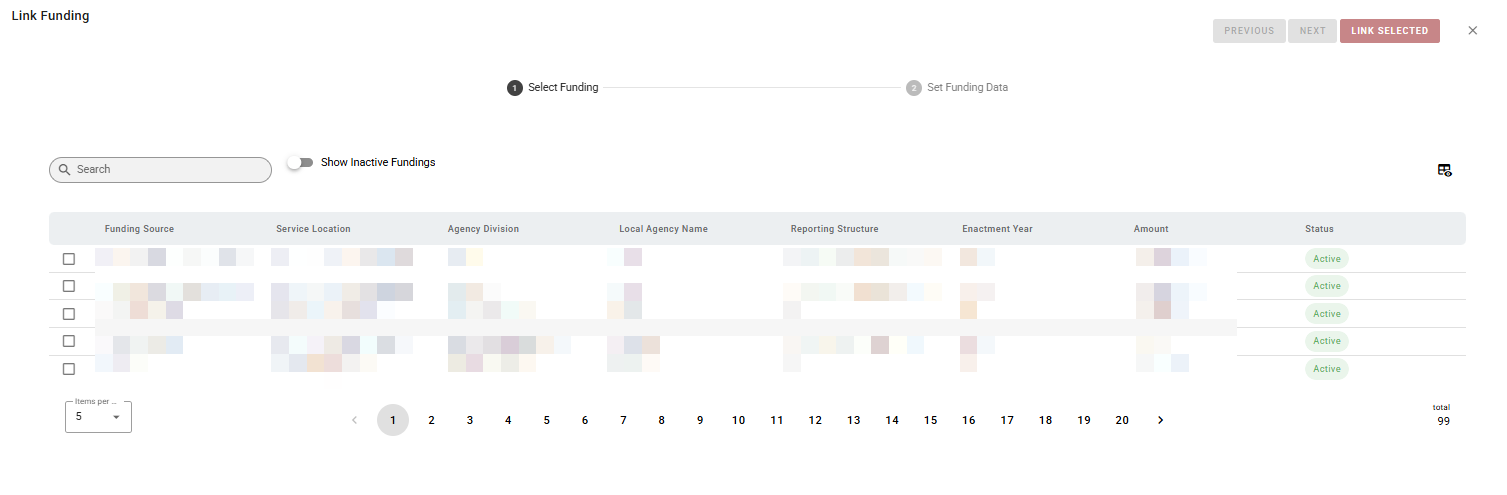
Use the free-text search field to find existing funds or use the toggle to Show Inactive Fundings. Once a fund is selected, a second window appears to enter additional information.

9. History
The History tab provides an audit log of changes made to the project record, including what was changed, by whom, and when.
New Project
A prominent New Project button in the top right launches the project creation workflow.
Enter the required information. Required fields vary by Program and fields are dynamic based on your selection. Example: Forest Health requires an Alt ID; CalVTP requires an “Rx Number”.
When creating a project, the Status defaults to Proposed. Users may change the status after saving the project.
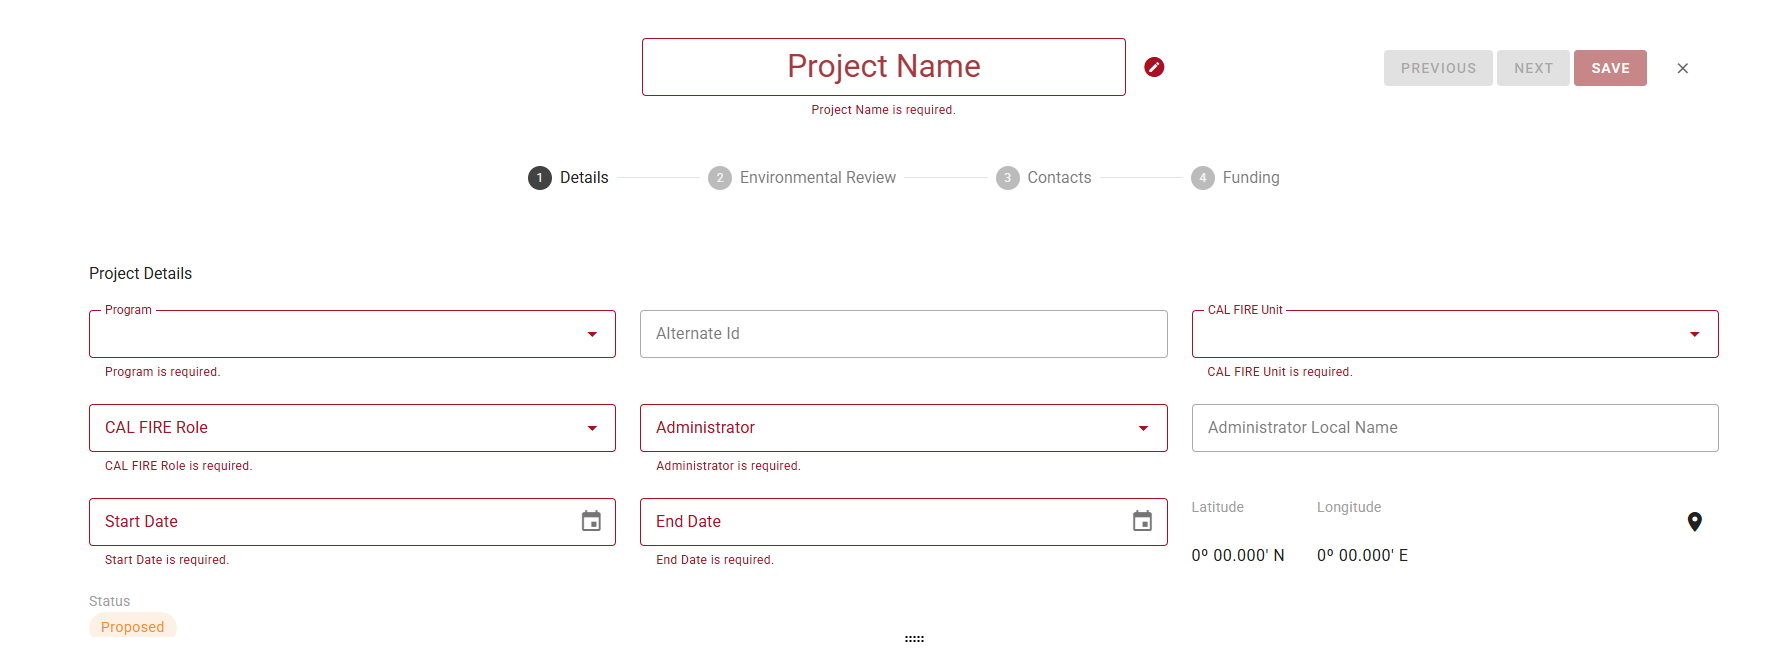
At least one jurisdiction must have Proposed Acres greater than zero for the Next or Save buttons to activate
Click Next to move through each of the four tabs: Details, Environmental Review, Contacts, and Funding. Click Save to add the project to the table.
Adding Environmental Reviews, Contacts and Funding is optional at this stage but can be done at any later time. Users may link existing records or create new ones as needed
After saving a Project, the Project page opens to the Mapping tab. Users can only add geometry after the Project has been saved.