
Mapping features are points, lines, polygons, and labels added to an incident map.
Mapping features are stored on your device until they are synced. Other users cannot see your features or edits until you sync them.
The Mapping Features Toolbar at the bottom of the Map tab provides the following options for mapping features:
-
Add Coordinates (pin icon)
-
Record a Line (line icon)
-
Record a Perimeter (square vertices icon)
-
Draw a Feature (hand icon)
-
Import a Feature (folder icon)
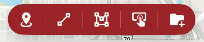
Mapping features you create will be available to sync by default.
Add Coordinates
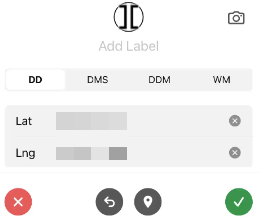
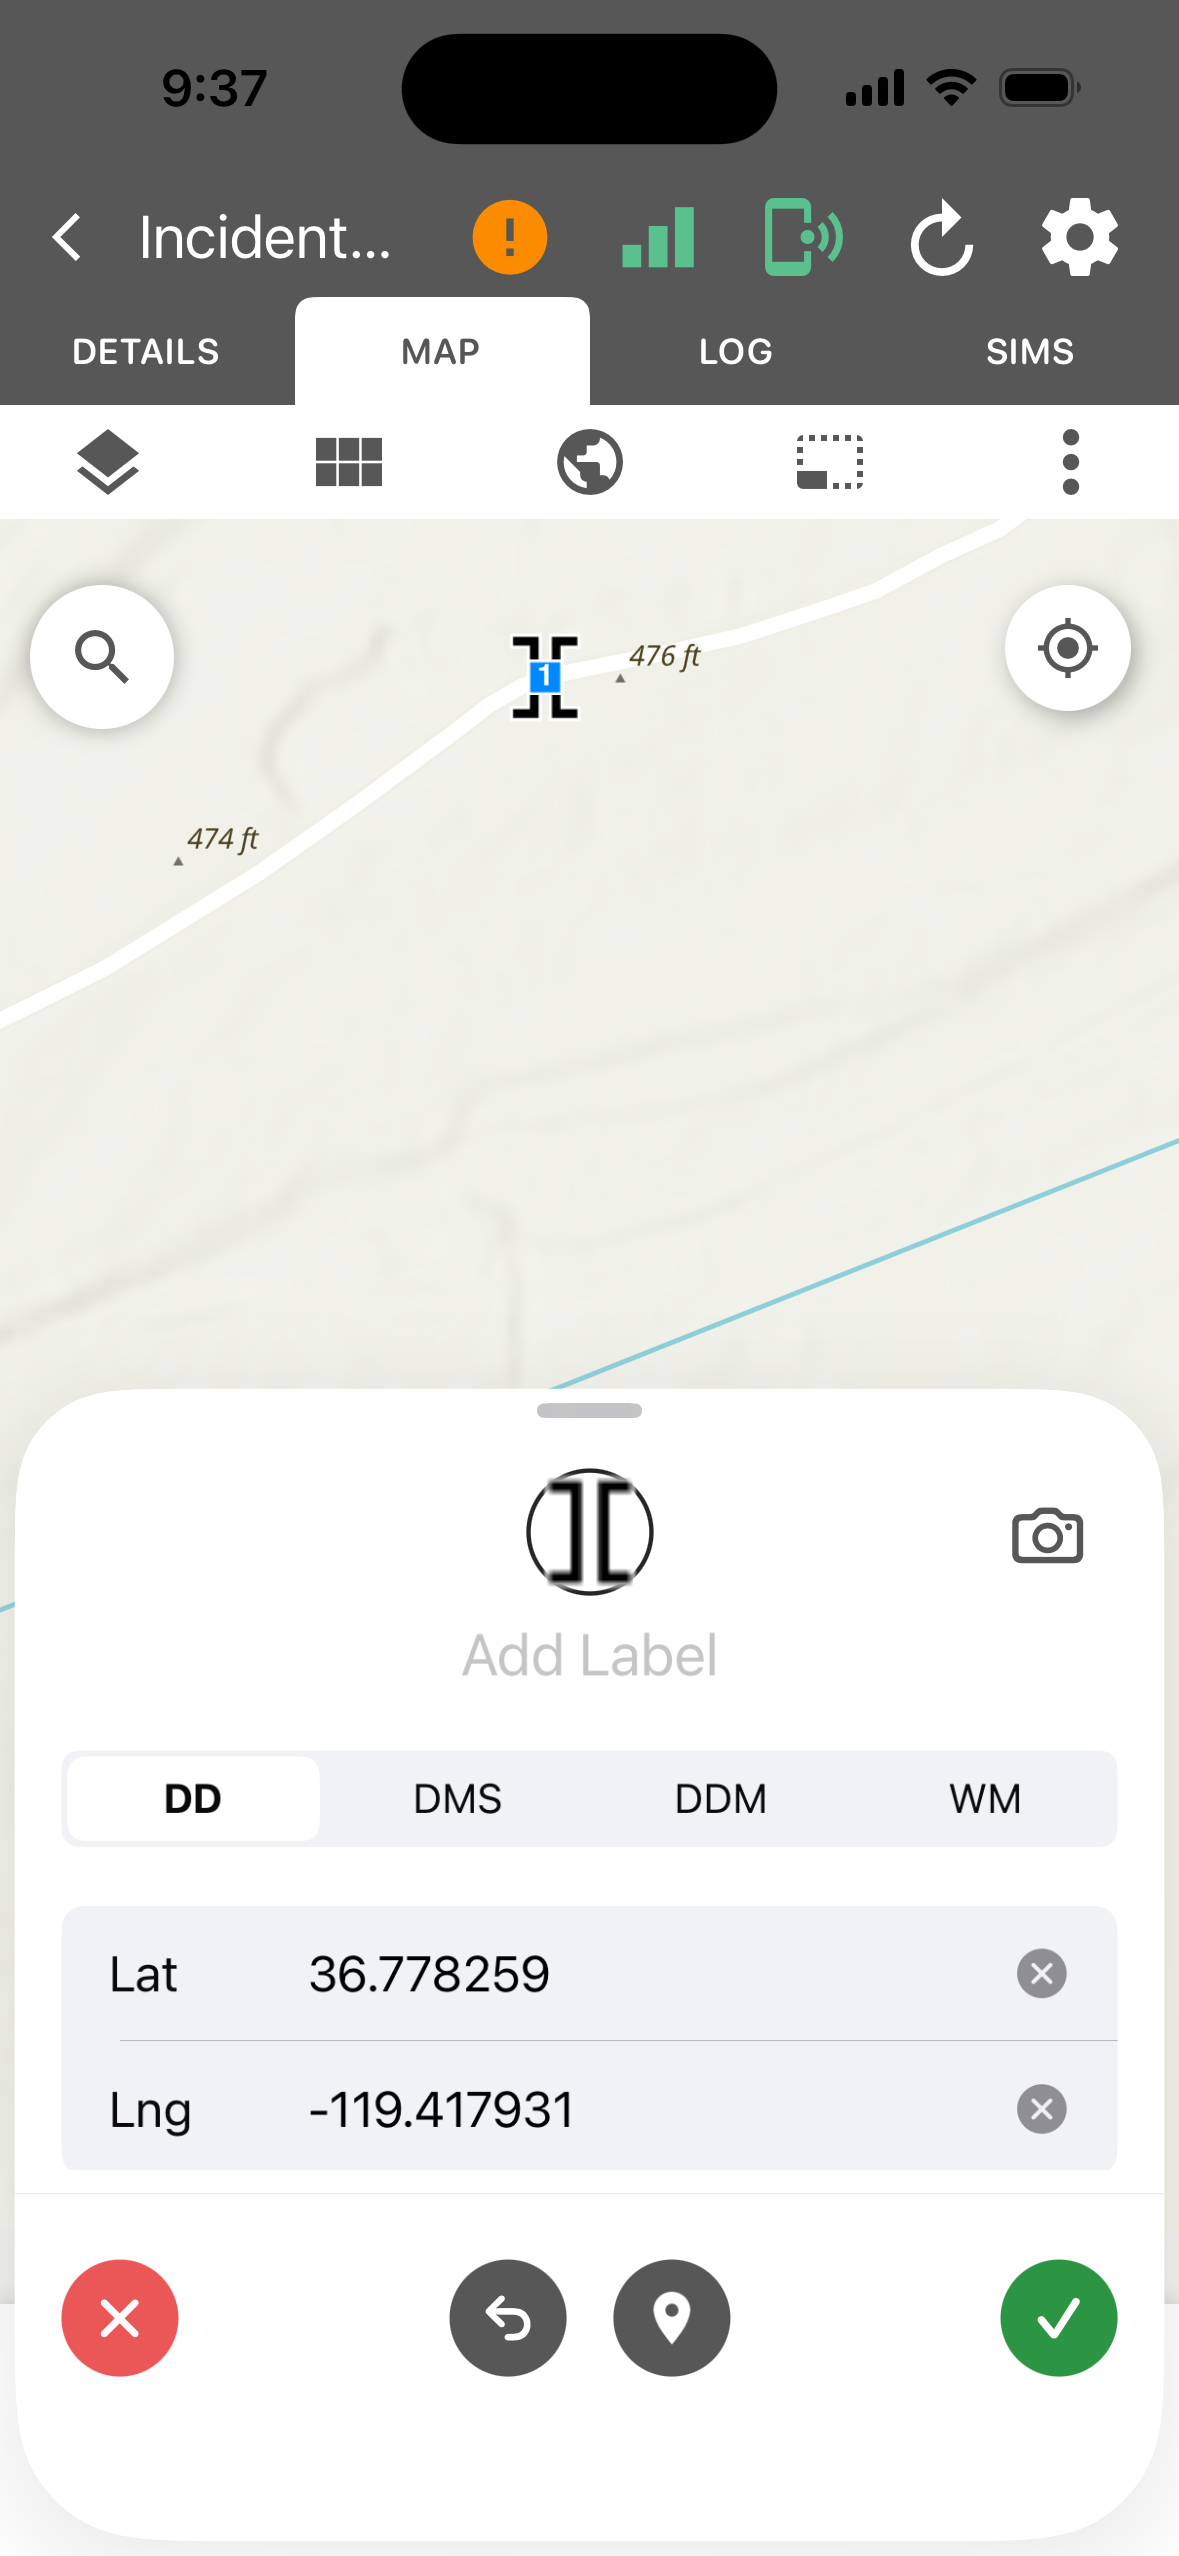
Select the pin icon on the toolbar at the bottom of the Map tab.
-
Tap the symbol at the top to select a different point symbol. Symbology is searchable and grouped by type (e.g., NWCG).
-
Tap Add Label to enter a name for the point.
-
Select a coordinate format from the tabs above the coordinate fields:
-
DD: Decimal degrees
-
DMS: Degrees, minutes, seconds
-
DDM: Degrees, decimal minutes
-
WM
-
-
Set the coordinates in the Lat and Lng fields: use your current location, tap the map, or enter them manually. Tap the pin icon to reset to the current location or the back arrow to undo.
-
Tap the camera icon to attach a photo if desired.
-
Tap the green check to save the point or the red x to discard.
Record a Line
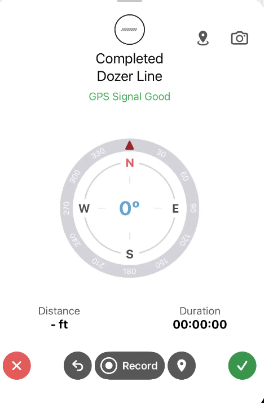
Select the line icon on the toolbar at the bottom of the Map tab to record a line using GPS.
-
Tap the symbol at the top to select a different line symbol. Symbology is searchable and grouped by type (e.g., NWCG).
-
Check the GPS status below the feature name. Wait for GPS Signal Good before recording.
-
Tap Record. The app drops a point at your current location and continues to drop points as you move. Distance and Duration update as you record.
-
Tap Pause to stop recording.
-
Tap the camera icon to attach a photo if desired.
-
Tap the green check to save the line or the red x to discard.
Record a Perimeter
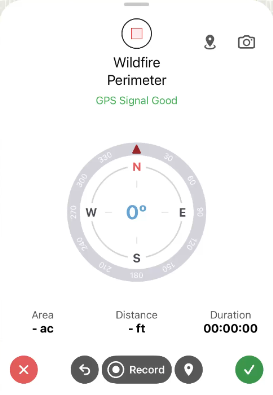
Select the square vertices icon on the toolbar at the bottom of the Map tab to record a perimeter using GPS.
-
Tap the symbol at the top to select a different polygon symbol. Symbology is searchable and grouped by type (e.g., NWCG).
-
Check the GPS status below the feature name. Wait for GPS Signal Good before recording.
-
Tap Record. The app drops a point at your current location and continues to drop points as you move. Distance and Duration update as you record.
-
Tap Pause to stop recording.
-
Tap the camera icon to attach a photo if desired.
-
Tap the green check to save the feature or the red x to discard.
Draw a Feature
Select the hand icon on the toolbar at the bottom of the Map tab and select Point, Label, Line, or Polygon to draw the selected feature type.
To draw a point or label, follow the instructions as for Add Coordinates.
To draw a line or polygon,
-
Tap the symbol at the top to select a different polygon or line symbol. Symbology is searchable and grouped by type (e.g., NWCG).
-
Tap Label to enter a name for the line or polygon.
-
Tap the camera icon to attach a photo if desired.
-
Optionally, add a Comment.
-
Toggle on or off Active: On by default.
-
Toggle on or off Sync With Central: On by default.
-
Tap the green check to save the feature or the red x to discard.
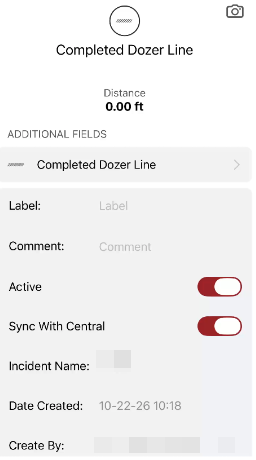
Incident Name, Date Created, and Create By are filled in automatically.
Import a Feature
Select the folder icon on the toolbar at the bottom of the Map tab to browse to a feature to import. This is the same as the Import option on the Mapping Features List.
Edit a Feature
You must sync edits through My Edits so other users can see them.
Edit Feature Details
To open a Feature Details Card:
-
Select the feature on the map and tap the i button or,
-
Open it from the Mapping Features List from the Incident Card.
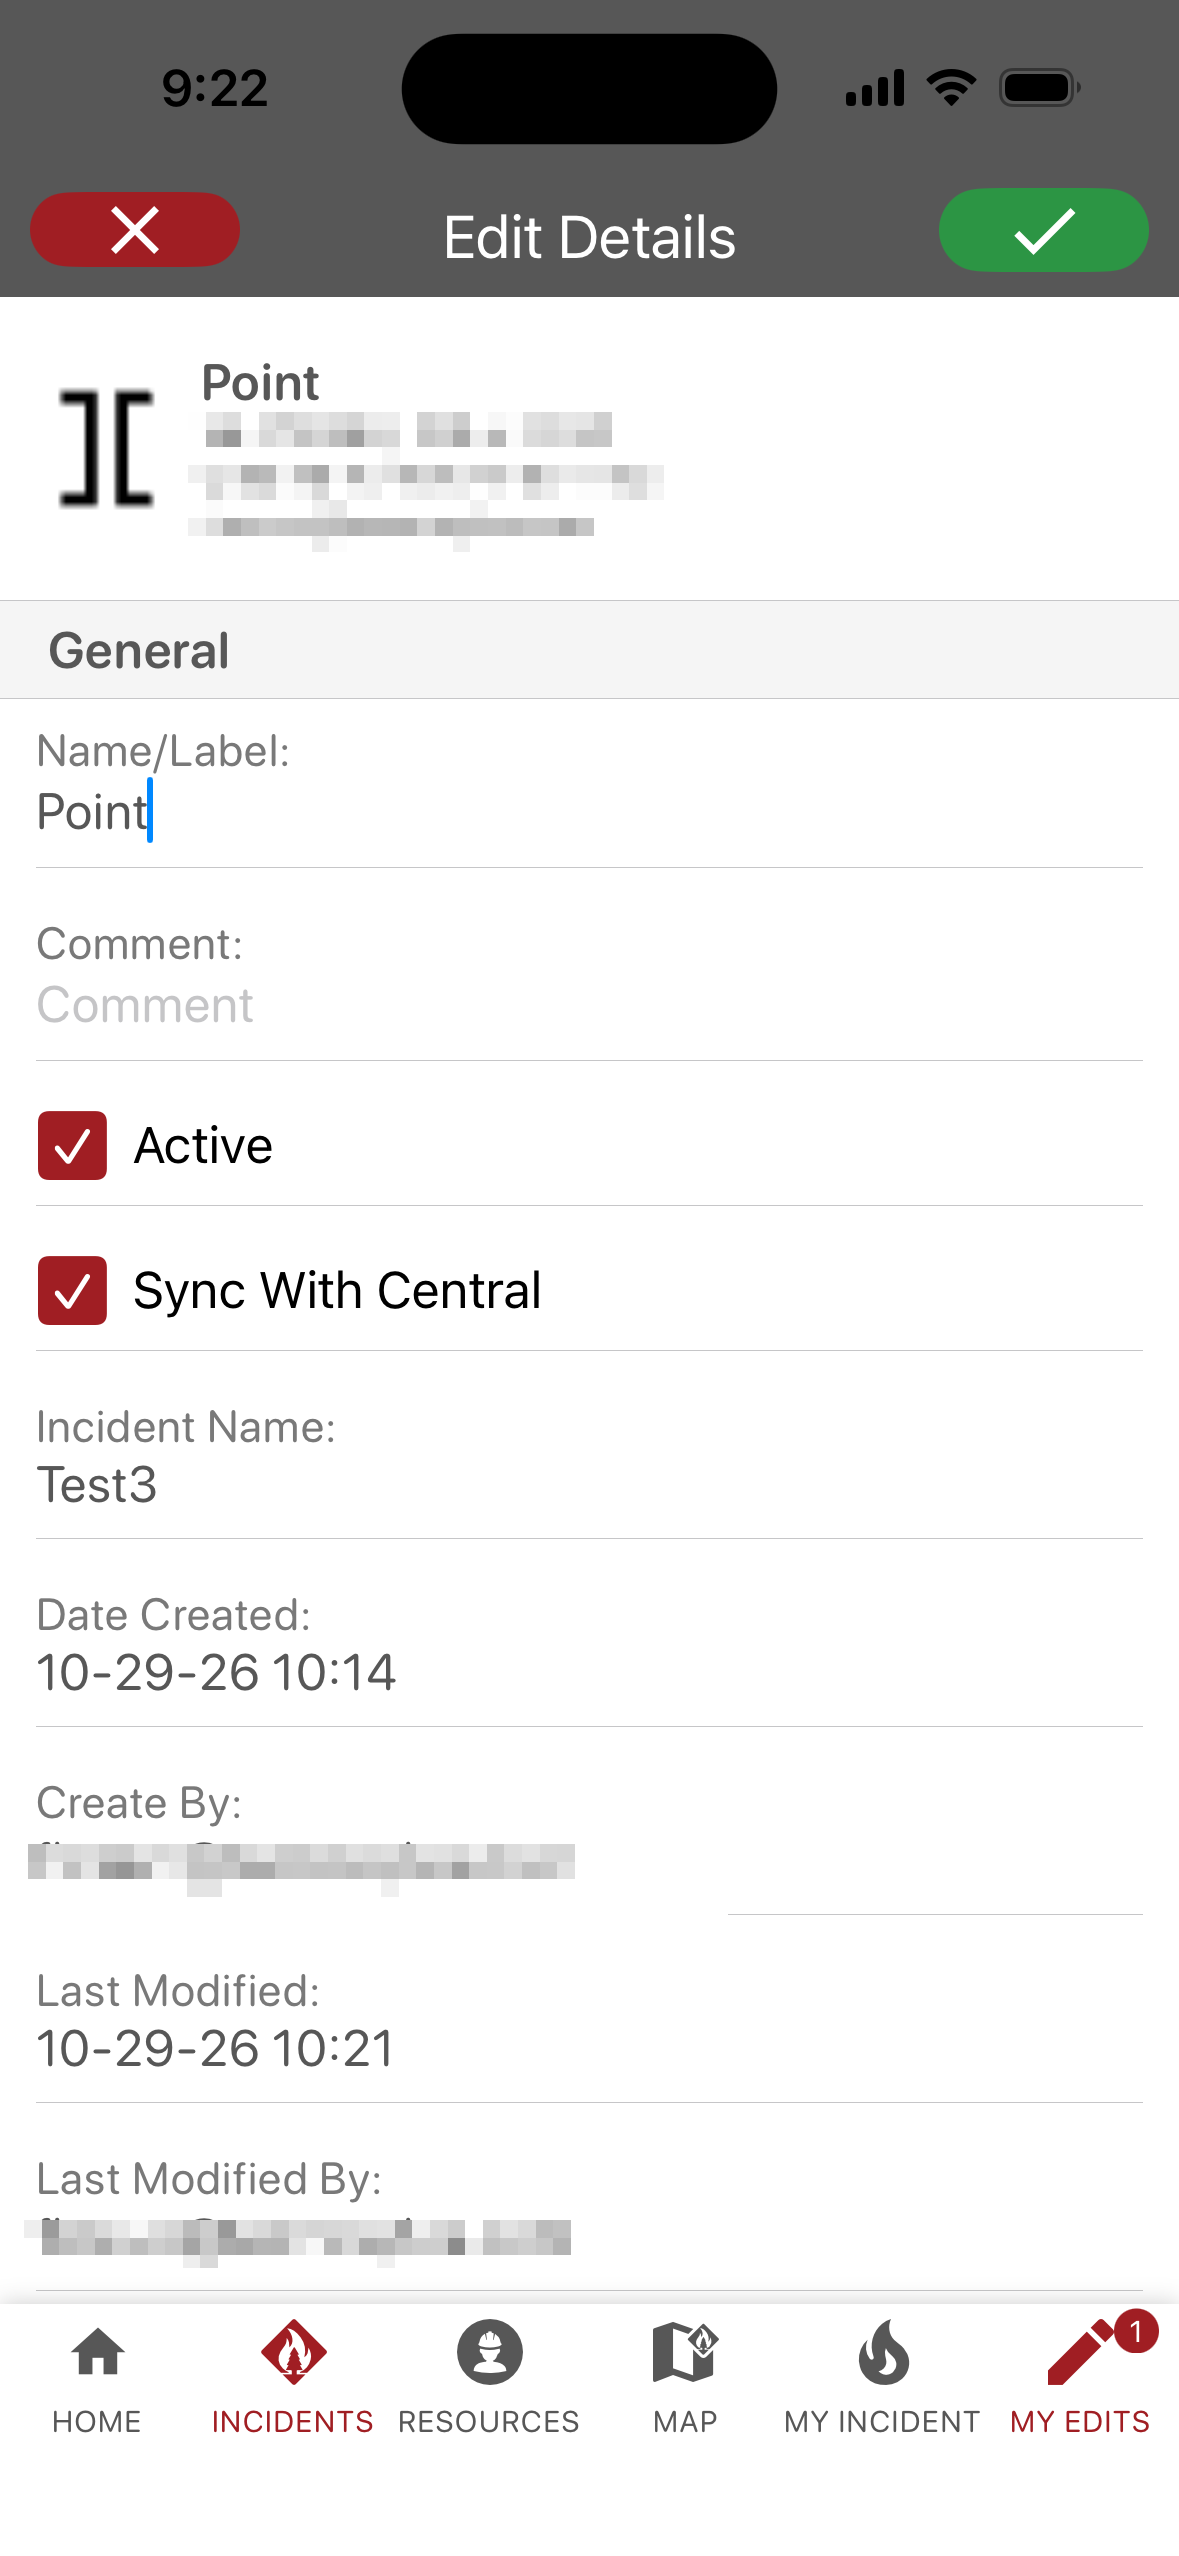
If a feature is editable, a pencil icon appears on the Feature Details Card. Tap the pencil icon to activate the editable fields.
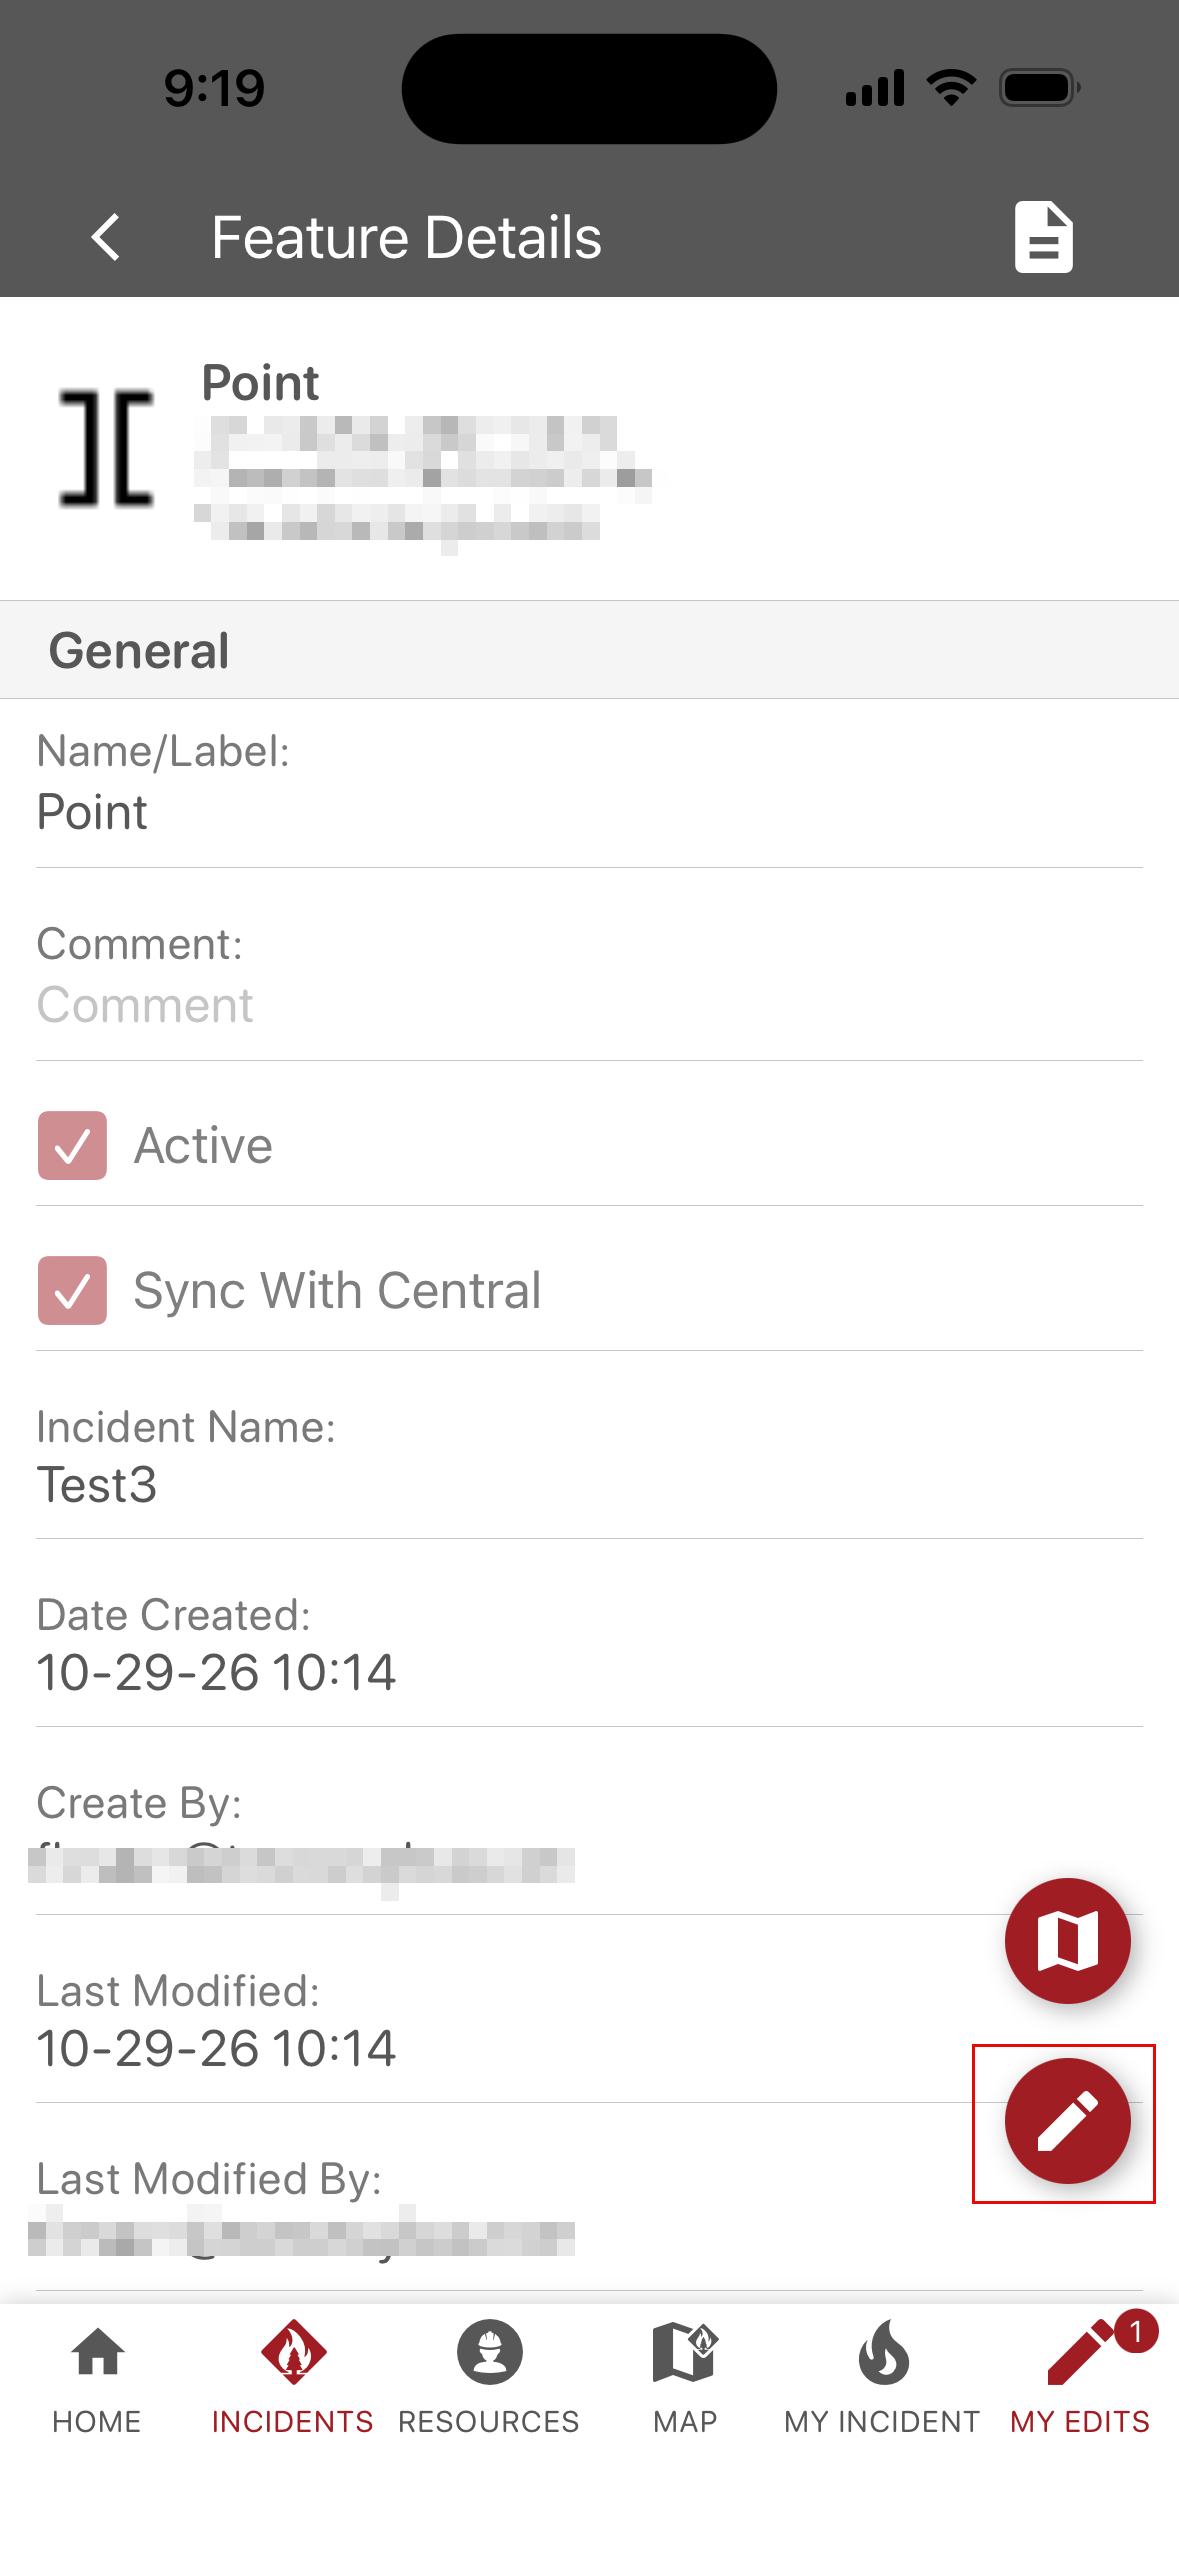
Make your edits and click the green check to save or the red x to discard edits.
Edit Feature Geometry
Select the feature on the map. If it is editable, a pencil icon will appear. Tap the pencil icon to begin editing.
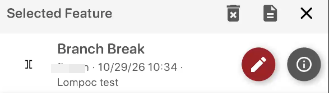
Tap a vertex or midpoint (for line or polygon features). The selected vertex or midpoint will have a blue halo.
Vertices are the square icons containing a number and midpoints are the white circular icons.
Tap and hold on the selected vertex or midpoint and drag it to a new location. When the vertex or midpoint is in the preferred location, release to move the point. Repeat as necessary.
When finished, tap the green check to save or the red x to discard edits.
Moving a vertex changes only that vertex. Moving a midpoint adds a new vertex at the new location.”