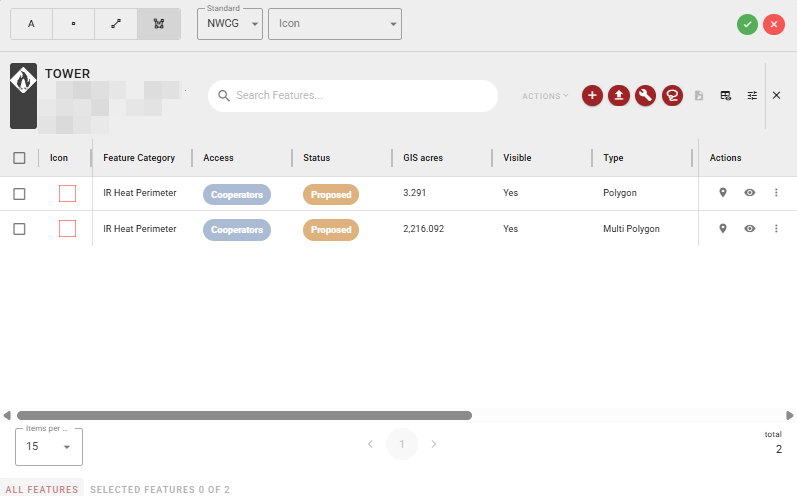
The Incident Mapping Grid provides a tabular view of all features for the selected incident. Access the Incident Mapping Grid by selecting the grid icon near the top of the Incident Card - Mapping Tab.
Use the items per page control at the bottom left to adjust how many features are shown at once. Use the pagination controls to navigate between pages.
Hovering over a feature in the grid will highlight it on the map in yellow.
Add Features
Click the red + icon to open the Add Features Toolbar above the Incident Mapping Grid.
-
Geometry Type - Select Label, Point, Line, or Polygon feature type. The Add Features toolbar is dynamic and will change based on the geometry type selected.
-
Label - Visible for Label feature types only.
-
Standard - Sets the symbology standard applied to features (e.g. NWCG).
-
Icon - Changes based on the symbology standard selected.
-
Confirm - Save the new feature.
-
Close - Close the Add Features Toolbar. The Incident Mapping Grid remains open.
You can change Geometry Type, Standard, and Symbology in the same drawing session and continue to draw, allowing you to add multiple features rather than one feature at a time.
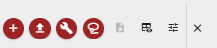
Toolbar
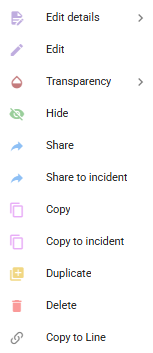
Actions
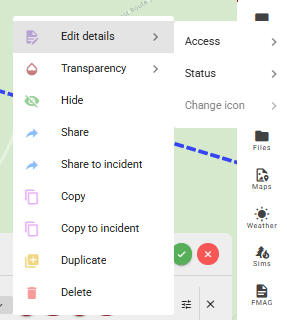
To use the Actions menu, select the features you would like to work with and choose an option below from the dropdown. The Actions dropdown will be greyed out if no features are selected. If you would like to work with a single feature, you can also use the Feature Actions available in each row. The Actions dropdown is dynamic and options change based on the feature type selected.
-
Edit Details - Edit the feature's attributes and properties (Access, Status, and Change Icon).
-
Edit - Edit the feature's geometry on the map canvas. Opens the Editing Toolbar.
-
Transparency - Adjust the transparency of the feature.
-
Hide - Hide the feature from the map canvas.
-
Share - Share the feature.
-
Share to Incident - Share the feature to another incident.
-
Copy - Copy the feature.
-
Copy to Incident - Copy the feature to another incident.
-
Duplicate - Create a duplicate of the feature within the same incident.
-
Delete - Permanently delete the feature.
-
Copy to Line - Copy the feature as a line geometry (available only for polygons). Users can easily add a fire edge by using the Copy to Line tool. If the tick marks are facing the wrong direction, use the Invert tool below.
-
Invert - Inverts a line feature (available only for lines). Useful for inverting a fire line if the tick marks are facing the wrong direction.
Editing Toolbar
When editing a feature, the editing toolbar appears on the map canvas and provides the following tools from left to right. Editing features will be greyed out if not available for the type or number of polygons selected in the table.
-
Modify Polygon - Edit the vertices and shape of an existing polygon feature.
-
Resize - Resize a feature while maintaining its proportions.
-
Split by Line - Split a polygon feature by drawing a line through it.
-
Split and Aggregate - Split a feature and combine the resulting parts with adjacent features.
-
Aggregate - Combine multiple features into a single feature. The start and end vertex of the new extension must be inside the existing polygon.
-
Merge Lines - Merge two or more line features into a single line.
-
Merge Polygons - Merge two or more polygon features into a single polygon.
-
Difference - Remove the overlapping area between two features, keeping the non-overlapping portion. The polygon you select first will be the one that is kept and the polygon that is selected second will be subtracted.
-
Intersect (Overlap) - Create a new feature from the area where two features overlap.
-
Intersect (No Overlap) - Create a new feature from the areas of two features that do not overlap.

Other Tools
-
Add - Add a new feature (opens Add Features Toolbar above).
-
Upload [KML, KMZ, GeoJSON, Shapefiles] - Upload a file to create features.
-
Edit Tools - Opens the Editing Toolbar.
-
Lasso - Select multiple features on the map canvas by drawing a selection area.
-
Export - Export features in a geospatial file format.
-
Visible Columns - Adjust which columns are visible on the table.
-
Filter - Filter table by feature properties.
-
Close - Closes the Incident Mapping Grid.
Feature Actions
For each row (feature) in the Incident Mapping Grid, the following options are available:
-
Zoom - Zoom to the feature’s location on the Map Canvas.
-
Visibility - toggle visibility on the Map Canvas.
-
Options - Lists the Actions as described above but performs them only on the individual feature. The Actions dropdown is dynamic and options change based on the feature type selected.

Edit Features
Edit Feature Geometry
Editing features from the Incident Mapping Grid allows you to enter an “edit session” where you can edit multiple features before saving.
To enter an edit session and edit a feature or features:
-
Open the Incident Mapping Grid.
-
Open the Editing Toolbar (red wrench icon at the top right of the Incident Mapping Grid).
-
Hold down
Shiftand hover your cursor over the feature you want to edit. Click and drag to edit the geometry or add new vertexes. -
Click Confirm to apply the changes or click Close to cancel all edits.
You can also enter an edit session by clicking Options → Edit in the Actions column of a feature in the Incident Mapping Grid. The feature will automatically be selected for editing.
Features can also be edited from the Incident Card. Only one feature can be edited at a time using this method.
Edit Feature Attributes
The Incident Mapping Grid supports inline editing. You can edit the details or change the symbology of drawn features during a drawing session without having to exit the drawing session. To edit details while drawing:
-
On the feature you want to edit the details for, hover over the table cell and click the edit (pencil) icon that appears over it.
-
Edit the selected attribute and click the green check to confirm or the red x to cancel.
Batch Edit Feature Attributes
You can change certain fields for multiple features at once.
-
Select the features in the grid using the checkboxes to the left.
-
Click Options → Edit in the Actions column and select the attribute you want to edit.
Rotate a Point
To rotate a point:
-
Find the feature in the Incident Mapping Grid and select Options → Edit.
-
Hover the mouse over the Icon (in the Icon column) and click the edit (pencil) icon that appears over it.
-
While holding the left click move the mouse up and down to rotate the Icon.
-
Click the green check to confirm or the red x to cancel.
