
This tutorial walks through a typical operational day using Tactical Analyst Web and Mobile, from initial attack through the transition to extended attack. It covers the key tasks a senior operations staff member would perform, including incident monitoring, mapping, board management, and the approval workflow.
This is not an exhaustive reference. Links to detailed instructions are provided throughout.
Morning: Start of Shift
1. Log In and Orient
Open Tactical Analyst Web and log in. Check the environment indicator in the Profile Menu to confirm you are in Production and not Training.
Select Go to Extent in the Map Tools bar to return to your default map view. If you have not set a default extent for your area of responsibility, do that now.
Optional: Select Settings from the Profile Menu and confirm your units, time zone, and any other personal preferences are set correctly for your assignment.
2. Select Active Incidents
Open the Incident List from the lefthand Main Toolbar. Scan active incidents in your area. The time badge on each entry shows how long ago the incident was reported. Content indicators show which incidents have photos, files, or other media attached.
Use Active Filters in the Map Tools bar to filter the incident list by relevant criteria if the list is large.
Pin your primary incidents to switch between incidents quickly if you are managing more than one.
3. Review Your Primary Incidents
Use Pinned Incidents in the Map Tools bar to quickly switch between your primary incidents.
Select any incident of interest to open its Incident Card and review the Details tab for the Incident Overview, Location, and Measurements.
4. Review the Working Board
In the Incident Card header, confirm you are on the Working Board. This is the primary operational board and the one that mobile users sync to.
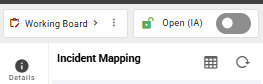
After reviewing the Incident Details, review the Mapping tab to see what features are currently on the working board. Select Refresh to ensure you have the latest data.
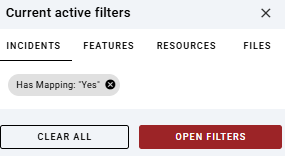
Check for any perimeter updates, control lines, or operational features that may have come in overnight. If necessary, consider using Active Filters to select incidents with features mapped.
5. Check the Weather Tab
Select the Weather tab to review current conditions and the three-day forecast for the incident location. For more detailed forecasting, select Spot Wx or Windy from the More Details section.
6. Check Simulations
Select the Sims tab. If simulations have been published from Wildfire Analyst (WFA), review them now. Animate the simulation to understand projected fire spread for the operational period.
Morning: Initial Attack Phase (Open Mode)
7. Confirm Incident Mode
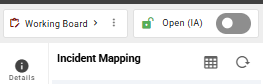
Check the mode toggle in the Incident Card header. It should show Open (IA) with a green indicator.
During initial attack the incident is in Open mode. There is no review or approval process. Features added to the Working Board are immediately visible to all users.
If the mode toggle shows Approval mode, confirm with your team before proceeding.
8. Map the Incident
As the incident develops, add mapping features to reflect the operational picture.
Open the Incident Mapping Grid from the Mapping tab and enter a draw session. Select the geometry type, standard, and symbol. Digitize features on the map canvas. You can add multiple features in a single session before saving.
9. Upload External Data
If you have received a perimeter or feature file from an external source (KMZ, KML, GeoJSON, or Shapefile), upload it directly to the Mapping List using the + button and selecting the upload icon.
10. Share Features to Public Board
If any features need to be visible on the Public Board for external stakeholders, select those features and change their access level to Public and their status to Approved. Features on the Working Board in Open mode default to Cooperators access and Proposed status.
11. Manage Photos and Files
Select the Photos tab to review any imagery submitted by field personnel or aviation. Use Show on Map to overlay photos at their GPS locations for spatial context.
Check Files for any documents attached to the incident. Upload situation reports or operational documents using Upload File.
12. Post to the Chat Log
Use the Chat Log to post updates, observations, or coordination messages for the incident. Select the appropriate group (Ops, Fobs, Sit, Air Ops, or Other) so messages are visible to the right audience.
Midday: Transition to Extended Attack
As the incident grows and more personnel are assigned, the incident transitions from initial attack to extended attack. This is when you switch the incident to Approval mode.
13. Create User Defined Boards
Before switching to Approval mode, consider whether any working groups need their own boards. For example, an air operations group or a situation unit may benefit from a dedicated board.
Open the Boards List by selecting the current board name in the Incident Card header. Select New Board, enter a name and description, set the access controls, and select Save. Add the relevant members.
14. Switch to Approval Mode
Only users with elevated permissions can switch incident modes.
Open the Incident Card and select the mode toggle in the header. Confirm the switch when prompted. The toggle will update to show Approval mode with a red indicator. The Review Board is created automatically.
From this point forward, all features added on mobile or to the Working Board on web must be reviewed and approved before they are visible on the Working Board to other users.
15. Brief Your Team
Notify mobile users that the incident is now in Approval mode. Features they add will go to the Review Board before appearing on the Working Board. They will continue to see the Working Board on their mobile devices.
If any user defined boards have been created, add members and brief them on the board access and content workflow.
Afternoon: Extended Attack Operations
16. Monitor the Review Board
Switch to the Review Board to see features that have been submitted for review. These will have a status of Proposed.
17. Share Approved Features Between Boards
Once features are approved and visible on the Working Board, share relevant features to user defined boards or the Public Board as needed.
From the Board Toolbar, select the options icon and select Share Content to share groups of features to another board. To share individual features, use the options icon on the feature row.
18. Generate Map Products
At the end of the operational period, generate map products for the IAP and briefing.
Open the Print Map tool from the Main Toolbar. Select the template (varies by customer), search for the incident, set the size and orientation, and complete the operational period details. Select Create, adjust the map view and layer visibility in the preview, then select Create again to submit.
You will receive an email when the map is ready. Download it from the History log in the Print Map panel.
19. Export Features
If features need to be shared with an external GIS or another agency, export them from the Mapping tab or Features Grid. Select the appropriate format (KML, GeoJSON, Shapefile, or GDB). See Incident Card Workflows.
Handoff: Web to Mobile
Field personnel use Tactical Analyst Mobile and sync to the Working Board. The following applies when coordinating between web and mobile users.
-
Features added by mobile users in Open mode appear immediately on the Working Board.
-
Features added by mobile users in Approval mode go to the Review Board before appearing on the Working Board.
-
Mobile users always see the Working Board regardless of incident mode.
-
Photos and files uploaded from mobile appear in the Photos and Files tabs of the Incident Card and are visible to web users immediately.
-
The Chat Log is shared between web and mobile users in real time.
Ensure mobile users are briefed on the current incident mode and which board they should be working from.
End of Shift
20. Post a Situation Update
Use the Chat Log to post an end-of-shift summary with the current operational status, size, containment, and any notable developments.
21. Archive Completed Documents
In the Files tab, archive any documents that are no longer actively needed using the Archive option on the three-dot menu. Archived files are hidden by default but can be retrieved using the Show Archived toggle.
22. Save a Bookmark for Your Operational Area
If you spent the day working a specific map extent, save it as a bookmark so you can return to it quickly next shift. Open Bookmarks from the Main Toolbar, select +, and save the current extent.
23. Log Out
Select Profile Menu from the Map Tools Bar and select Logout.