
The functionality available to the user is based on the user’s role and permissions.
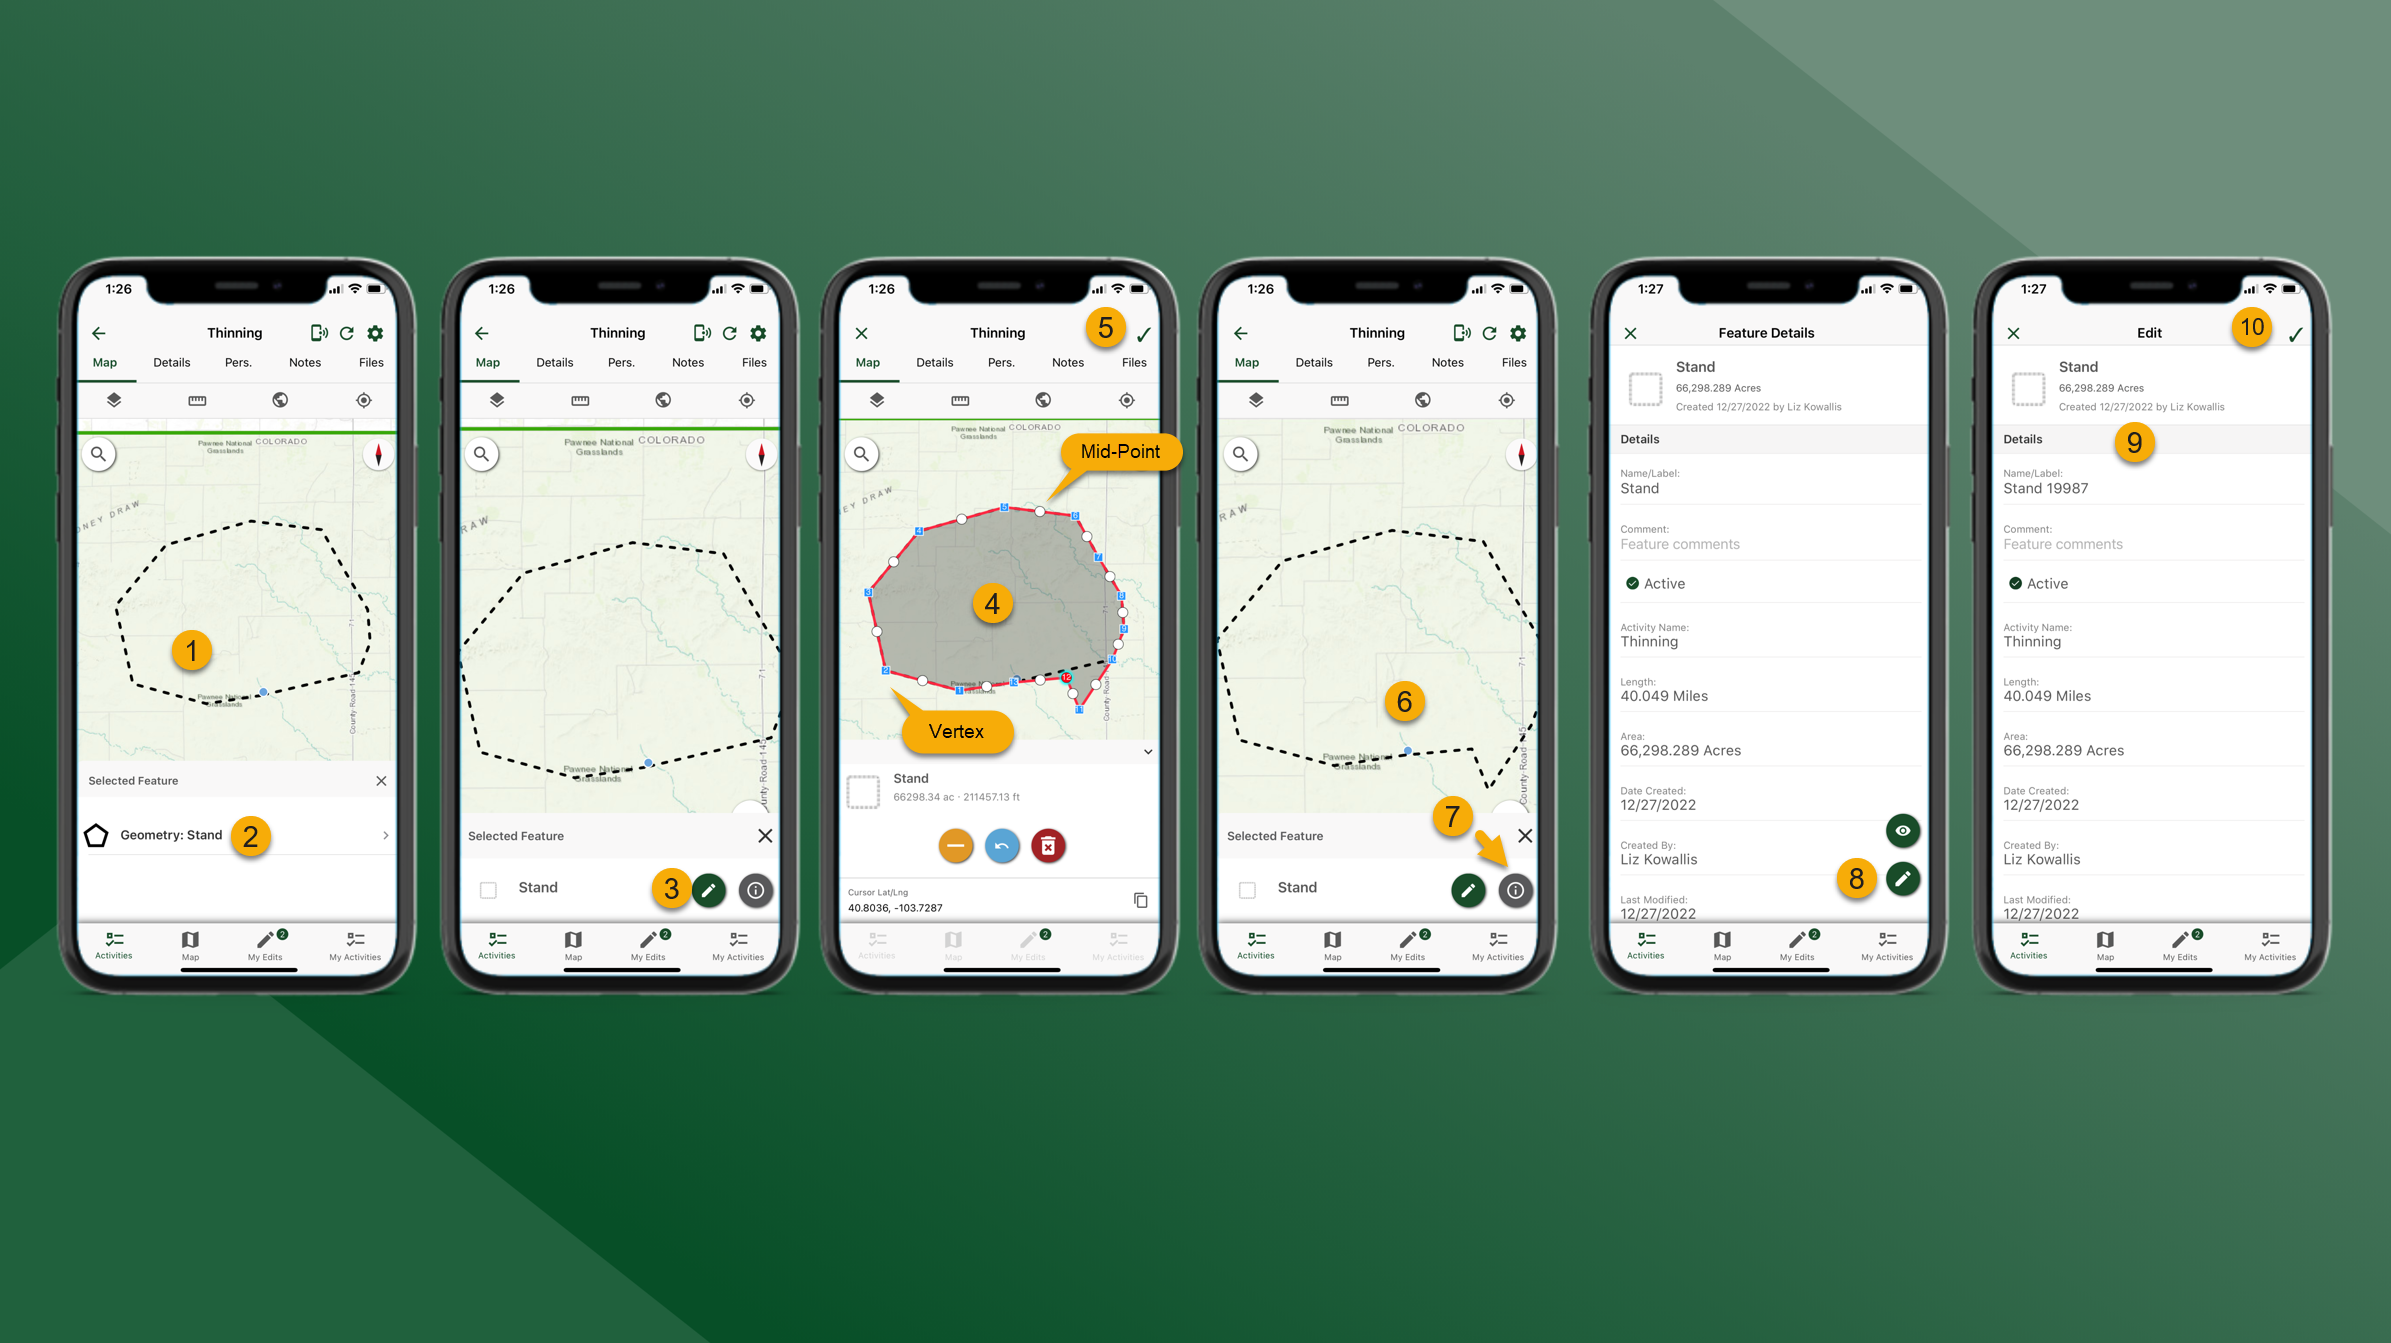
To edit map features, follow the steps outlined below:
When the user moves a vertex the selected vertex will simply be moved. However, when the user moves a mid-point, the mid-point will be moved and a new vertex will be added to the line or polygon feature at the new location.
-
From the Map tab for the selected Activity choose a feature to edit by tapping it on the map.
-
Select the feature that should be edited.
-
Tap
to Edit Geometry
-
First, tap on a vertex or mid-point to select. (The selected vertex or mid-point will have a blue halo).
-
Tap and hold on the selected vertex or mid-point and drag it to a new location.
-
When the vertex or mid-point is in the preferred location release the tap and hold to move the point. Complete this as many times as necessary to edit the feature geometry.
-
-
Tap
and tap Yes to save feature geometry edits.
-
Tap on the map feature and select the feature again.
-
Tap
to Edit Feature Details.
-
On the Feature Details screen tap
-
Edit Feature Details as necessary.
-
When finished tap