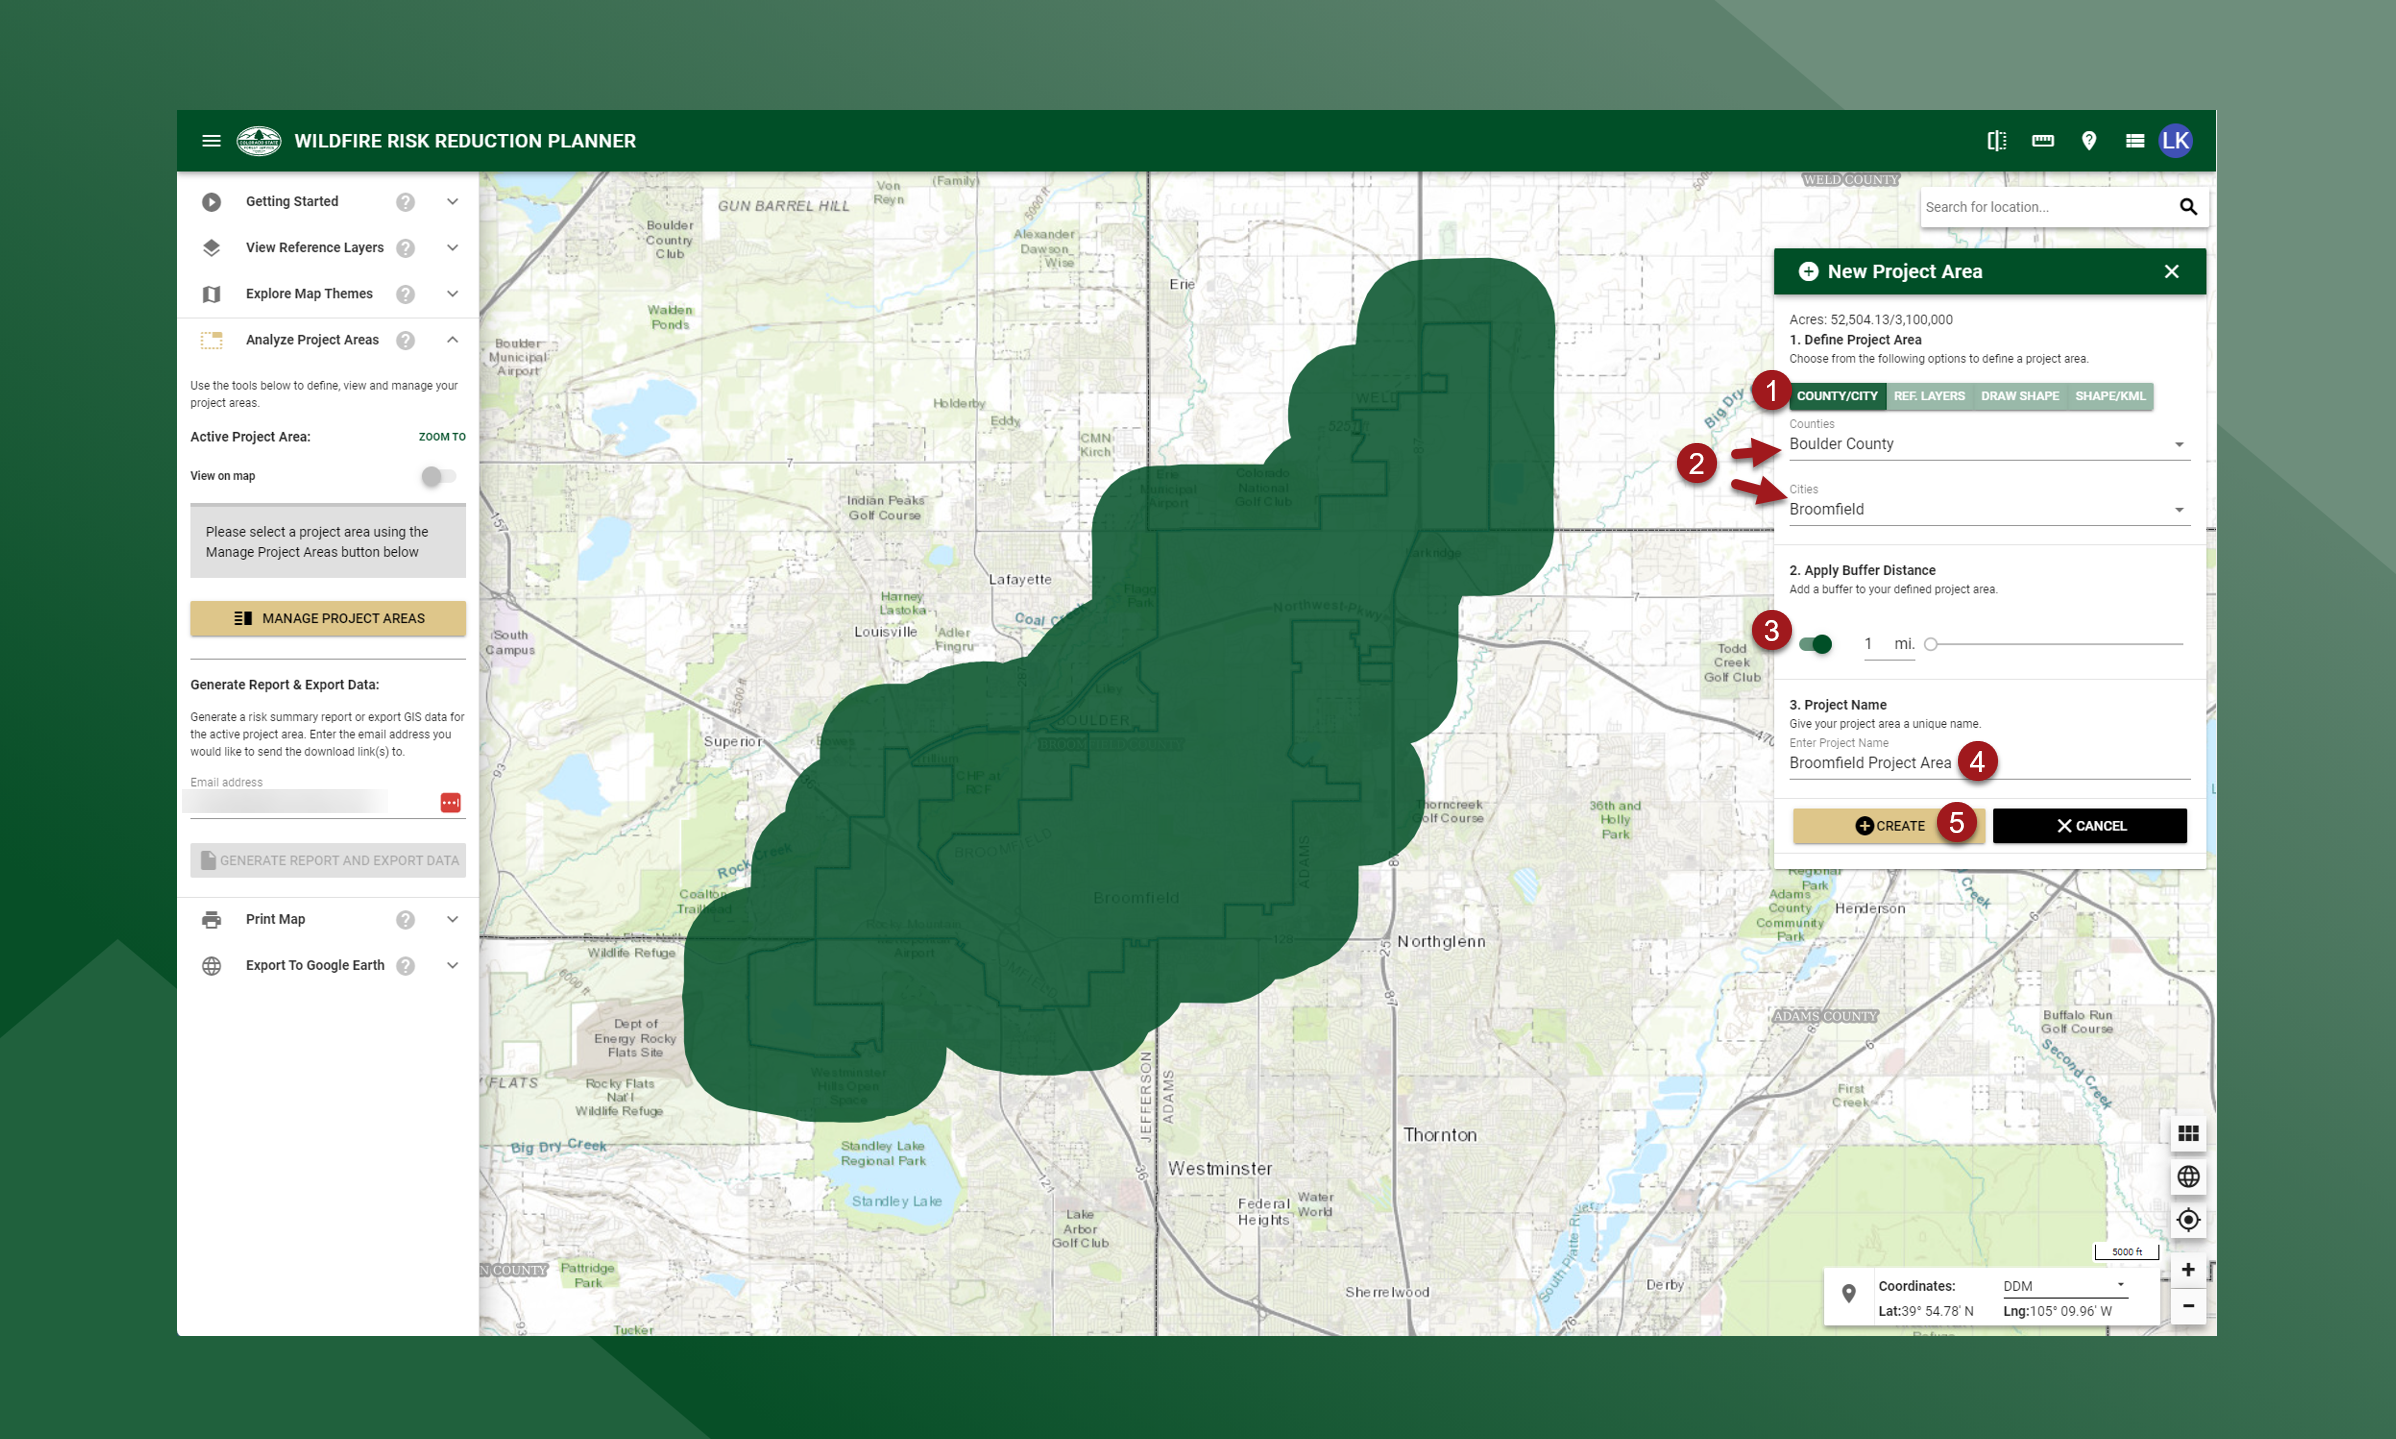
Project Areas cannot be larger than 3,100,000 acres
To use a county or incorporated city as your Project Area, follow these steps:
-
Select the County/City tab in the New Project Area dialog
-
Select the County or City
-
You can select either a city or county using the provided dropdown lists. When you make a selection, the map will automatically zoom to that area and the boundary will be displayed on the map.
-
When you select a county, only the incorporated cities in that county will be shown in the city dropdown list.
-
Start typing the name of the city or county in the dropdown list to filter the results
-
-
Apply a Buffer Distance
-
This option allows you to define a buffer distance around the selected county or city. Click on the toggle switch to enable a buffer. By default, the buffer is not enabled. If the toggle switch is turned off, no buffer will be applied. The default buffer distance is 2 miles but can be increased or decreased to your desired size.
-
-
Add a Project Name
-
A project name is required for all project areas. The Create button will be disabled until a project name is added.
-
-
Click Create
-
Once you have defined the boundary of your project area, applied a buffer if needed, and given your project area a name, click Create to submit and create your new project area. Once created, your new project area can be found and selected through the Manage Project Areas dialog.
-